Difference between revisions of "Default Shader 4.5"
m (Added overview description.) |
m (Added descriptions for Colour tab settings.) |
||
| Line 33: | Line 33: | ||
'''Settings:''' | '''Settings:''' | ||
<ul> | <ul> | ||
| − | * ''' Base colour: ''' | + | * ''' Base colour: '''This setting specifies the basic colour of a surface material, and acts as a multiplier to the "Colour image" and "Colour function" settings. Clicking on the colour swatch to the right of the slider opens the [[Colour_Picker|Colour Picker]] pane. The slider can be used to quickly darken or lighten the surface material. |
| − | * ''' Colour image: ''' | + | * ''' Colour image: '''This setting allows you to choose an image file as the basic colour for the surface material. It also acts as a multiplier for the "Base colour" and "Colour function" settings. |
| − | * ''' Colour function: ''' | + | * ''' Colour function: ''' This setting allows you to choose shader or function nodes as the basic colour for the surface material, and acts as a multiplier for the "Base colour" and "Colour image" settings. |
| − | * ''' Translucency: ''' | + | * ''' Translucency: '''This setting specifies the amount of translucency a surface material has, and acts as a multiplier to the "Translucency image" and "Translucency function" settings. Translucency is the effect of light filtering through a surface, and more information may be found [[Translucency|here]]. |
| − | * ''' Translucency image: ''' | + | * ''' Translucency image: '''This setting allows you to choose an image file to control the translucency of a surface material. It acts as a multiplier to the "Translucency" and "Translucency function" settings. |
| − | * ''' Translucency function: ''' | + | * ''' Translucency function: '''This setting allows you to choose shader or function nodes to control the translucency of a surface material. It acts as a multiplier to the "Translucency" and "Translucency image" settings. |
| − | * ''' Luminosity: ''' | + | * ''' Luminosity: '''This setting specifies the amount of luminosity a surface material has, and acts as a multiplier to the "Luminosity image" and "Luminosity function" settings. Luminosity gives the effect of a glowing or self illuminated surface, and more information may be found [[Surface_Layer_-_Luminosity_Tab|here.]] |
| − | * ''' Luminosity image: ''' | + | * ''' Luminosity image: '''This setting allows you to choose an image file to control the luminosity of a surface material. It acts as a multiplier to the "Luminosity" and "Luminosity function" settings. |
| − | * ''' Luminosity function: ''' | + | * ''' Luminosity function: ''' This setting allows you to choose shader or function nodes to control the luminosity of a surface material. It acts as a multiplier to the "Luminosity" and "Luminosity image" settings. |
</ul> | </ul> | ||
== Roughness Tab == | == Roughness Tab == | ||
Revision as of 22:47, 20 November 2020
Contents
Overview[edit]
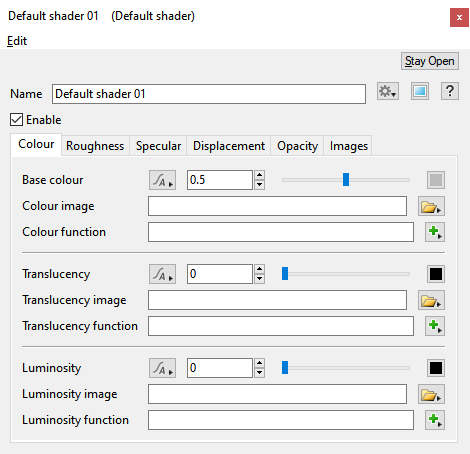
The Default shader node forms the basis for object surface mapping. It can provide base colours or load external images, as well as allowing control over translucency, luminosity, specular effects, displacement and opacity. Beginning with Terragen 4.5 the Default shader has been improved for working with Physically Based Rendering (PBR) materials.
Many aspects of this node are made up of groups of related settings. For example the base colour aspect has settings for "Base colour", "Colour image" and "Colour function". All of these settings work together to control the particular aspect they relate to.
This has implications you might not expect. For example, lets say you want to map the image of a leaf onto the leaf polygons of a plant model. For the true colours of the image to come through you need to set the "Base colour" to white. If it was set to some other colour, like red, that colour would influence the colours from the leaf image, tinting them red. You can use this to your advantage. If you thought the image was too bright you could use a grey colour to make it darker.
Keep in mind that the different settings of each group aspect interact with each other. This makes the Default shader very versatile, but you might want to make step-by-step changes and render previews in order to see their effect as you learn how they work together.
Here are some tips to working with the different aspects of the Default shader:
To specify a basic colour:
- Choose a colour with the "Base colour" setting.
- Don't specify anything for the Image and Function settings.
To use the colours directly from an image:
- Choose an image file with the "Colour image" setting.
- Set the "Base colour" setting to white.
- Don't specify anything for the "Colour function" setting.
To use the colours directly from a shader or function:
- Assign a shader or function to the "Colour function" setting.
- Set the "Base colour" setting to white.
- Don't specify anything for the "Colour image" setting.
To use an image or function to control where the colour appears:
- Specify the colour using the "Base colour" setting.
- Specify a greyscale image in the "Colour image" setting or "Colour function". More of the specified colour will appear where the image or function is lighter. White means full colour and black means no colour.
Colour Tab[edit]
Settings:
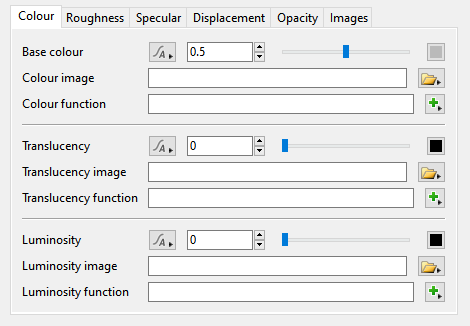
- Base colour: This setting specifies the basic colour of a surface material, and acts as a multiplier to the "Colour image" and "Colour function" settings. Clicking on the colour swatch to the right of the slider opens the Colour Picker pane. The slider can be used to quickly darken or lighten the surface material.
- Colour image: This setting allows you to choose an image file as the basic colour for the surface material. It also acts as a multiplier for the "Base colour" and "Colour function" settings.
- Colour function: This setting allows you to choose shader or function nodes as the basic colour for the surface material, and acts as a multiplier for the "Base colour" and "Colour image" settings.
- Translucency: This setting specifies the amount of translucency a surface material has, and acts as a multiplier to the "Translucency image" and "Translucency function" settings. Translucency is the effect of light filtering through a surface, and more information may be found here.
- Translucency image: This setting allows you to choose an image file to control the translucency of a surface material. It acts as a multiplier to the "Translucency" and "Translucency function" settings.
- Translucency function: This setting allows you to choose shader or function nodes to control the translucency of a surface material. It acts as a multiplier to the "Translucency" and "Translucency image" settings.
- Luminosity: This setting specifies the amount of luminosity a surface material has, and acts as a multiplier to the "Luminosity image" and "Luminosity function" settings. Luminosity gives the effect of a glowing or self illuminated surface, and more information may be found here.
- Luminosity image: This setting allows you to choose an image file to control the luminosity of a surface material. It acts as a multiplier to the "Luminosity" and "Luminosity function" settings.
- Luminosity function: This setting allows you to choose shader or function nodes to control the luminosity of a surface material. It acts as a multiplier to the "Luminosity" and "Luminosity image" settings.
Roughness Tab[edit]
Settings:
- Roughness:
- Roughness image:
- Invert image:
- Gamma image:
- Roughness function:
Specular Tab[edit]
Settings:
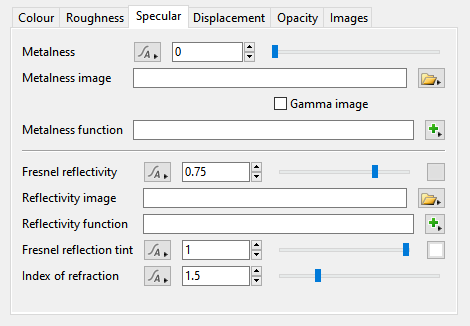
- Metalness:
- Metalness image:
- Gamma image:
- Metalness function:
- Fresnel reflectivity:
- Reflectivity image:
- Reflectivity function:
- Fresnel reflection tint:
- Index of refraction:
Displacement Tab[edit]
Settings:
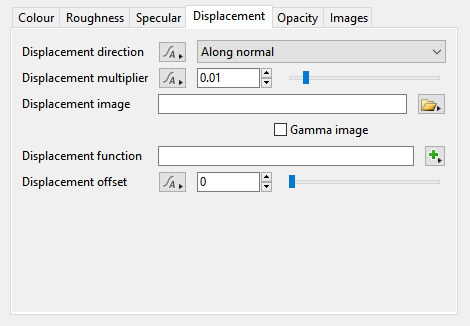
- Displacement direction:
- Displacement multiplier:
- Displacement image:
- Gamma image:
- Displacement function:
- Displacement offset:
Opacity Tab[edit]
Settings:
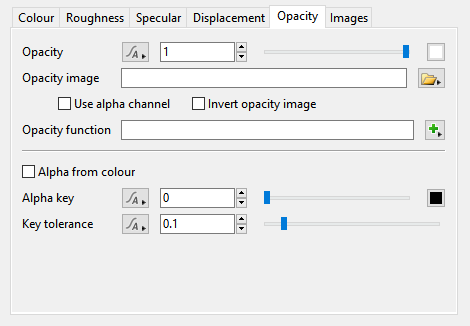
- Opacity:
- Opacity image:
- Use alpha channel:
- Invert opacity image:
- Opacity function:
- Alpha from colour:
- Alpha key:
- Key tolerance:
Images Tab[edit]
Settings:
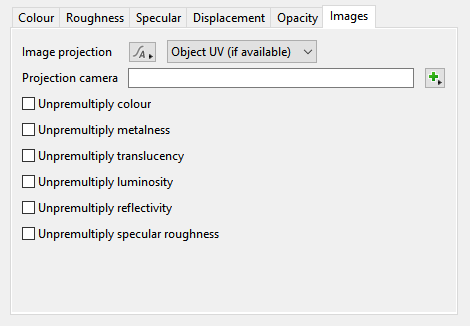
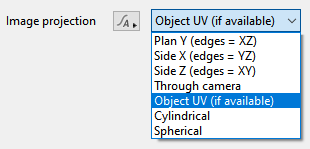
- Image projection:
- Projection camera:
- Unpremultiply colour:
- Unpremultiply metalness:
- Unpremultiply translucency:
- Unpremultiply luminosity:
- Unpremultiply reflectivity:
- Unpremultiply specular roughness:
A shader is a program or set of instructions used in 3D computer graphics to determine the final surface properties of an object or image. This can include arbitrarily complex descriptions of light absorption and diffusion, texture mapping, reflection and refraction, shadowing, surface displacement and post-processing effects. In Terragen 2 shaders are used to construct and modify almost every element of a scene.
Literally, to change the position of something. In graphics terminology to displace a surface is to modify its geometric (3D) structure using reference data of some kind. For example, a grayscale image might be taken as input, with black areas indicating no displacement of the surface, and white indicating maximum displacement. In Terragen 2 displacement is used to create all terrain by taking heightfield or procedural data as input and using it to displace the normally flat sphere of the planet.
