Masking Populations with Inverted Fractals
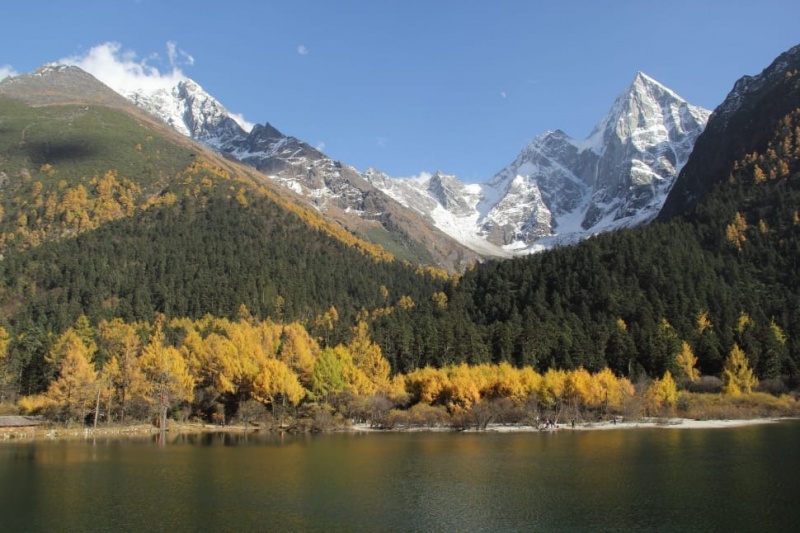
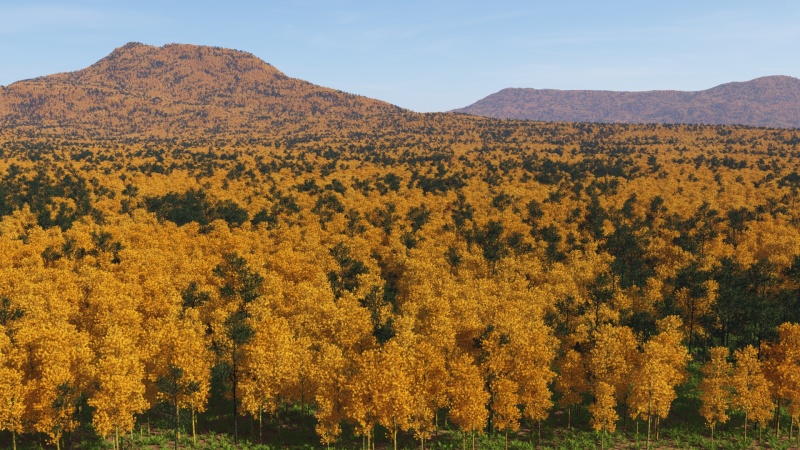
There are times when you want to create distinct bands of certain populations, as shown in this reference image in which there are patterns of warm yellowish colored trees juxtaposed with cool dark-green trees.
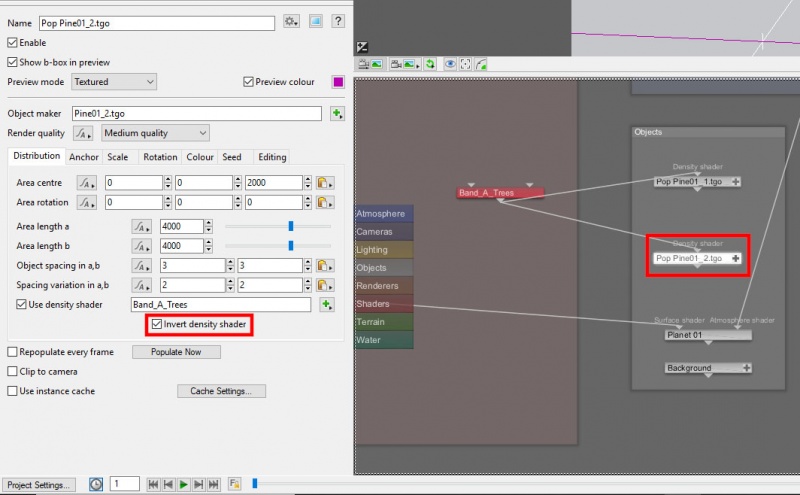
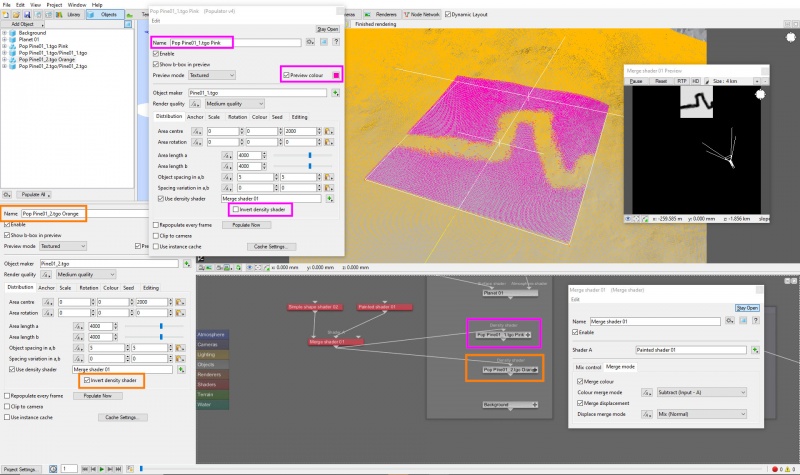
In some cases sharing a mask between two populations and simply enabling the “Invert density shader” checkbox on one of them may achieve this result.
But often times when a mask is used to limit the instanced objects to a section within the areas as defined by the population’s “Area length a” and “Area length b” parameters, then inverting the mask may not provide the solution you’re looking for. This is because inverting the mask would allow the instances to be generated all the way to the extent of the area as defined by the population’s “Area length a” and “Area length b” parameters.
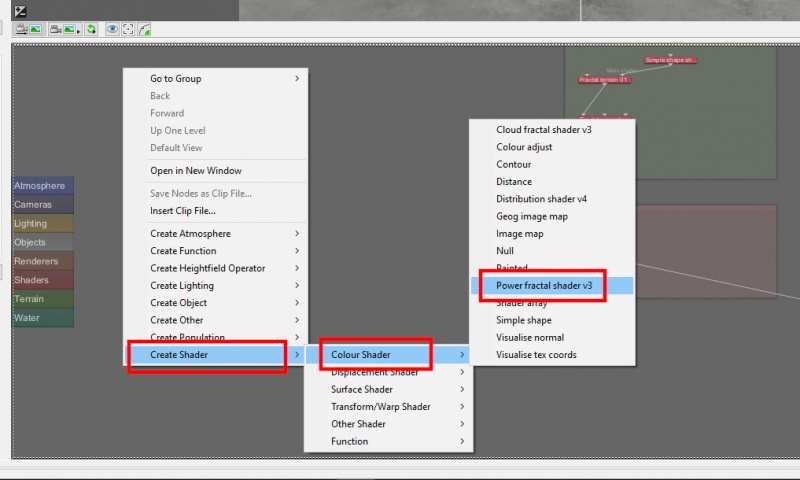
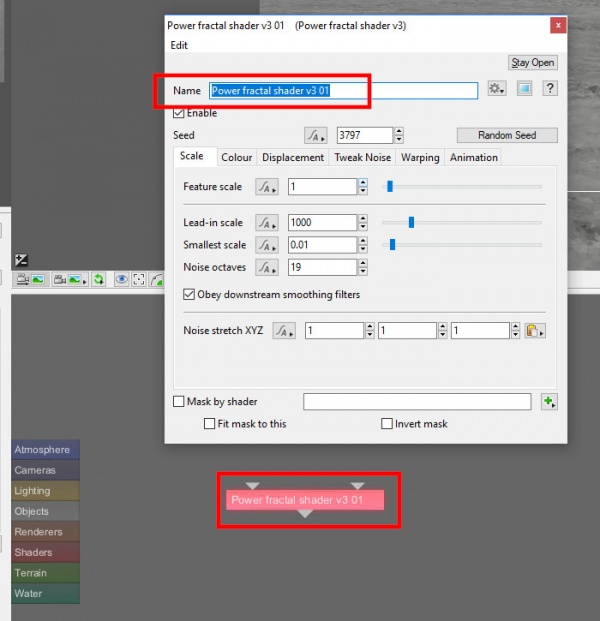
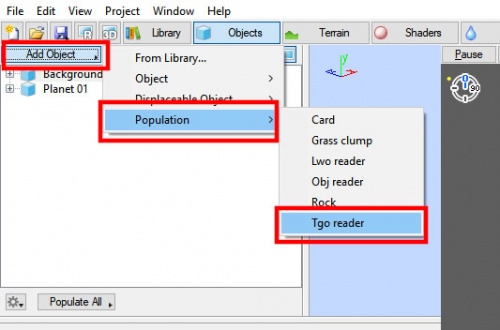
Let’s explore how to use two almost identical Power Fractals to provide the masks we need. To create the first mask that will be used to band certain species of trees together, right-click in the Node Network view and select “Create Shader”, then “Colour Shader”, then “Power Fractal shader v3”.
Double click on the Power Fractal node to open up its dialog pane, then give it a descriptive name.
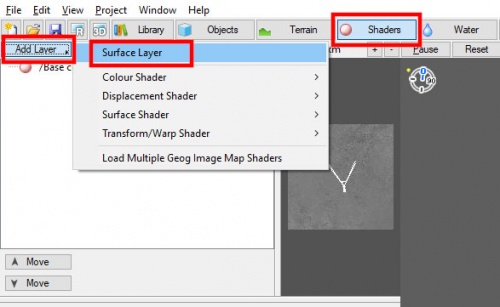
To help visualize the mask on the terrain, we can add a new shader by clicking on the “Shader” button located below the main menu, then click “Add Layer” and select “Surface Layer”.
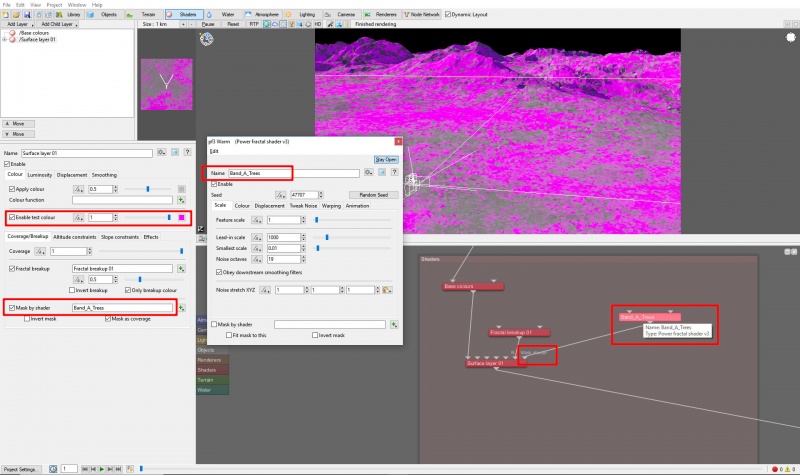
Clicking the checkbox to "Enable test color" will allow us to quickly see exactly where the shader is being applied to the terrain. In the Node Network view drag the output of the Power Fractal node to the input of the Surface Layer’s “Mask by shader” input.
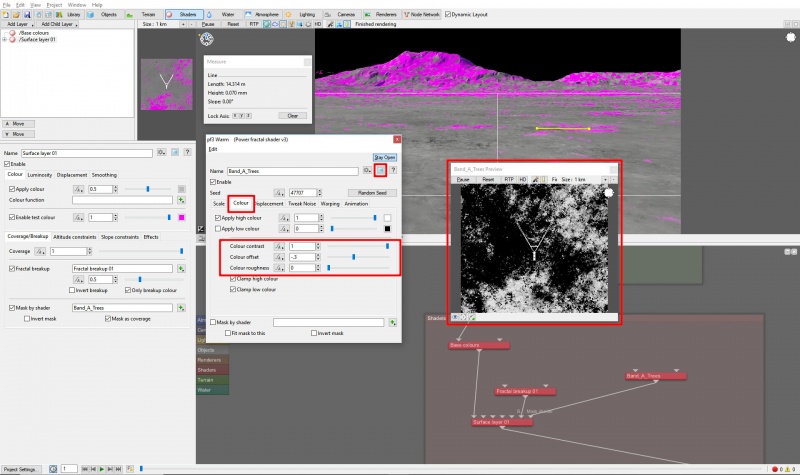
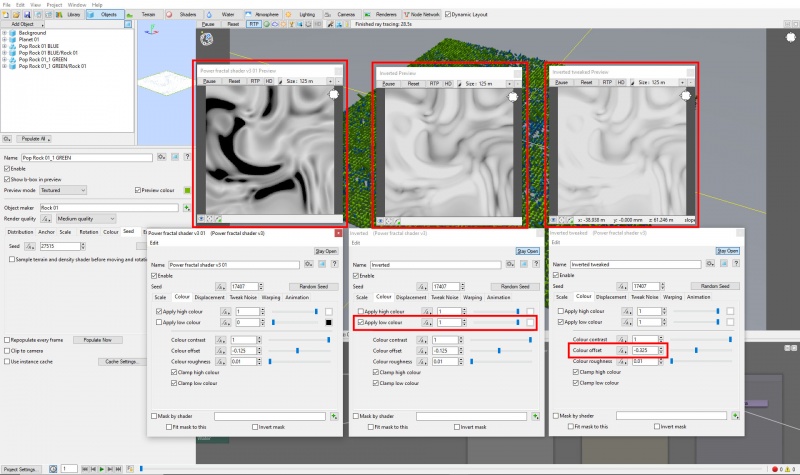
We want to create a fairly high contrast mask without a lot of roughness to begin with, so on the Power fractal shader’s Colour tab, set the “Color contrast” value to “1.0”, the “Color roughness” value to “0.0”, and the “Color offset” value to about “-0.3”.
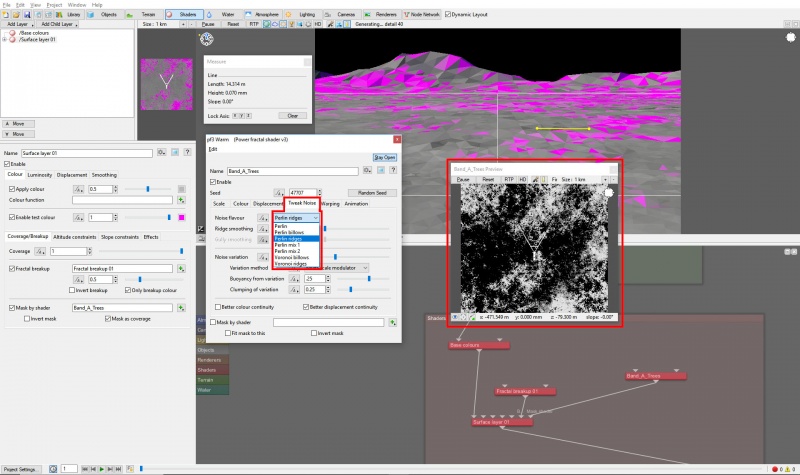
On the Tweak Noise tab set the “Noise flavour” to “Perlin ridges”. The “ridge” noise patterns are the opposite of the “billow” patterns and means they have narrow sharp ridges which drop down to rounded bottoms.
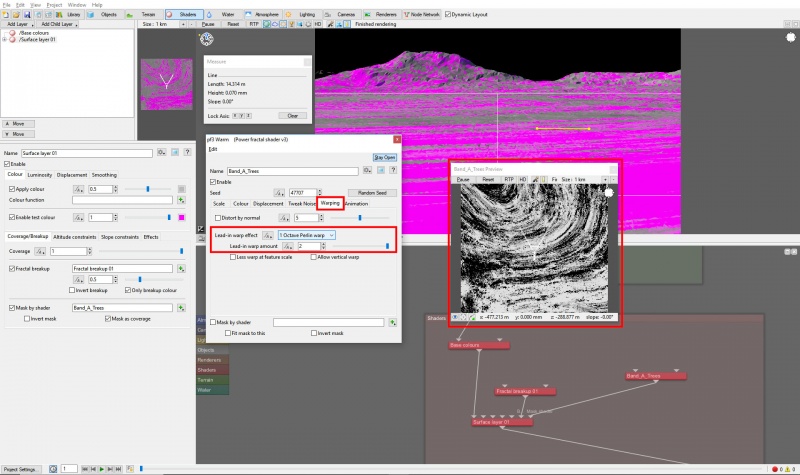
On the Warping tab set the “Lead-in warp effect” to “1 Octave Perlin warp” and the “Lead-in warp amount” value to “2.0”. This will warp and displace the fractal pattern in a random wavy fashion.
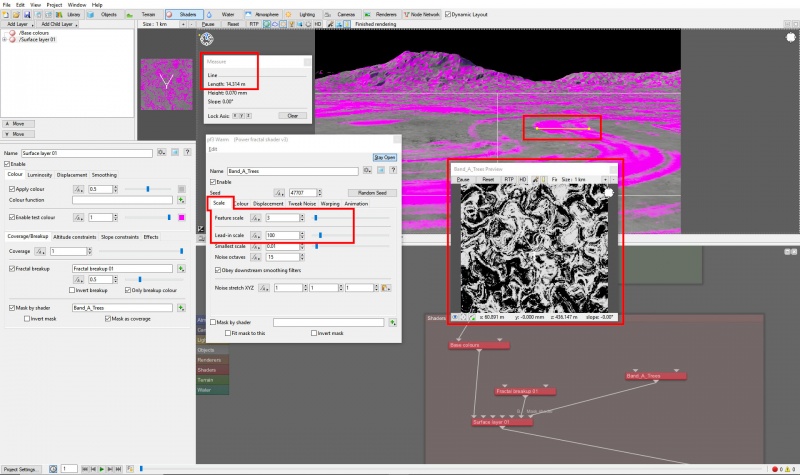
On the Scale tab adjust the “Feature scale” and “Lead-in scale” to fit your terrain and scene. Use the measuring tool if necessary.
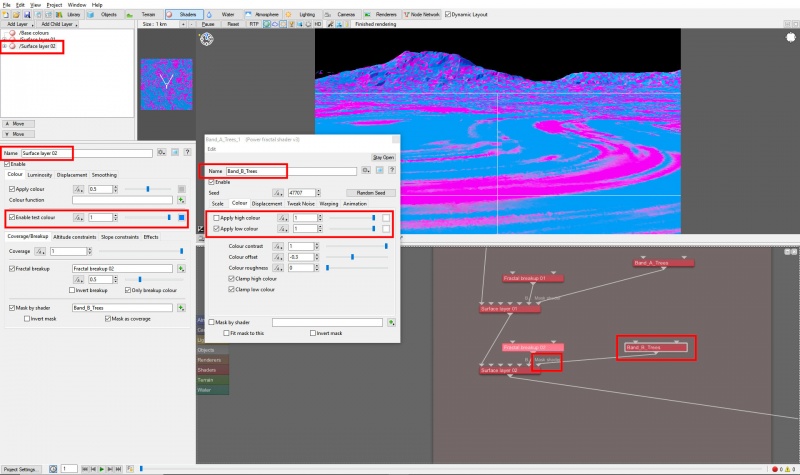
Once you’re happy with the mask, copy and paste the Power fractal node to duplicate it. Double click on the new power fractal node to open its dialog window, then give it a descriptive name and go to its Colour tab.
Our goal is to invert the fractal noise pattern colours. First uncheck the “Apply high colour” checkbox to disable the “Apply high colour” parameter. The effect of this is to pass “black” or a value of “0.0” through this part of the fractal pattern and the Power fractal node’s output. Next, check the “Apply low colour” checkbox to enable it and set the “Apply low colour” value to “white” or “1.0”. Now we have the exact inverse of the other Power fractal.
To visualize this second mask, add another Surface Layer and assign the second power fractal to its “Mask by shader” input. Enable the Surface Layer’s test colour and change the test colour to anything other than the default pink.
An added benefit to this method, is now that you have two Power fractals, you can make subtle adjustments to the parameters of one of the patterns to create variations or adjustments if needed. For example, you could adjust the “Colour offset” value to expand or contract the shape of the fractal pattern which would allow the instanced objects of one population to encroach into the pattern of the other population.
Now that we have our two masks set up, we can apply them to a population.
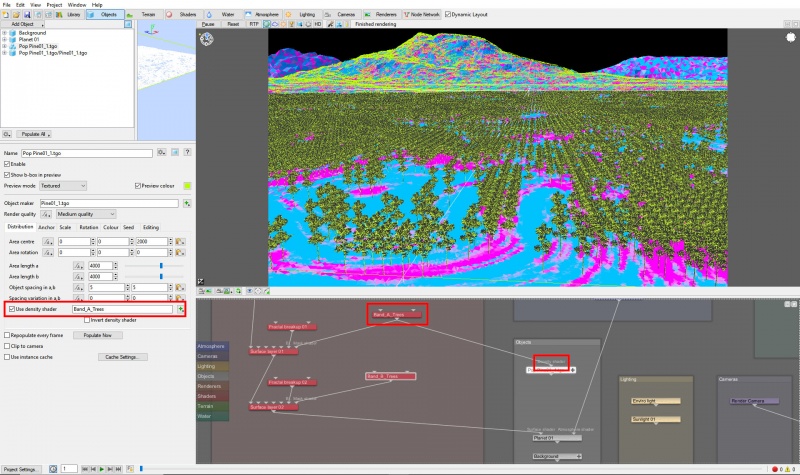
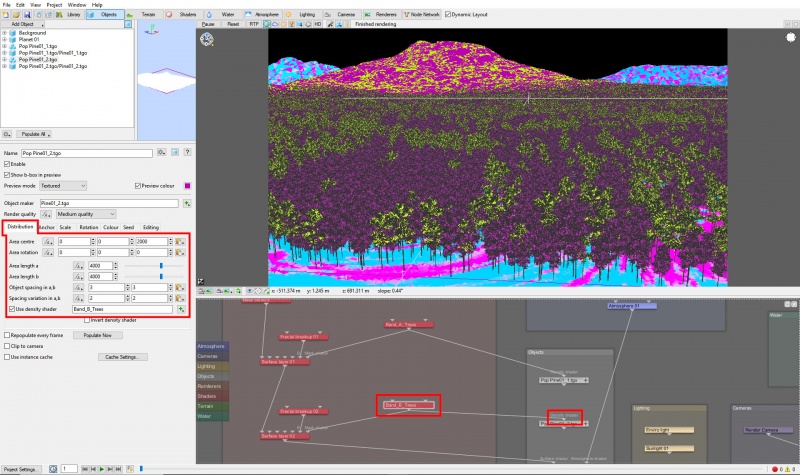
Add the first population, and so that we can visualize exactly how the instances are being distributed, zero out the “Spacing variation in a,b” and the “Maximum Y rotation” values. Apply one of the power fractals as the Density shader then click "Populate Now", and the result will show an aligned grid of trees exactly as defined by the mask.
Repeat this procedure for a second group of trees using the other power fractal as the mask.
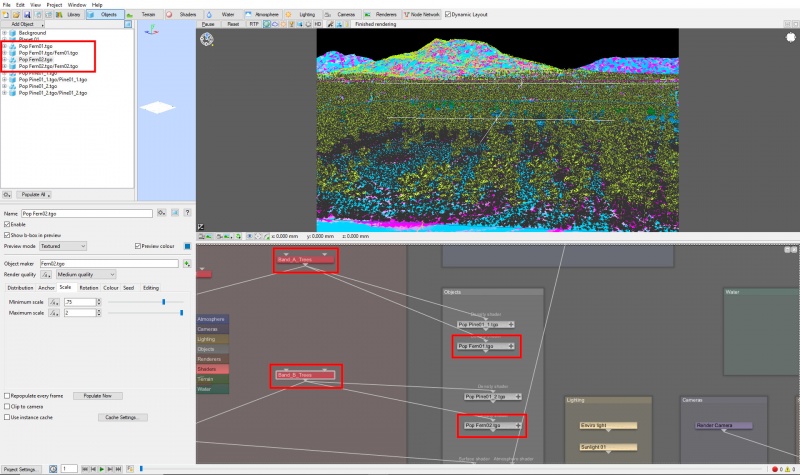
Now that you’ve established the two masking bands and see that they’re working as desired, you can randomize the populations by returning some value to the “Spacing variation in a,b” and their rotations, and minimum and maximum scales.
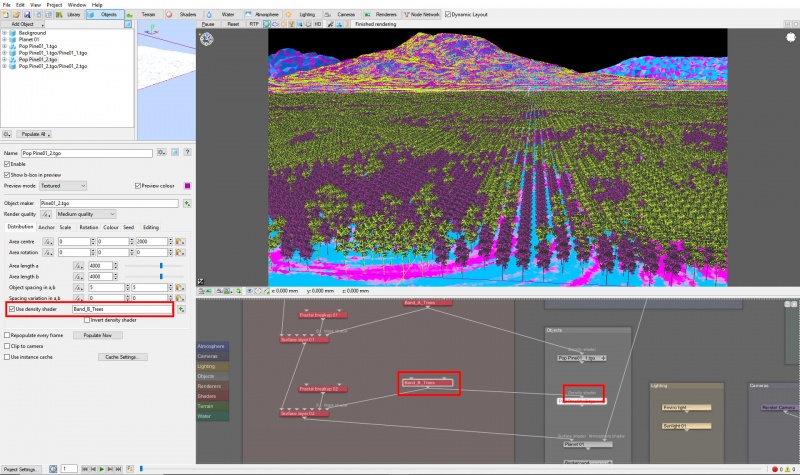
Next, you can add additional tree populations and choose which band they will be distributed in by selecting the appropriate power fractal as the mask.
Here's a render of the populated forest showing the results of using this Density shader masking approach. You can clearly see the non-overlapping areas of the two bands of tree populations.
Download the Terragen project file for this tutorial here.
File:Tutorial_MaskPopulationByInvertedFractals.zip
A shader is a program or set of instructions used in 3D computer graphics to determine the final surface properties of an object or image. This can include arbitrarily complex descriptions of light absorption and diffusion, texture mapping, reflection and refraction, shadowing, surface displacement and post-processing effects. In Terragen 2 shaders are used to construct and modify almost every element of a scene.
Literally, to change the position of something. In graphics terminology to displace a surface is to modify its geometric (3D) structure using reference data of some kind. For example, a grayscale image might be taken as input, with black areas indicating no displacement of the surface, and white indicating maximum displacement. In Terragen 2 displacement is used to create all terrain by taking heightfield or procedural data as input and using it to displace the normally flat sphere of the planet.
A parameter is an individual setting in a node parameter view which controls some aspect of the node.
A single object or device in the node network which generates or modifies data and may accept input data or create output data or both, depending on its function. Nodes usually have their own settings which control the data they create or how they modify data passing through them. Nodes are connected together in a network to perform work in a network-based user interface. In Terragen 2 nodes are connected together to describe a scene.
