I'm going to be away for some time after today so, here's a farewell gift.

You can lay this layer straight onto the ground to get complete coverage of the surface shown here:
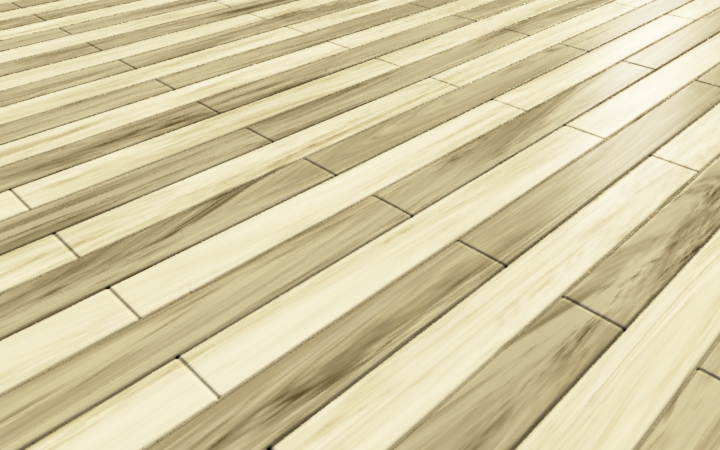
It contains 'wood 1',
from the first post here.
I have lots more wood shaders made but 'wood 1' is all I'm posting, for now(wood 2 here is just a different variation of wood 1).
Here's the simplest way to connect the flooring to the main scene's node network(the 'base colours' node isn't required):
[attachimg=#]
The actual wood shaders(in their own groups inside) are nothing special but, when used with my 'planks' function there are many possibilities for editing pattern, combinations etc.
For the wood shaders, the direction the grain will run on is decided by one(or more) of the 'grain XYZ' nodes. Both wood groups defaults are 'X'.
The 'grain X,Y or Z' nodes can also be simply applied to anything for a plain, bare wood surface, if you wanted that instead.
Here, though, the 'wood' groups are stashed inside the main shader because, if you plan on playing with my cracks, that's where you'll need them, to edit them easily.
The cracks are a collection of functions that create masks for displacement, colour distribution and reflectivity:
[attachimg=#]
Surface layers W1 and W2 can feed either of the add/mix nodes beneath them or, you can bypass the 'add colour'/'mix colour' and 'combined colour' nodes completely, if you want to only have 1 flavour of wood on your final surface.
Default settings are for 'wood 2' to be added to wood 1 alternately.
Someone might be able to simplify the internal network a little more, it makes sense to me but, I'm not always the sharpest box in the tool!

Have at it! : [attachimg=#]
Cheers and, enjoy!
* Edit: Replaced clipfile. I forgot the reflectivity masking.
** Edit: Mega update downstairs... Old files removed.