Difference between revisions of "Painted Shader"
(Updated page with example images for Brush tab. Transform tab examples coming soon.) |
|||
| Line 1: | Line 1: | ||
| − | [[ | + | [[File:PaintedShdr_00_GUI.png|none|470px|Painted Shader]] |
| − | + | ||
| + | __TOC__ | ||
| + | |||
| + | ==Overview== | ||
The Painted shader allows you to paint into your scene using the 3D Preview. Amongst other things you can paint colours for a surface, a mask to control where a surface or clouds appear, the distribution of a population or you could use the shader to generate displacement on a surface. | The Painted shader allows you to paint into your scene using the 3D Preview. Amongst other things you can paint colours for a surface, a mask to control where a surface or clouds appear, the distribution of a population or you could use the shader to generate displacement on a surface. | ||
For more information about using the Painted shader please read the [[Painted Shader Guide]]. | For more information about using the Painted shader please read the [[Painted Shader Guide]]. | ||
| + | '''Settings:''' | ||
| + | |||
| + | *'''Name:''' This setting allows you to apply a descriptive name to the node, which can be helpful when using multiple Painted shader nodes in a project. | ||
| + | |||
| + | *'''Enable:''' When checked, the node is active and the settings below will affect the surface. When unchecked, the node is ignored. | ||
| + | |||
| + | *'''Clear button: '''Clicking this button will delete all the painted strokes for the shader. | ||
| + | |||
| + | |||
| + | == Brush Tab== | ||
| + | [[File:PaintedShdr_01_BrushTab.png|none|470px|Brush Tab]] | ||
| + | |||
| + | |||
| + | *'''Use absolute brush:''' When checked the brush will be a fixed size in metres. | ||
| + | <ul> | ||
| + | *'''Brush size in metres:''' This sets the size of the absolute brush. | ||
| + | <ul> | ||
| + | {| | ||
| + | |- | ||
| + | | [[File:PaintedShdr_05_ABS1000m.jpg|none|800px|Use absolute brush = 1000 metres]] | ||
| + | |- | ||
| + | | [[File:PaintedShdr_06_ABS100m.jpg|none|800px|Use absolute brush = 100 metres]] | ||
| + | |} | ||
| + | </ul> | ||
| + | </ul> | ||
| + | |||
| + | |||
| + | *'''Use view-relative brush:''' When checked, the size of the brush will change depending on where you paint. It will stay a consistent size relative to the size of 3D Preview but when you paint further away from the camera it will be larger and vice versa. | ||
| + | <ul> | ||
| + | |||
| + | *'''View-relative brush size:''' This sets the size of the view-relative brush. The size is relative to the horizontal field of view of the 3D Preview. Smaller numbers make the the brush smaller. For example a value of 0.1 means the brush is 10% of the view width and a value of 0.5 would mean it was 50% of the view width. | ||
| + | <ul> | ||
| + | {| | ||
| + | |- | ||
| + | | [[File:PaintedShdr_07_REL0p1.jpg|none|800px|Use view-relative brush = 0.1]] | ||
| + | |- | ||
| + | | [[File:PaintedShdr_08_REL0P25.jpg|none|800px|Use view-relative brush = 0.25]] | ||
| + | |} | ||
| + | </ul> | ||
| + | </ul> | ||
| + | |||
| + | |||
| + | *'''Brush falloff:''' This controls the opacity of the brush from the centre to edge. A value of 1 means the brush smoothly moves from transparent at the edge to opaque in the centre. A value of 0 means the brush is completely opaque. | ||
| + | <ul> | ||
| + | {| | ||
| + | |- | ||
| + | | [[File:PaintedShdr_09_BrushFalloff0.jpg|none|800px|Brush falloff = 0]] | ||
| + | |- | ||
| + | | [[File:PaintedShdr_10_BrushFalloff0p75.jpg|none|800px|Brush falloff = 0.75]] | ||
| + | |} | ||
| + | </ul> | ||
| − | |||
| + | *'''Flow:''' This setting controls how quickly the brush applies its paint. Lower numbers mean the brush has less effect. | ||
| + | <ul> | ||
| + | {| | ||
| + | |- | ||
| + | | [[File:PaintedShdr_11_Flow0p05.jpg|none|800px|Flow = 0.05]] | ||
| + | |- | ||
| + | | [[File:PaintedShdr_12_Flow1.jpg|none|800px|Flow = 1]] | ||
| + | |} | ||
| + | </ul> | ||
| − | |||
| − | + | *'''Colour:''' Sets the colour of paint used by the brush. | |
<ul> | <ul> | ||
| − | + | {| | |
| − | + | |- | |
| − | + | | [[File:PaintedShdr_13_ColourRed.jpg|none|800px|Colour = Red (sRGB 255,0,0)]] | |
| − | + | |- | |
| − | + | | [[File:PaintedShdr_14_ColourRGB.jpg|none|800px|Colour = red, green, blue. Each colour can be isolated and used as a mask independently.]] | |
| − | + | |} | |
| − | |||
| − | |||
| − | |||
| − | |||
| − | |||
| − | |||
| − | |||
| − | |||
| − | |||
| − | |||
| − | |||
| − | |||
| − | |||
| − | |||
| − | |||
</ul> | </ul> | ||
| − | == | + | ==Transform Tab== |
| + | [[File:PaintedShdr_02_TransformTab.png|none|470px|Brush Tab]] | ||
| + | |||
| + | |||
| + | *'''Projection:''' This popup menu has four options in which to project the painted shader. | ||
| + | <ul> | ||
| + | [[File:PaintedShdr_04_TransformTab_Projection.png|none|203px|Projection options]] | ||
| + | <u>3D:</u> <br /n> | ||
| + | <u>Plan Y:</u> <br /n> | ||
| + | <u>Plan X: </u> <br /n> | ||
| + | <u>Plan Z: </u> <br /n> | ||
| + | </ul> | ||
| + | |||
| + | |||
| + | *'''Coordinates: '''This popup menu has two options in order to select the texture coordinates of the painted shader. | ||
| + | <ul> | ||
| + | [[File:PaintedShdr_03_TransformTab_Coordinates.png|none|290px|Coordinates options]] | ||
| + | <u>Final position:</u> <br /n> | ||
| + | <u>Position in terrain/texture</u> <br /n> | ||
| + | </ul> | ||
| + | |||
| + | |||
| + | *'''Translate:''' Sets the position of the origin of the shader. You can use this to move the shader after you've finished painting it or even reposition it while you are painting. | ||
| + | |||
| + | <br /n> | ||
| + | |||
| − | |||
[[Category:Colour Shader]] | [[Category:Colour Shader]] | ||
Revision as of 23:01, 6 August 2021
Contents
Overview[edit]
The Painted shader allows you to paint into your scene using the 3D Preview. Amongst other things you can paint colours for a surface, a mask to control where a surface or clouds appear, the distribution of a population or you could use the shader to generate displacement on a surface.
For more information about using the Painted shader please read the Painted Shader Guide.
Settings:
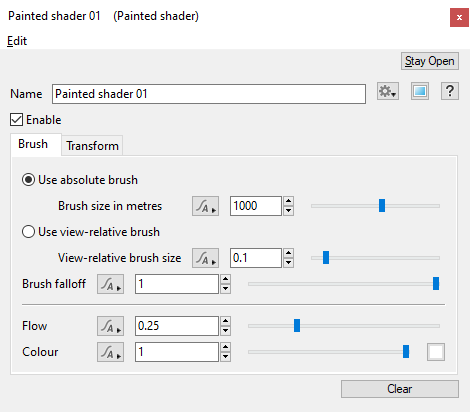
- Name: This setting allows you to apply a descriptive name to the node, which can be helpful when using multiple Painted shader nodes in a project.
- Enable: When checked, the node is active and the settings below will affect the surface. When unchecked, the node is ignored.
- Clear button: Clicking this button will delete all the painted strokes for the shader.
Brush Tab[edit]
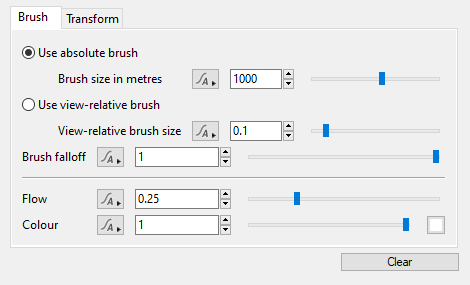
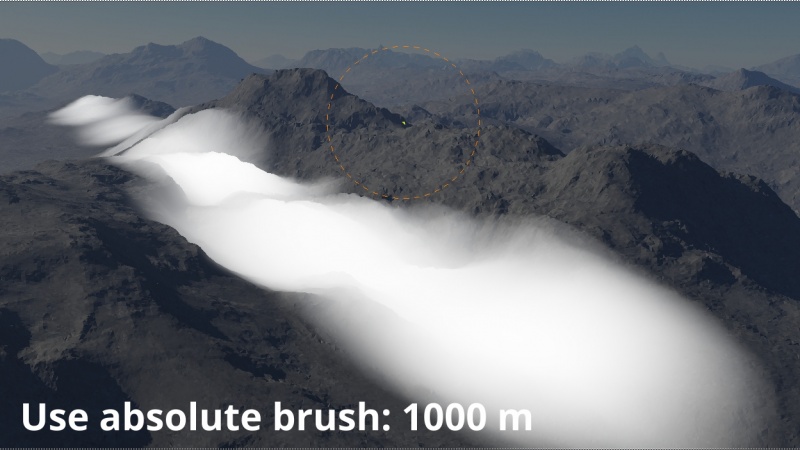
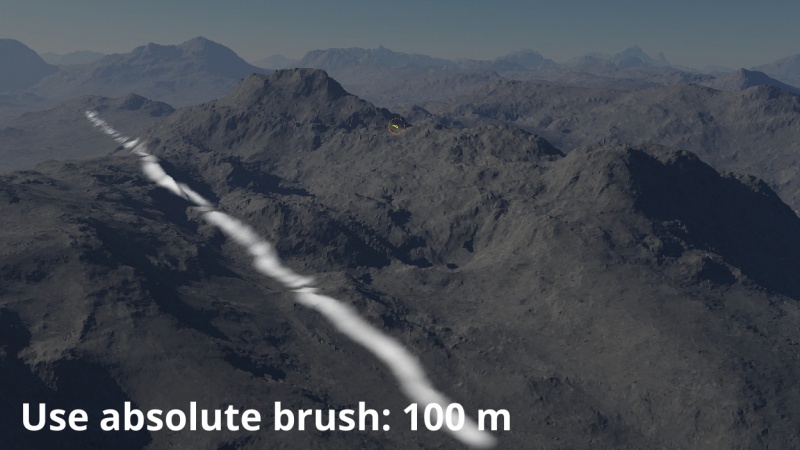
- Use absolute brush: When checked the brush will be a fixed size in metres.
- Brush size in metres: This sets the size of the absolute brush.
- Use view-relative brush: When checked, the size of the brush will change depending on where you paint. It will stay a consistent size relative to the size of 3D Preview but when you paint further away from the camera it will be larger and vice versa.
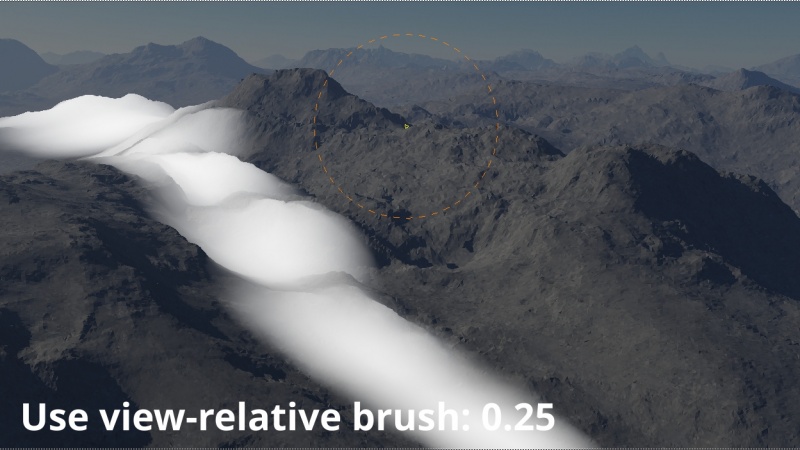
- View-relative brush size: This sets the size of the view-relative brush. The size is relative to the horizontal field of view of the 3D Preview. Smaller numbers make the the brush smaller. For example a value of 0.1 means the brush is 10% of the view width and a value of 0.5 would mean it was 50% of the view width.
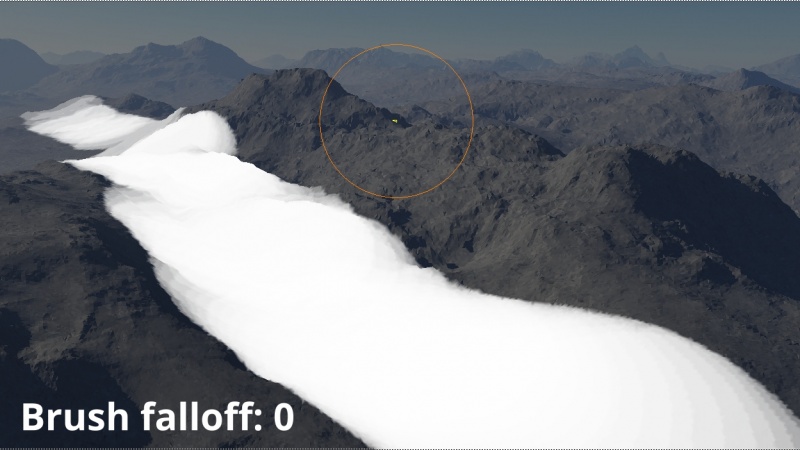
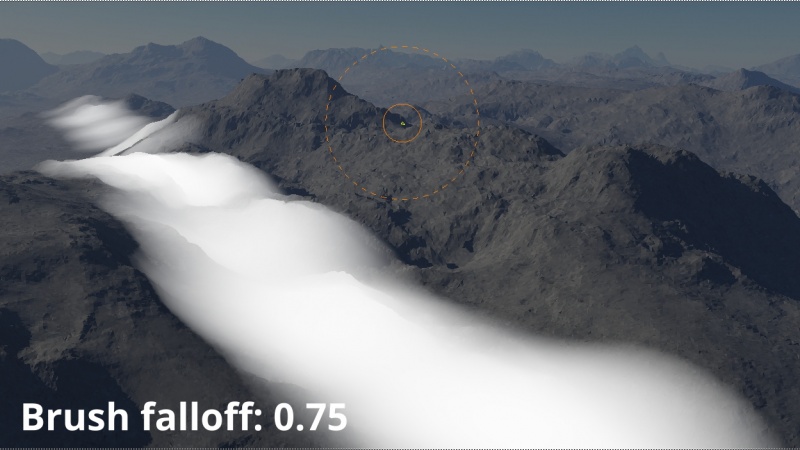
- Brush falloff: This controls the opacity of the brush from the centre to edge. A value of 1 means the brush smoothly moves from transparent at the edge to opaque in the centre. A value of 0 means the brush is completely opaque.
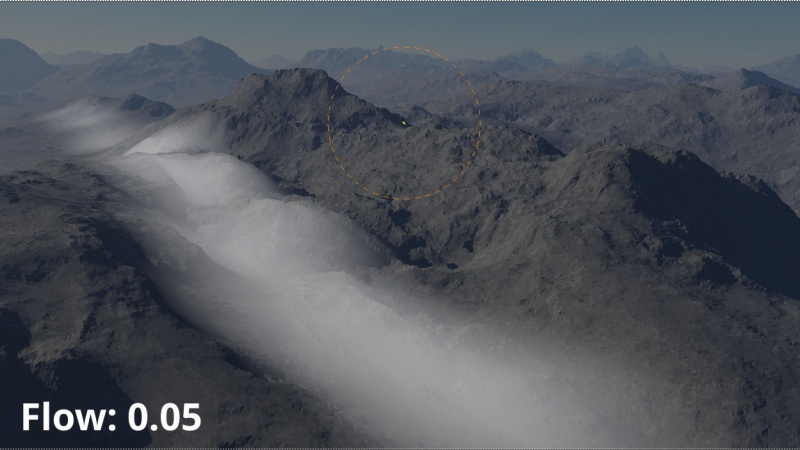
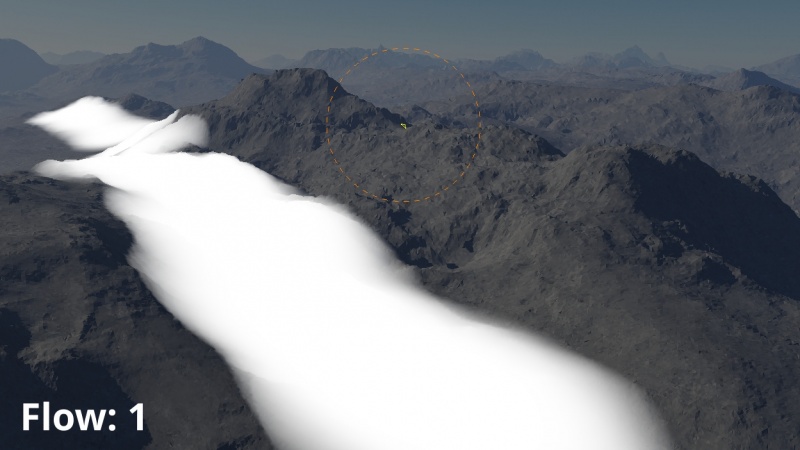
- Flow: This setting controls how quickly the brush applies its paint. Lower numbers mean the brush has less effect.
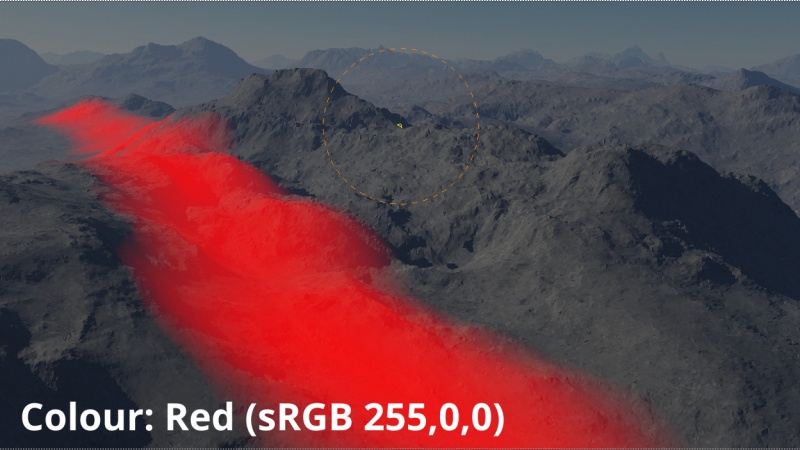
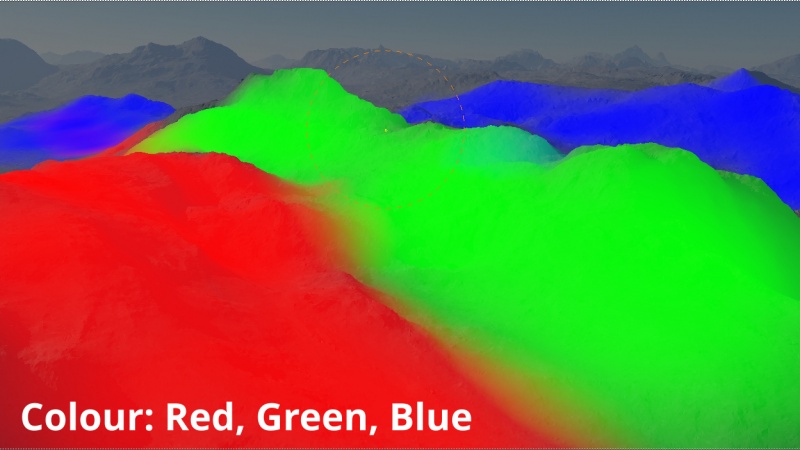
- Colour: Sets the colour of paint used by the brush.
Transform Tab[edit]
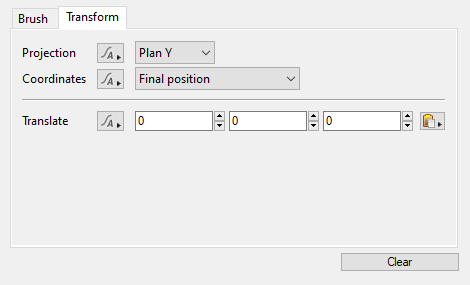
- Projection: This popup menu has four options in which to project the painted shader.
3D:
Plan Y:
Plan X:
Plan Z:
- Coordinates: This popup menu has two options in order to select the texture coordinates of the painted shader.
Final position:
Position in terrain/texture
- Translate: Sets the position of the origin of the shader. You can use this to move the shader after you've finished painting it or even reposition it while you are painting.
A shader is a program or set of instructions used in 3D computer graphics to determine the final surface properties of an object or image. This can include arbitrarily complex descriptions of light absorption and diffusion, texture mapping, reflection and refraction, shadowing, surface displacement and post-processing effects. In Terragen 2 shaders are used to construct and modify almost every element of a scene.
Literally, to change the position of something. In graphics terminology to displace a surface is to modify its geometric (3D) structure using reference data of some kind. For example, a grayscale image might be taken as input, with black areas indicating no displacement of the surface, and white indicating maximum displacement. In Terragen 2 displacement is used to create all terrain by taking heightfield or procedural data as input and using it to displace the normally flat sphere of the planet.
A single object or device in the node network which generates or modifies data and may accept input data or create output data or both, depending on its function. Nodes usually have their own settings which control the data they create or how they modify data passing through them. Nodes are connected together in a network to perform work in a network-based user interface. In Terragen 2 nodes are connected together to describe a scene.
