Difference between revisions of "Visualise Tex Coords"
(Added descriptions and example images for all settings.) |
(Updated overview, description and example images.) |
||
| Line 2: | Line 2: | ||
== Overview == | == Overview == | ||
| − | + | In order to apply textures to 3D objects and the terrain, the vertices of a 3D object or the sample points in a terrain make use of texture coordinates which instructs the shader how to colour the given point. | |
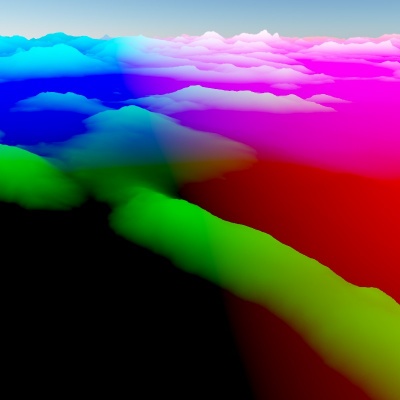
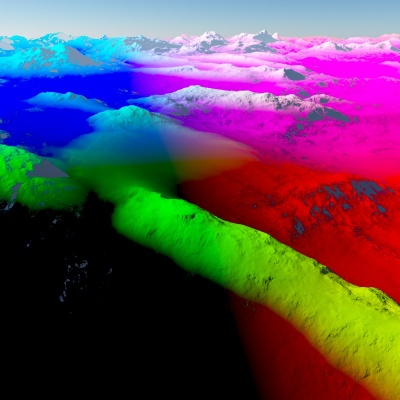
| − | + | The Visualise tex coords shader outputs an RGB representation of the 3D vector of the texture coordinates, remapping them into the visible range of 0 to 1. In this colour representation the R value is the X component, the G value is the Y, and the B value is the Z. The shader can output this information as diffuse or luminosity. Also note that the Get Position in Texture function can provide the same information, but not as luminosity. | |
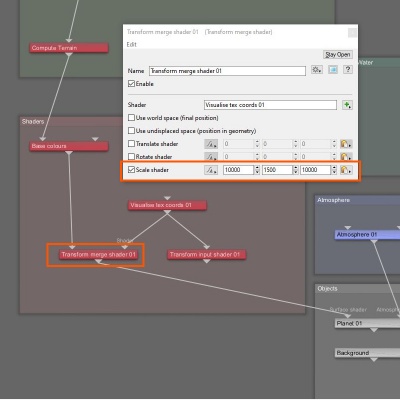
| + | For terrains, the texture coordinates are calculated via a Compute Terrain node or the Tex Coords from XYZ node which return the X,Y and Z position in world space for a given sample point. World space starts at the origin of the project at 0,0,0 and by default is scaled to 1 metre. You can increase the scale by applying a Transform Input node or Transform Merge node after the Visualise Tex Coords node and increasing its XYZ scale values. | ||
| − | '''Settings: ''' | + | {| |
| + | |- | ||
| + | | [[File:VisTexCoord_28_Terrain_Luminous.jpg|none|400px|Visualise tex coords applied to terrain.]] || [[File:VisTexCoord_29_NodeNetwork_Transform.jpg|none|400px|The Transform Merge node can be used to scale the Visualise tex coords scale, which defaults to 1 metre x 1 metre.]] | ||
| + | |} | ||
| + | |||
| + | Imported 3D geometry makes use of the object’s UV coordinates which can be formatted in UV or UDIM layouts. The X and Y position for each vertex synchronize to the texture map providing the colour information. Typically, the UV coordinates for the bottom left corner are 0,0 and the top right corner are 1,1. UDIM layouts provide a way to offset vertex coordinates, by shifting them to a new 0 to 1 space. This provides a way in which to apply separate texture maps, with various resolutions, to specific surfaces on the object; in other words, you can assign higher resolution texture maps to the areas that require more texture data or use smaller texture maps for areas not often seen. | ||
| + | |||
| + | {| | ||
| + | |- | ||
| + | | [[File:VisTexCoord_31_OnUVObj.jpg|none|800px|Example of workflow using UV layout.]] | ||
| + | |- | ||
| + | | [[File:VisTexCoord_32_OnUDIMObj.jpg|none|800px|Example of workflow using UDIM layout.]] | ||
| + | |} | ||
| + | |||
| + | Terragen 4 Professional can save the raw texture coordinate data for a rendered frame via its Render Layer feature by enabling the Surface Position checkbox under the Render Elements tab. This render element can be useful for post processing effects and adjustments to the beauty pass. This does not require a Visualise tex coords node within a project. | ||
| + | |||
| + | [[File:VisTexCoord_30_RenderElements_GUI.png|none|470px|Render Elements tab]] | ||
| + | |||
| + | |||
| + | '''Settings:''' | ||
<ul> | <ul> | ||
| + | *'''Name:''' This setting allows you to apply a descriptive name to the node, which can be helpful when using multiple Visualise tex coords nodes in a project. | ||
| − | + | *'''Enable: '''When checked, the node is active and the settings below will affect the surface. When unchecked, the node is ignored. | |
| − | |||
| − | *'''Enable:''' When checked, the node is active and the settings below will affect the surface. When unchecked, the node is ignored. | ||
| − | * '''Diffuse:''' When checked, the surface of the object or terrain is treated as diffuse | + | *'''Diffuse:''' When checked, the surface of the object or terrain is treated as a diffuse surface. |
<ul> | <ul> | ||
{| | {| | ||
|- | |- | ||
| − | | [[File: | + | | [[File:VisTexCoord_35_Terrain_Diffuse.jpg|none|400px|Diffuse setting enabled in the Visualise tex coords applied to terrain.]] || [[File:VisTexCoord_33_DiffuseOn.jpg|none|400px|Diffuse setting enabled in the Visualise tex coordinates shader of the UV Cube object.]] |
| − | |||
| − | |[[File: | ||
| − | |||
| − | |||
| − | |||
| − | |||
|} | |} | ||
</ul> | </ul> | ||
| − | + | *'''Luminous:''' When checked, the surface of the object or terrain is treated as fully luminous. | |
| − | |||
| − | *'''Luminous:''' When checked, the surface of the object or terrain is treated as fully luminous. | ||
<ul> | <ul> | ||
{| | {| | ||
|- | |- | ||
| − | | [[File: | + | | [[File:VisTexCoord_28_Terrain_Luminous.jpg|none|400px|Luminous setting enabled in the Visualise tex coords applied to terrain.]] || [[File:VisTexCoord_34_LumOn_DiffOff.jpg|none|400px|Luminous setting enabled in the Visualise tex coords shader of the UV Cube object.]] |
| − | |||
| − | |||
| − | |||
| − | |||
| − | |||
| − | |||
|} | |} | ||
</ul> | </ul> | ||
| − | + | *'''Repeat:''' When checked, the texture coordinate values of a procedural object such as the terrain, will be tiled across the surface, repeating the 0 - 1 range. | |
| − | *'''Repeat: ''' When checked, the texture coordinate values of a procedural object | ||
<ul> | <ul> | ||
{| | {| | ||
|- | |- | ||
| − | | [[File: | + | | [[File:VisTexCoord_36_Repeat1500m.jpg|none|400px|Repeat enabled with scale at 1,500 metres.]] || [[File:VisTexCoord_37_Repeat10000m.jpg|none|400px|Repeat enabled with scale at 10,000 metres.]] |
| − | |||
| − | |||
|} | |} | ||
| + | </ul> | ||
</ul> | </ul> | ||
| − | |||
| − | |||
| − | |||
<br /> | <br /> | ||
[[Category:Colour Shader]] | [[Category:Colour Shader]] | ||
Revision as of 03:04, 1 July 2021
Overview[edit]
In order to apply textures to 3D objects and the terrain, the vertices of a 3D object or the sample points in a terrain make use of texture coordinates which instructs the shader how to colour the given point.
The Visualise tex coords shader outputs an RGB representation of the 3D vector of the texture coordinates, remapping them into the visible range of 0 to 1. In this colour representation the R value is the X component, the G value is the Y, and the B value is the Z. The shader can output this information as diffuse or luminosity. Also note that the Get Position in Texture function can provide the same information, but not as luminosity.
For terrains, the texture coordinates are calculated via a Compute Terrain node or the Tex Coords from XYZ node which return the X,Y and Z position in world space for a given sample point. World space starts at the origin of the project at 0,0,0 and by default is scaled to 1 metre. You can increase the scale by applying a Transform Input node or Transform Merge node after the Visualise Tex Coords node and increasing its XYZ scale values.
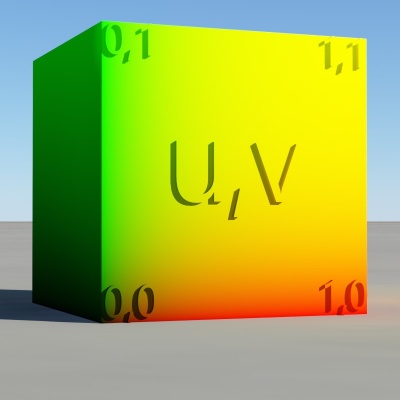
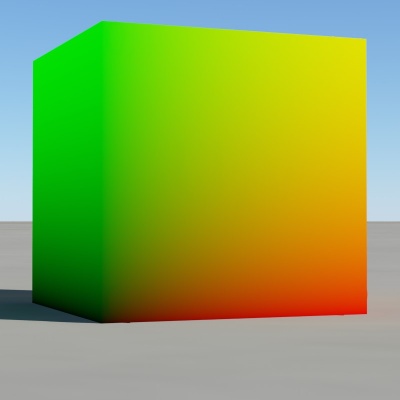
Imported 3D geometry makes use of the object’s UV coordinates which can be formatted in UV or UDIM layouts. The X and Y position for each vertex synchronize to the texture map providing the colour information. Typically, the UV coordinates for the bottom left corner are 0,0 and the top right corner are 1,1. UDIM layouts provide a way to offset vertex coordinates, by shifting them to a new 0 to 1 space. This provides a way in which to apply separate texture maps, with various resolutions, to specific surfaces on the object; in other words, you can assign higher resolution texture maps to the areas that require more texture data or use smaller texture maps for areas not often seen.
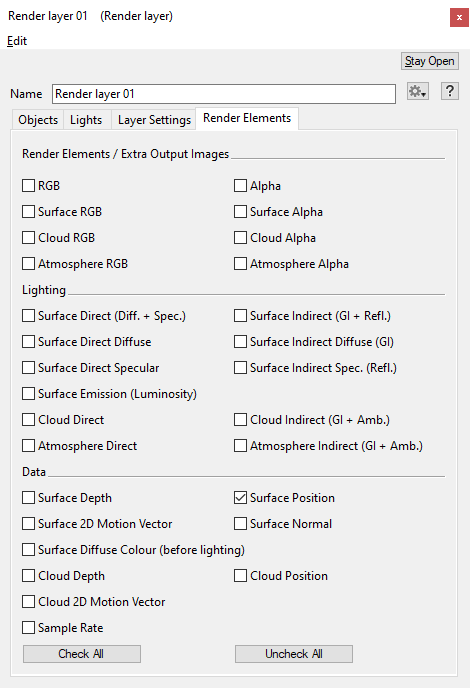
Terragen 4 Professional can save the raw texture coordinate data for a rendered frame via its Render Layer feature by enabling the Surface Position checkbox under the Render Elements tab. This render element can be useful for post processing effects and adjustments to the beauty pass. This does not require a Visualise tex coords node within a project.
Settings:
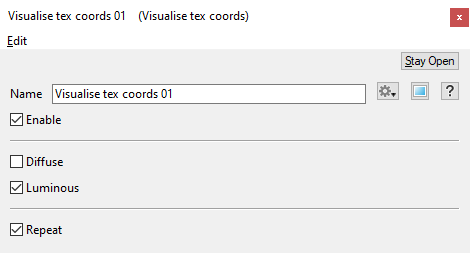
- Name: This setting allows you to apply a descriptive name to the node, which can be helpful when using multiple Visualise tex coords nodes in a project.
- Enable: When checked, the node is active and the settings below will affect the surface. When unchecked, the node is ignored.
- Diffuse: When checked, the surface of the object or terrain is treated as a diffuse surface.
- Luminous: When checked, the surface of the object or terrain is treated as fully luminous.
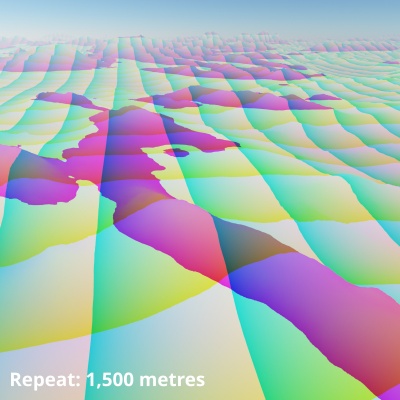
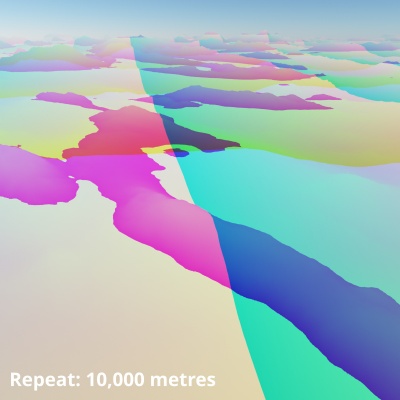
- Repeat: When checked, the texture coordinate values of a procedural object such as the terrain, will be tiled across the surface, repeating the 0 - 1 range.
A sample refers to a value or set of values at a point in time and/or space. The defining point of a sample is that it is a chosen value out of a continuous signal. In Terragen 2 it is usually a mathematical (procedural) function that is being sampled.
A shader is a program or set of instructions used in 3D computer graphics to determine the final surface properties of an object or image. This can include arbitrarily complex descriptions of light absorption and diffusion, texture mapping, reflection and refraction, shadowing, surface displacement and post-processing effects. In Terragen 2 shaders are used to construct and modify almost every element of a scene.
A vector is a set of three scalars, normally representing X, Y and Z coordinates. It also commonly represents rotation, where the values are pitch, heading and bank.
A single object or device in the node network which generates or modifies data and may accept input data or create output data or both, depending on its function. Nodes usually have their own settings which control the data they create or how they modify data passing through them. Nodes are connected together in a network to perform work in a network-based user interface. In Terragen 2 nodes are connected together to describe a scene.
