Serenity

Started by aknight0, August 06, 2023, 11:50:27 PM

Previous topic - Next topic

aknight0

Haven't done a full scene in a while, so here's a fox by the lake and some summer serenity.  Background mountains are Gaea, plants mostly Xfrog, and the fox is photoshopped, since apparently a nice 3D model of a sitting fox doesn't exist :P

Dune

Looks terrific! I really love the lake and shores, also the eroded mountain, the nice mix of veggies, and the fox fits well. You wouldn't say it's photoshopped in.
There is a DAZ fox, but to make it this beautiful is not so easy.

One crit; the big cloud. It looks very good and like a huge thick almost thundercloud, but I don't understand why the cirrus is poking through.

And what my criticism is of PT (though beautiful) is that shadows almost invariably turn out very dark. The wood is almost black. I wish there were a slider/variable that would enhance reflected light in the renderer at wish.

Stormlord

#2
Looks very good and realistic, although why all these pictures are so dark?
Bring in more light, make it more brilliant, then it would look like a photo....

Just double the Layer in Photoshop and mix it with the original with negative multiply.
I'll show you the quick example which I often use...
Below your original
Above, same but blended with negative multiply
Some more color added, finto la muzika
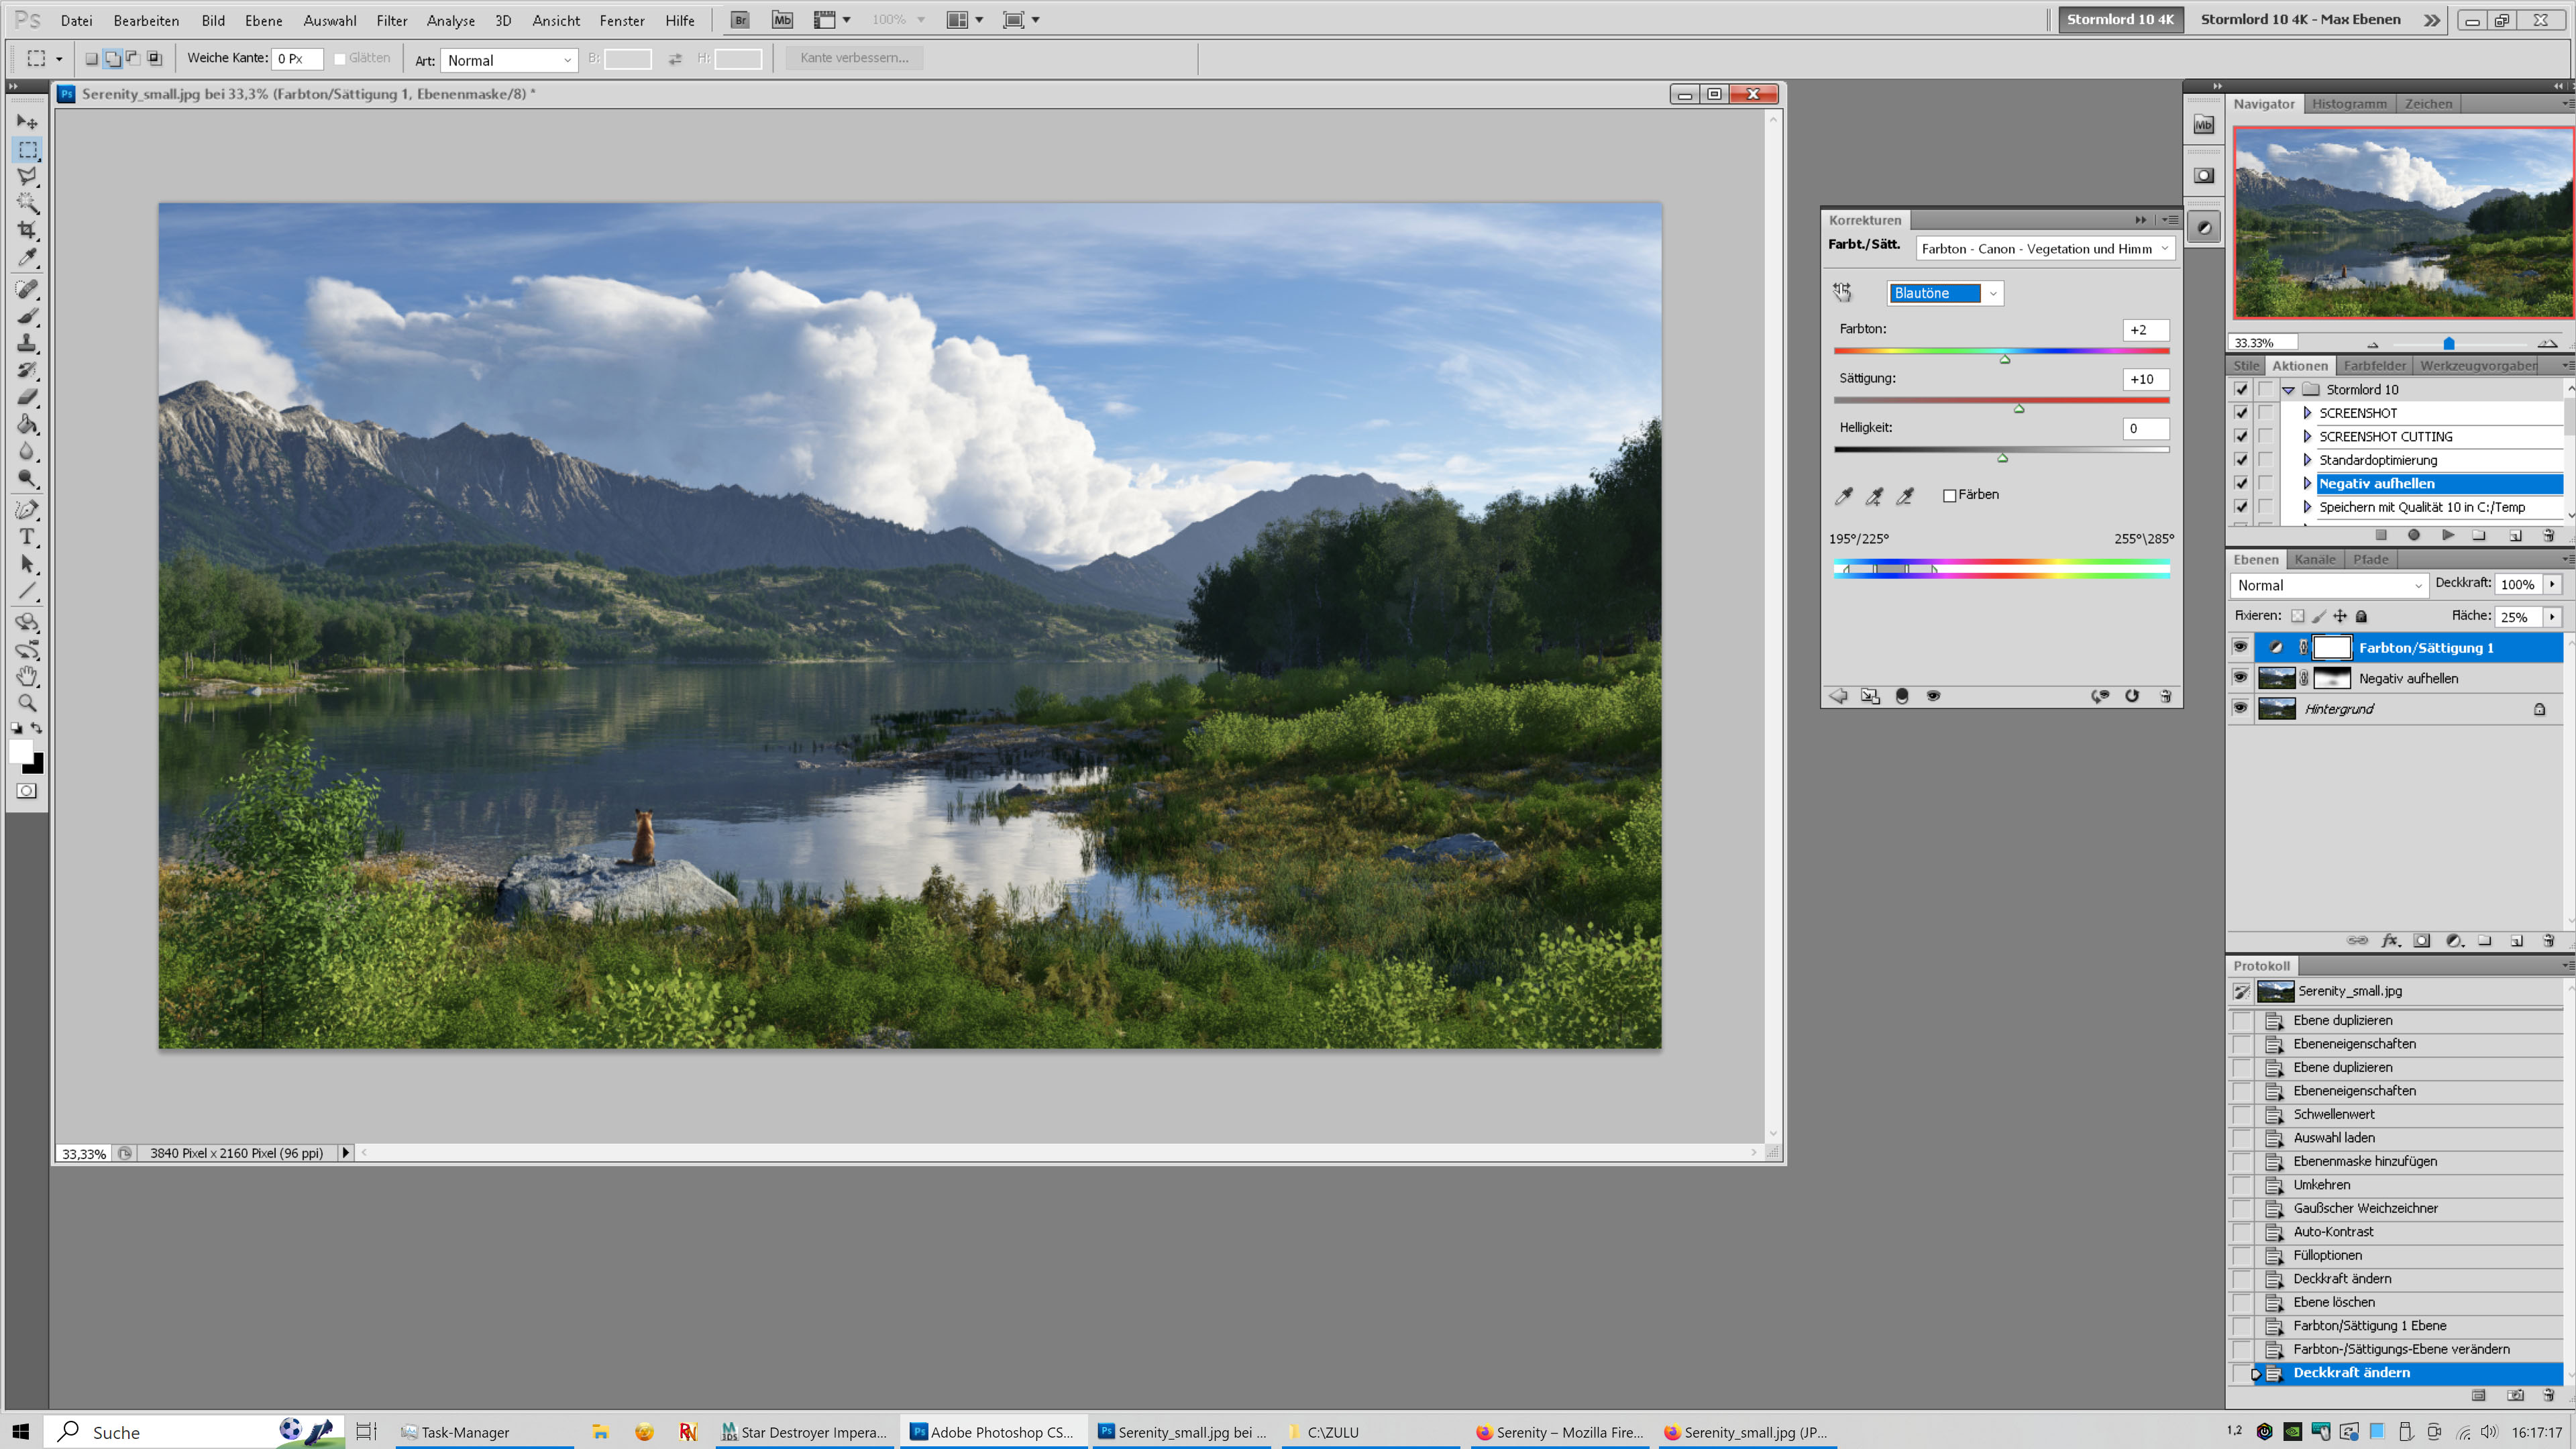
Example.jpg
Example, -> see the actions in Poposhop
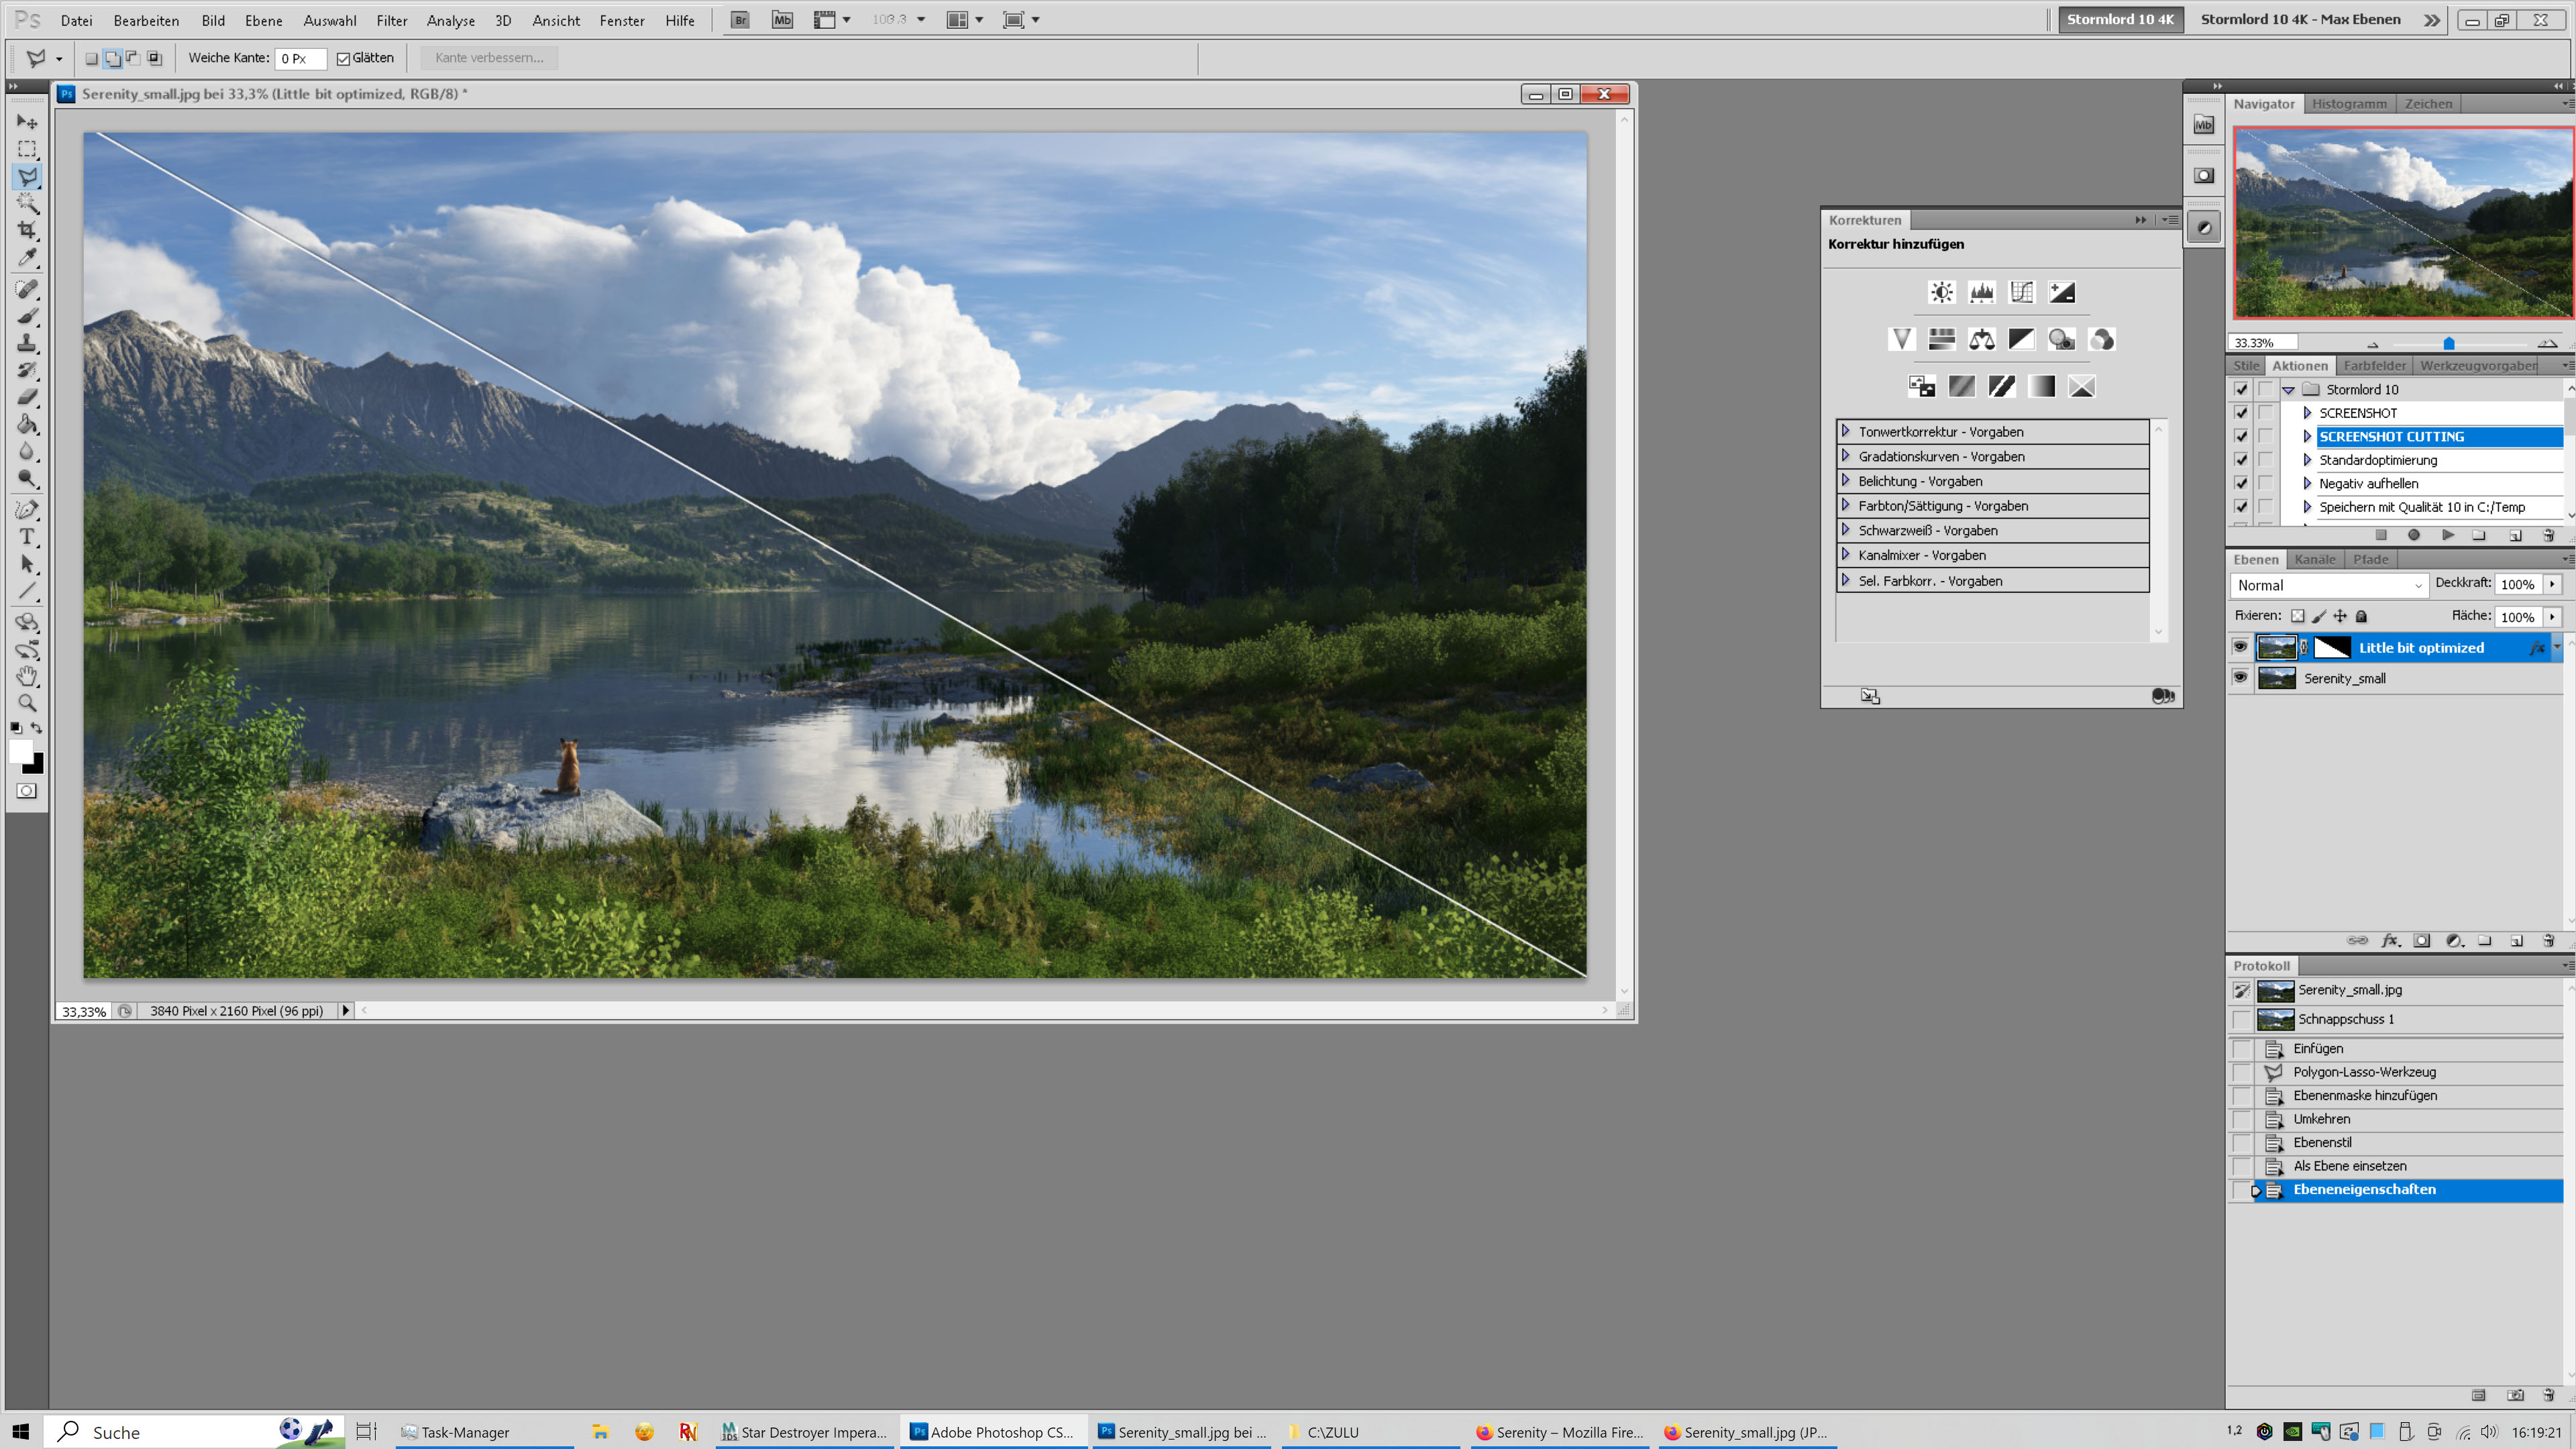
Example Comparisson.jpg
Direct comparison / Which is better ? / It just took me 1 minute or so!
You decide!

Then fade/blend in the dark areas as you wish... or bring in more light in the scene (and into your materials as well).

STORMLORD

Dune

Cool technique. I also use HDR sometimes.

schmeerlap

A beautiful scene; and I love the fox, enjoying the view in a state of repose.
I hope I realise I don't exist before I apparently die.

Doug

can you please tell us how to make aknight0's Terragen file brighter inside Terragen

that's is one thing i cant work out very effectively yet

Stormlord

#6
No Problem.... Just increase the diffuse color inside the parts shader.
Default is 0.25, increase up to 0.5, this brightens the colors very effectively and brings you an extra boost !!!

Both Screenshots show you the difference.
The lightning in the scene is untouched! The only rule is, just try to have the sun always in your back, not in front of you!
(Pay attention to the suns position in my screenshot and where the shadow is pointing to).

Just the "diffuse color" inside the parts shader has doubled.
You must try out, what looks best according to your scene and your lightning condition.

Diffuse Color in Parts Shader 0.25 (Default Value).jpg
All diffuse colors inside the Parts Shader are coming with a default value of 0.25 if you import an object like a bush or tree

Diffuse Color in Parts Shader 0.5.jpg
Now go inside the parts shader and increase all diffuse colors up to 0.5, render and BOOM !!!

Just ask yourself, which one looks better?
I guess, the second...

-> https://planetside.co.uk/forums/index.php/topic,30552.msg297962.html#msg297962
-> https://planetside.co.uk/forums/index.php?action=dlattach;topic=26446.0;attach=89903;image

STORMLORD

schmeerlap

I always add a second sun 180 degrees from the default sun at a strength of about 0.4 to 0.6 (and remembering to turn off shadows).
This brightens up shadows and shaded areas of the scene.
I hope I realise I don't exist before I apparently die.

Stormlord

#8
Yeah, this method is good for lighting up shadow zones (or the atmosphere if not disabled in the settings), but you miss the bright colors inside the greens!

I got the idea to increase the diffuse color inside the parts shader (from 0.25[default] up to 0.4-0.5) from the field of photography.
Here #1 Rule while taking photos. Always use a lens with a big diameter, the biggest you have in stock! Better use 1 : 2.8 than 1 : 4.0
A big lens means physically = More light comes into the scene -> which results in brighter colors and more contrast (beside lower exposure times) in your picture.
So you will end up with brilliant colors and a better contrast in your photo.

-> Transferred this principle to TG, the goal must be, bring in more light.
So your idea goes in the right direction, but doesn't bring up more light into your vegetation (only into the shadow zones)!

That's the point!
Try it out if you don't believe this statement (I tried it). A 2nd sun only brightens the shadows and atmosphere.

Increasing the diffuse color inside the parts shader means the vegetation looks brighter, your render doesn't look so dull, more liveley!
See my example above


STORMLORD

Dune

What also helps is to decrease the opacity of leaves (to something between 0.50001 and 1) to let more light through. But only with a hard white-black opacity alpha.

I do believe, btw. that an extra sun can be used as it is the idea to have more light in the shadows (you can set the extra sun to just light terrain and objects, not atmo). But a higher default diffuse also helps indeed (you can go above 1 if needed). A bit of reflection, and enough translucency also brightens up shaded areas, but when canopy is very heavy, it might still be too dark. And there is the camera exposure setting of course.

pixelpusher636

Nice work man! All around killer work and those clouds are the cherry on top. 
The more I use Terragen, the more I realize the world is not so small.

aknight0

Thanks guys!  Here's a version with the darks boosted lighter for comparison.  It must be a personal taste thing, I almost always increase the contrast of my renders in post ;D

Dune

I like this much more, still some intriguing darks, but more natural, IMO.

Stormlord

Maybe it depends also on the monitor, its settings and where your monitor stands in the room?
For my taste, the second picture is way better than the first. Bright, but natural..

STORMLORD