Difference between revisions of "Easy Cloud"
m (Added description for Move textures with clouds.) |
m (Replaced 2 example images on Tweaks tab for Fake dark sharpness setting. Both images Fake dark power setting = 1, not 0 as in the previous renders.) |
||
| (16 intermediate revisions by the same user not shown) | |||
| Line 1: | Line 1: | ||
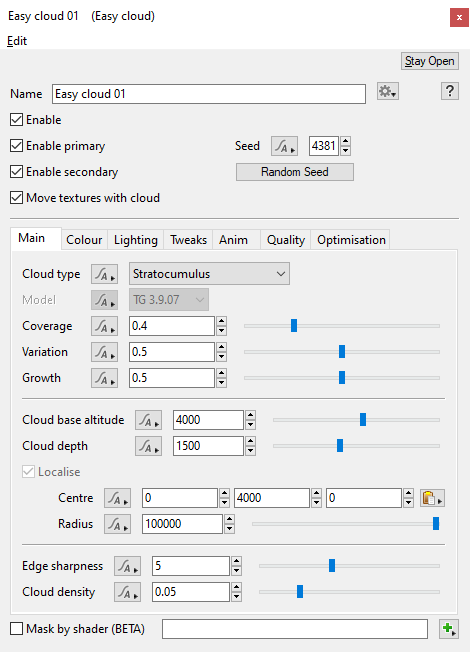
[[File:EasyCld_00_GUI.png|none|470px|Easy Cloud]] <br /> | [[File:EasyCld_00_GUI.png|none|470px|Easy Cloud]] <br /> | ||
== Overview == | == Overview == | ||
| − | + | Easy Clouds are a set of presets accessed via the "Add Cloud Layer" menu and based on Cloud Layer V3 technology that provides a quick and easy way to create real world cloud types such as Altocumulus and Cirrocumulus with extremely realistic results including subtle features, details and highly plausible cloud shapes. | |
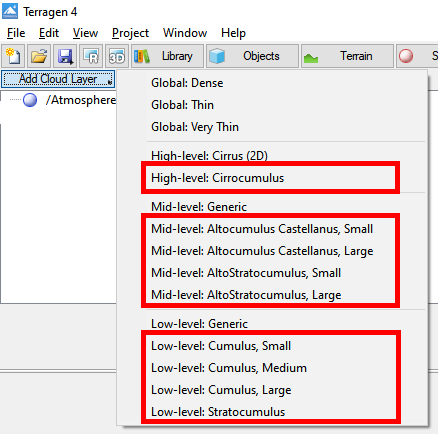
| − | [[File:EasyCld_94_PresetsGUI.png|none|438px|Easy | + | [[File:EasyCld_94_PresetsGUI.png|none|438px|Easy Cloud presets highlighted in red.]] |
'''Settings:''' | '''Settings:''' | ||
<ul> | <ul> | ||
* '''Enable: '''When unchecked, or disabled, the cloud layer is completely turned off and will no longer contribute to the scene. | * '''Enable: '''When unchecked, or disabled, the cloud layer is completely turned off and will no longer contribute to the scene. | ||
| − | * '''Enable primary: '''When unchecked, or disabled, the cloud layer will not be visible to the camera and will not show up in renders. However, if the Enable secondary checkbox is | + | * '''Enable primary: '''When unchecked, or disabled, the cloud layer will not be visible to the camera and will not show up in renders. However, if the "Enable secondary" checkbox is enabled the cloud layer will still affect scene lighting and be visible in reflections. |
* '''Enable secondary: '''When unchecked, or disabled, the cloud layer will not influence scene lighting or be visible in reflections. | * '''Enable secondary: '''When unchecked, or disabled, the cloud layer will not influence scene lighting or be visible in reflections. | ||
| − | * '''Move textures with cloud: '''When checked, or enabled, the fractal noise patterns that internally define the cloud layer moves with the cloud layer as it’s repositioned using the | + | * '''Move textures with cloud: '''When checked, or enabled, the fractal noise patterns that internally define the cloud layer moves with the cloud layer as it’s repositioned using the Centre setting. When unchecked, or disabled, repositioning the cloud layer causes a different part of the fractal noise pattern to be visible. |
* '''Seed: '''The seed value controls the noise pattern generated. Each seed value generates a slightly different pattern. You can either set the value manually or use the Random Seed button at right to generate a random value. | * '''Seed: '''The seed value controls the noise pattern generated. Each seed value generates a slightly different pattern. You can either set the value manually or use the Random Seed button at right to generate a random value. | ||
<!-- * '''Random Seed button: ''' --> | <!-- * '''Random Seed button: ''' --> | ||
| Line 18: | Line 18: | ||
'''Settings:''' | '''Settings:''' | ||
<ul> | <ul> | ||
| − | * '''Cloud Type:''' This popup | + | * '''Cloud Type:''' This popup menu contains options for three cloud types. <u>Cumulus</u> clouds have flat bases and are low-level clouds, generally less than 2,0000 metres in altitude. <u>Altocumulus Castellanus</u> clouds are named for the tower-like projections billowing upwards from their base, which can form as low as 2,000 metres or as high as 6,000 metres. <u>Stratocumulus</u> clouds are characterized by large, dark, rounded masses which are usually in groups, lines or wave-like patterns. Their individual elements are larger than those in Altocumulus and as a whole are usually at a lower height, below 2,000 metres. |
<ul> | <ul> | ||
[[File:EasyCld_08_MainTab_CloudType.png|none|277px|Cloud types]] | [[File:EasyCld_08_MainTab_CloudType.png|none|277px|Cloud types]] | ||
| − | * <u>Cumulus:</u> | + | <!-- * <u>Cumulus:</u> This cloud type has flat bases and are low-level clouds, generally less than 2,000 metres in altitude. |
| − | * <u>Altocumulus Castellanus:</u> | + | * <u>Altocumulus Castellanus:</u> This cloud type is named for its tower-like projections that billow upwards from the base of the cloud. The base of the cloud can form as low as 2,000 metres or as high as 6,000 metres. |
| − | * <u>Stratocumulus:</u> | + | * <u>Stratocumulus:</u> This cloud type is characterized by large dark, rounded masses, usually in groups, lines, or waves, the individual elements being larger than those in altocumulus, and the whole being at a lower height, usually below 2,000 metres. --> |
</ul> | </ul> | ||
| − | * '''Model: ''' This popup has two options. | + | * '''Model: ''' This popup menu has two options that coincide with the development of Easy Clouds. Model <u>TG 3.9.07</u> is a refinement of <u>TG 3.9.04</u>. In some situations, however, <u>TG 3.9.04</u> can look better, and is especially good for producing rougher and more billowy clouds. |
| + | |||
<ul> | <ul> | ||
[[File:EasyCld_09_MainTab_ModelType.png|none|195px|Model types]] | [[File:EasyCld_09_MainTab_ModelType.png|none|195px|Model types]] | ||
| − | * <u>TG 3.9.04:</u> | + | <!-- * <u>TG 3.9.04:</u> |
| − | * <u>TG 3.9.07:</u> | + | * <u>TG 3.9.07:</u> --> |
| + | </ul> | ||
| + | * '''Coverage: '''This setting controls the amount of clouds within the cloud layer. Low values reduce the amount of individual clouds and increase the amount of empty space between them. Increasing the value fills up the area with more individual clouds. | ||
| + | <!-- | ||
| + | <ul> | ||
| + | {| | ||
| + | |- | ||
| + | | [[File:EasyCld_95_MainTab_Coverage0p4.jpg|none|400px|Coverage = 0.4]] || [[File:EasyCld_96_MainTab_Coverage1.jpg|none|400px|Coverage = 1.0]] | ||
| + | |} | ||
| + | </ul> | ||
| + | --> | ||
| + | * '''Variation: '''This setting controls the visibility of very large scale noise patterns within the cloud layer. It can reduce the cloud’s density in some places and increase it in other places. Likewise, it can reduce the cloud’s coverage in some places and increase it in others. This parameter is useful for generating randomness and is most noticeable when viewing a large expanse of the cloud layer, and when the cloud layer covers an area much larger than the depth of the cloud. When working with smaller clouds it tends to push them in random directions. | ||
| + | <!-- | ||
| + | <ul> | ||
| + | {| | ||
| + | |- | ||
| + | | [[File:EasyCld_97_MainTab_Variation002.jpg|none|400px|Variation = 0.2]] || [[File:EasyCld_98_MainTab_Variation1.jpg|none|400px|Variation = 1.0]] | ||
| + | |} | ||
| + | </ul> | ||
| + | --> | ||
| + | * '''Growth: ''' This setting constricts or expands the individual clouds within the cloud layer. Lowering the value causes the clouds to appear to evaporate, losing size and becoming more transparent. Raising the value causes each cloud to expand, and become more dense and opaque. | ||
| + | <!-- | ||
| + | <ul> | ||
| + | {| | ||
| + | |- | ||
| + | | [[File:EasyCld_99_MainTab_Growth0.jpg|none|400px|Growth = 0]] || [[File:EasyCld_100_MainTab_Growth1.jpg|none|400px|Growth = 1]] | ||
| + | |} | ||
| + | </ul> | ||
| + | --> | ||
| + | * '''Cloud base altitude: '''This setting is the altitude at the base of the Easy Cloud. | ||
| + | * '''Cloud depth: '''This setting controls the height, or depth, of the Easy Cloud starting from its base altitude. For example, if the "Cloud depth" was 1,000 metres and the "Cloud base altitude" was 500 metres, then the Easy Cloud would extend from 500 metres to 1,500 metres in height. | ||
| + | <ul> | ||
| + | [[ File:EasyCld_102_MainTab_BaseAltitude.png|none|266px|Easy Cloud base altitude and depth example]] | ||
| + | </ul> | ||
| + | * '''Localized: '''For Easy Cloud presets this setting is enabled and can not be edited. | ||
| + | * '''Centre: '''This setting is the position coordinates of the cloud layer within the project. For Easy Clouds the “Y” axis value will attempt to sync to the "Cloud base altitude" and update automatically as it is changed. | ||
| + | * '''Radius: '''This setting defines the maximum extent of the Easy Cloud layer. | ||
| + | <!-- | ||
| + | <ul> | ||
| + | [[File:EasyCld_101_MainTab_Radius.jpg|none|800px|Easy cloud layer radius shows up as dotted circle.]] | ||
</ul> | </ul> | ||
| − | + | --> | |
| − | |||
| − | |||
| − | |||
| − | |||
| − | |||
| − | |||
| − | |||
* '''Edge sharpness: ''' | * '''Edge sharpness: ''' | ||
| − | * '''Cloud density: ''' | + | <!-- |
| + | <ul> | ||
| + | {| | ||
| + | |- | ||
| + | | [[File:EasyCld_105_MainTab_EdgeSharpness1.jpg|none|400px|Edge sharpness = 1]] || [[File:EasyCld_106_MainTab_EdgeSharpness100.jpg|none|400px|Edge sharpness = 100]] | ||
| + | |} | ||
| + | </ul> | ||
| + | --> | ||
| + | * '''Cloud density: ''' Along with "Edge sharpness" this setting controls the transparency or opaqueness of the clouds within the cloud layer. Low values make the clouds look thin and let more light pass through them. Higher values make the clouds look thicker and denser, as well as darker because less light passes through them. Generally speaking we recommend using the "Cloud density setting" because the automatic sampling adjustments that derive from the "Ray-marching quality" are more strongly influenced by "Cloud density" than by "Edge sharpness". In other words, if you set "Cloud density" very high, the render quality will adjust accordingly to keep the noise levels the same, but if you do this with "Edge sharpness" it will not increase sampling to the same degree, meaning that you might have to increase the "Ray-marching quality" much higher than is typical for most scenes. | ||
| + | <!-- | ||
| + | <ul> | ||
| + | {| | ||
| + | |- | ||
| + | | [[File:EasyCld_103_MainTab_CloudDensity0p1.jpg|none|400px|Cloud density = 0.1]] || [[File:EasyCld_104_MainTab_CloudDensity1.jpg|none|400px|Cloud density = 1.0]] | ||
| + | |} | ||
| + | </ul> | ||
| + | --> | ||
</ul> | </ul> | ||
| + | <!-- Alternate layout for example images --> | ||
| + | '''Examples:''' | ||
| + | {| | ||
| + | |- | ||
| + | | [[File:EasyCld_95_MainTab_Coverage0p4.jpg|none|400px|Coverage = 0.4]] || [[File:EasyCld_96_MainTab_Coverage1.jpg|none|400px|Coverage = 1.0]] | ||
| + | |- | ||
| + | | [[File:EasyCld_97_MainTab_Variation002.jpg|none|400px|Variation = 0.2]] || [[File:EasyCld_98_MainTab_Variation1.jpg|none|400px|Variation = 1.0]] | ||
| + | |- | ||
| + | | [[File:EasyCld_99_MainTab_Growth0.jpg|none|400px|Growth = 0]] || [[File:EasyCld_100_MainTab_Growth1.jpg|none|400px|Growth = 1]] | ||
| + | |} | ||
| + | {| | ||
| + | |- | ||
| + | | [[File:EasyCld_101_MainTab_Radius.jpg|none|800px|Easy cloud layer radius shows up as dotted circle.]] | ||
| + | |} | ||
| + | {| | ||
| + | |- | ||
| + | | [[File:EasyCld_105_MainTab_EdgeSharpness1.jpg|none|400px|Edge sharpness = 1]] || [[File:EasyCld_106_MainTab_EdgeSharpness100.jpg|none|400px|Edge sharpness = 100]] | ||
| + | |- | ||
| + | | [[File:EasyCld_103_MainTab_CloudDensity0p1.jpg|none|400px|Cloud density = 0.1]] || [[File:EasyCld_104_MainTab_CloudDensity1.jpg|none|400px|Cloud density = 1.0]] | ||
| + | |} | ||
| + | |||
| + | |||
<br /> | <br /> | ||
== Colour Tab == | == Colour Tab == | ||
| Line 47: | Line 118: | ||
'''Settings:''' | '''Settings:''' | ||
<ul> | <ul> | ||
| − | * '''Cloud colour: '''This setting controls the colour of the cloud. Displayed beneath the setting is a readout indicating the level of albedo, which is a measurement of reflected light. The maximum albedo possible In the real world is 100% and a | + | * '''Cloud colour: '''This setting controls the colour of the cloud. Displayed beneath the setting is a readout indicating the level of albedo, which is a measurement of reflected light. The maximum albedo possible In the real world is 100% and a "Cloud colour" of 0.25 can result in 100% albedo if the clouds are dense enough due to the way volumetric colours are calibrated in Terragen. For realistic looking cloud layers, it is recommended to keep the albedo value to around 100%. |
{| | {| | ||
|- | |- | ||
| − | | [[File:EasyCld_30_ColourTab_CloudColour0p25.jpg|none| | + | | [[File:EasyCld_30_ColourTab_CloudColour0p25.jpg|none|400px|Cloud colour = 0.25 (sRGB 135,135,135)]] || [[File:EasyCld_31_ColourTab_CloudColour0p5.jpg|none|400px|Cloud colour = 0.5 (sRGB 135,135,135)]] |
| + | |- | ||
| + | | [[File:EasyCld_32_ColourTab_CloudColour1.jpg|none|400px|Cloud colour = 0.5 (sRGB 165,160,186)]] || [[File:EasyCld_33_ColourTab_CloudColour2.jpg|none|400px|Cloud colour = 0.5 (sRGB 183,140,108)]] | ||
|} | |} | ||
</ul><br /> | </ul><br /> | ||
== Lighting Tab == | == Lighting Tab == | ||
[[File:EasyCld_03_LightingTab.png|none|461px|Lighting Tab]] | [[File:EasyCld_03_LightingTab.png|none|461px|Lighting Tab]] | ||
| − | + | ||
| − | + | ||
| − | + | '''Silver lining and dark edges: ''' The bright outline along the edge of the cloud known as the silver lining occurs when light is scattered by cloud droplets along the cloud's outer edge. This contrast between the change in brightness with respect to the angle of the sun, is most clearly seen when the Easy Clouds are back-lit by the sun. When the "Sun glow amount" and "Sun glow power" settings are set to 0, light is scattered uniformly in all directions decreasing the silver lining phenomenon. <br /> | |
| + | |||
{| | {| | ||
|- | |- | ||
| Line 63: | Line 137: | ||
|- | |- | ||
| [[File:EasyCld_84_LightingTab_SunGlow_SunHeading180.jpg|none|266px|Sun heading = 180 degrees. Behind observer's position.]] || [[File:EasyCld_85_LightingTab_SunGlow_SunHeading90.jpg|none|266px|Sun heading = 90 degrees. To the right of the observer's position.]] || [[File:EasyCld_86_LightingTab_SunGlow_SunHeading22.jpg|none|266px|Sun heading = 22 degrees. In front and to the right of the observer's position.]] | | [[File:EasyCld_84_LightingTab_SunGlow_SunHeading180.jpg|none|266px|Sun heading = 180 degrees. Behind observer's position.]] || [[File:EasyCld_85_LightingTab_SunGlow_SunHeading90.jpg|none|266px|Sun heading = 90 degrees. To the right of the observer's position.]] || [[File:EasyCld_86_LightingTab_SunGlow_SunHeading22.jpg|none|266px|Sun heading = 22 degrees. In front and to the right of the observer's position.]] | ||
| − | |} | + | |} |
| − | + | ||
| − | |||
| − | |||
| − | ''' | + | * '''Sun glow amount: '''When the sun is behind the cloud layer and opposite the observer (camera), increasing the "Sun glow amount" will scatter more light within the cloud, brightening the highlights of the cloud, especially in the area of the silver lining effect. When the sun is behind the observer, increasing the "Sun glow amount" causes more light to be absorbed by the cloud therefore less light to be scattered and the clouds look less bright. |
| − | |||
| − | |||
<ul> | <ul> | ||
{| | {| | ||
|- | |- | ||
| − | | [[File: | + | | [[File:EasyCld_120_LightingTab_SunGlowAmount0p2_Head0.jpg|none|400px|Sun glow amount = 0.2. Sun heading = 0 degrees.]] || [[File:EasyCld_121_LightingTab_SunGlowAmount4_Head0.jpg|none|400px|Sun glow amount = 4. Sun heading = 0 degrees.]] |
| + | |- | ||
| + | | [[File:EasyCld_122_LightingTab_SunGlowAmount0p2_Head180.jpg|none|400px|Sun glow amount = 0.2. Sun heading = 180 degrees.]] || [[File:EasyCld_123_LightingTab_SunGlowAmount4_Head180.jpg|none|400px|Sun glow amount = 4. Sun heading = 180 degrees.]] | ||
|} | |} | ||
</ul> | </ul> | ||
| − | * '''Sun glow power ''' | + | |
| + | <!-- {| | ||
| + | |- | ||
| + | | [[File:EasyCld_107_SunGlowAmount0p2.jpg|none|400px|Sun glow amount = 0.2, Sun heading = 0 degrees.]] || [[File:EasyCld_108_SunGlowAmount2.jpg|none|400px|Sun glow amount = 2.0 (default), Sun heading = 0 degrees.]] | ||
| + | |- | ||
| + | | [[File:EasyCld_109_SunGlowAmount0p2.jpg|none|400px|Sun glow amount = 0.2, Sun heading = 180 degrees.]] || [[File:EasyCld_110_SunGlowAmount2.jpg|none|400px|Sun glow amount = 2.0, Sun heading = 180 degrees.]] | ||
| + | |} --> | ||
| + | |||
| + | * '''Sun glow power: ''' | ||
<ul> | <ul> | ||
{| | {| | ||
|- | |- | ||
| − | | [[File: | + | | [[File:EasyCld_124_LightingTab_SunGlowPower0p5_Head0.jpg|none|400px|Sun glow power = 0.5. Sun heading = 0 degrees.]] || [[File:EasyCld_125_LightingTab_SunGlowPower1p5_Head0.jpg|none|400px|Sun glow power = 1.5. Sun heading = 0 degrees. ]] |
| + | |- | ||
| + | | [[File:EasyCld_126_LightingTab_SunGlowPower0p5_Head180.jpg|none|400px|Sun glow power = 0.5. Sun heading = 180 degrees.]] || [[File:EasyCld_127_LightingTab_SunGlowPower1p5_Head180.jpg|none|400px|Sun glow power = 1.5. Sun heading = 180 degrees.]] | ||
|} | |} | ||
</ul> | </ul> | ||
| + | <!-- {| | ||
| + | |- | ||
| + | | [[File:EasyCld_111_SunGlowPower0p5.jpg|none|400px|Sun glow power = 0.5, Sun heading = 0 degrees.]] || [[File:EasyCld_112_SunGlowPower2p5.jpg|none|400px|Sun glow power = 2.5, Sun heading = 0 degrees.]] | ||
| + | |- | ||
| + | | [[File:EasyCld_113_SunGlowPower0p5.jpg|none|400px|Sun glow power = 0.5, Sun heading = 180 degrees.]] || [[File:EasyCld_114_SunGlowPower2p5.jpg|none|400px|Sun glow power = 2.5, Sun heading = 180 degrees.]] | ||
| + | |} --> | ||
| + | |||
| + | |||
| + | |||
| + | '''Multiple scattering: ''' Easy Clouds calculate internal light by scattering rays through the voxels using principles from physically based rendering. Terragen’s cloud shader is optimized to approximate hundreds of scatters within the same volume, but can limit the number of bounces between separate cloud layers or surfaces. | ||
| + | <br /> | ||
| + | |||
* '''Softness: ''' | * '''Softness: ''' | ||
<ul> | <ul> | ||
| Line 99: | Line 193: | ||
|} | |} | ||
</ul> | </ul> | ||
| − | * '''Enviro light: ''' | + | |
| − | * '''Enviro light tint: ''' | + | |
| + | '''Light received from environment <br /> | ||
| + | * '''Enviro light: ''' As of Terragen 4.5 this setting has no effect on the Easy Cloud. | ||
| + | * '''Enviro light tint: ''' As of Terragen 4.5 this setting has no effect on the Easy Cloud. | ||
</ul><br /> | </ul><br /> | ||
== Tweaks Tab == | == Tweaks Tab == | ||
| Line 113: | Line 210: | ||
|} | |} | ||
</ul> | </ul> | ||
| − | * '''Environment light modulator: ''' | + | * '''Environment light modulator: '''As of Terragen 4.5 this setting has no effect on the cloud layer. |
| − | * '''Ambient light modulator: '''The shader or function assigned to this setting is used as a multiplier to the cloud layer’s | + | * '''Ambient light modulator: '''The shader or function assigned to this setting is used as a multiplier to the cloud layer’s Ambient setting. In order for the modulator to have an effect the Ambient value must be greater than 0. |
<ul> | <ul> | ||
{| | {| | ||
| Line 124: | Line 221: | ||
<!-- [[File:EasyCld_44_TweaksTab_AmbientLightModulatorOnOff.gif|none|400px|Comparison between no ambient and modulated ambient.]] --> | <!-- [[File:EasyCld_44_TweaksTab_AmbientLightModulatorOnOff.gif|none|400px|Comparison between no ambient and modulated ambient.]] --> | ||
</ul> | </ul> | ||
| − | * '''Shadow function: ''' | + | * '''Shadow function: '''This setting can be used to define additional regions of shadow on the Easy Cloud for any direct light sources that cast shadows. This may be useful to remove light in certain regions of the Easy Cloud when correct shadows of surfaces would be too expensive to calculate. Where the value is 1, or white, the Easy Cloud will receive no light contribution from light sources that have shadow casting enabled. Where the function is 0, or black, the Easy Cloud receives all the light from light sources. This function has no effect on the Enviro Light or light sources that do not have shadows enabled. |
<ul> | <ul> | ||
{| | {| | ||
|- | |- | ||
| − | | [[File: | + | | [[File:EasyCld_71-2_TweaksTab_ShadowFunctionOff.jpg|none|800px|Shadow function off.]] |
|- | |- | ||
| − | | [[File: | + | | [[File:EasyCld_72-2_TweaksTab_DistantShader.jpg|none|800px|Shadow function using Distant shader.]] |
|} | |} | ||
</ul> | </ul> | ||
| − | * '''Ambient: '''This setting defines a colour and intensity which is added to the lighting that illuminates the cloud layer. While disabled by default, so that only direct and indirect lighting (global illumination) affect the cloud layer, a practical example for using this setting would be to increase the overall brightness of the cloud layer. The colour and intensity of the Ambient setting can be modulated by the | + | * '''Ambient: '''This setting defines a colour and intensity which is added to the lighting that illuminates the cloud layer. While disabled by default, so that only direct and indirect lighting (global illumination) affect the cloud layer, a practical example for using this setting would be to increase the overall brightness of the cloud layer. The colour and intensity of the Ambient setting can be modulated by the "Ambient light modulator". |
<ul> | <ul> | ||
{| class="sortable" | {| class="sortable" | ||
| Line 144: | Line 241: | ||
{| | {| | ||
|- | |- | ||
| − | | [[File: | + | | [[File:EasyCld_132_TweaksTab_FakeDarkPower0.jpg|none|400px|Fake dark power = 0.]] || [[File:EasyCld_133_TweaksTab_FakeDarkPower1.jpg|none|400px|Fake dark power = 1.]] |
|} | |} | ||
</ul> | </ul> | ||
| − | * '''Fake dark sharpness: '''This setting is intended for planetary orbit views, as a way to artificially adjust the falloff of the terminator line on the cloud layer. In order for this setting to have an effect, the | + | * '''Fake dark sharpness: '''This setting is intended for planetary orbit views, as a way to artificially adjust the falloff of the terminator line on the cloud layer. In order for this setting to have an effect, the "Fake dark power" must be greater than 0. Higher values result in a quicker falloff or sharper transition. |
<ul> | <ul> | ||
{| | {| | ||
|- | |- | ||
| − | | [[File: | + | | [[File:EasyCld_136_TweaksTab_FakeDarkSharpness1.jpg|none|400px|Fake dark sharpness = 1]] || [[File:EasyCld_137_TweaksTab_FakeDarkSharpness100.jpg|none|400px|Fake dark sharpness = 100]] |
|} | |} | ||
</ul> | </ul> | ||
| Line 160: | Line 257: | ||
'''Settings:''' | '''Settings:''' | ||
<ul> | <ul> | ||
| − | * '''Enable drift: '''When checked, allows the clouds to drift at the speed and heading defined by the | + | * '''Enable drift: '''When checked, allows the clouds to drift at the speed and heading defined by the "Drift speed (m/s)" and "Drift heading (degrees)". |
* '''Drift speed (m/s): '''Determines the rate at which the clouds move. Note that the cloud layer itself does not drift. | * '''Drift speed (m/s): '''Determines the rate at which the clouds move. Note that the cloud layer itself does not drift. | ||
| − | * '''Drift heading (degrees): '''Determines the direction in which the clouds are moving. Note, that the cloud layer itself does not rotate to face in the direction of the | + | * '''Drift heading (degrees): '''Determines the direction in which the clouds are moving. Note, that the cloud layer itself does not rotate to face in the direction of the "Drift heading (degrees). |
| − | * '''Enable evolution: '''When checked, allows the clouds to evolve at the rate of speed and in the direction as defined by the | + | * '''Enable evolution: '''When checked, allows the clouds to evolve at the rate of speed and in the direction as defined by the "Evolution speed (m/s)" and "Evolution method". |
| − | * '''Evolution speed (m/s): '''Determines how rapidly the shape of the cloud layer changes over time, by moving its internal textures in the direction defined by the | + | * '''Evolution speed (m/s): '''Determines how rapidly the shape of the cloud layer changes over time, by moving its internal textures in the direction defined by the "Evolution method". The larger the value the greater the shape changes each frame. |
| − | * '''Evolution method: '''This popup has four options that determine the direction in which the cloud shapes evolve. | + | * '''Evolution method: '''This popup has four options that determine the direction in which the cloud shapes evolve. <u>Move all textures upwards/downwards</u> causes all the noise patterns that define the Easy Cloud to move up or down. <u>Move height texture upwards/downwards</u> cause only the “Y” axis component of the noise patterns to move in the direction chosen. |
<ul> | <ul> | ||
[[File:EasyCld_10_AnimTab_EvolutionMethod.png|none|363px|Evolution methods]] | [[File:EasyCld_10_AnimTab_EvolutionMethod.png|none|363px|Evolution methods]] | ||
| − | * <u>Move all textures upwards: </u> | + | {| |
| + | |- | ||
| + | | [[File:EasyCld_115_AnimTab_MoveAllTexturesUp.gif|none|400px|Move all textures upwards.]] || [[File:EasyCld_116_AnimTab_MovieHeightTextureUp.gif|none|400px|Move height texture upwards.]] | ||
| + | |} | ||
| + | <!-- * <u>Move all textures upwards: </u> | ||
* <u>Move all textures downwards: </u> | * <u>Move all textures downwards: </u> | ||
* <u>Move height texture upwards: </u> | * <u>Move height texture upwards: </u> | ||
| − | * <u>Move height texture downwards: </u> | + | * <u>Move height texture downwards: </u> --> |
</ul> | </ul> | ||
| − | * '''Frames per second: '''Determines the frame rate for calculating cloud drift and evolution. For example, if a cloud were to drift 1 meter in 1 second at 24 frames per second, then the clouds would drift approximately 0.042 meters each frame. At a higher | + | * '''Frames per second: '''Determines the frame rate for calculating cloud drift and evolution. For example, if a cloud were to drift 1 meter in 1 second at 24 frames per second, then the clouds would drift approximately 0.042 meters each frame. At a higher "Frames per second", the cloud would take more frames to move the 1 meter and appear to be drifting or evolving slower. |
| − | * '''Reference frame number: '''This is the frame at which changing the | + | * '''Reference frame number: '''This is the frame at which changing the "Evolution speed (m/s)" and "Evolution method" have no effect. For example, if the reference frame value is 1, then frame 1 will look the same no matter what the "Evolution speed (m/s)" and "Evolution method" are set to. All other frames are calculated according to the time difference from this frame. |
| − | * '''Time warp (control frame number using Animation Panel): ''' When checked, allows the | + | * '''Time warp (control frame number using Animation Panel): ''' When checked, allows the "Drift speed (m/s)" and "Evolution speed (m/s)", which are constant values, to be driven by the "Warped frame number". For example, if the cloud drifted at a constant rate of 1 meter per second at 24 frames per second, you could make the cloud drift twice as slow by setting a keyframe for the "Warped frame number" at frame 1 with a value of 1, and a second keyframe at frame 48 with a value of 24. Note, the interpolation mode for the keyframes is set in the Animation panel, and in this example should be set to “Linear” to ensure that the cloud drifts and evolves at a consistent rate. |
| − | * '''Warped frame number: ''' On any given frame the current value of this setting, whether animated or not, keyframed or interpolated, determines the frame for the | + | * '''Warped frame number: ''' On any given frame the current value of this setting, whether animated or not, keyframed or interpolated, determines the frame for the "Drift speed (m/s)" and "Evolution speed (m/s)" of the cloud. For example, if the current frame is 100, and the "Warped frame number" is 2, the clouds will appear as they were evaluated on frame 2. In subsequent frames, if the "Warped fame number" remains at 2, the clouds will appear to remain in place and not drift or evolve. With the "Warped frame number" it is possible to create slow motion or time lapsed effects. |
| Line 191: | Line 292: | ||
'''Settings:''' | '''Settings:''' | ||
<ul> | <ul> | ||
| − | * '''Rendering method: ''' This popup menu has two options which determine the way in which the cloud layer is rendered. Easy clouds are based on 3D volumetric data therefore the 2D rendering method is not recommended. | + | * '''Rendering method: ''' This popup menu has two options which determine the way in which the cloud layer is rendered. Easy clouds are based on procedural 3D textures and volumetric data therefore the <u>2D</u> rendering method, which samples one point per pixel midway between the base and top of the Easy Cloud, is not recommended. The <u>3D (volumetric)</u> rendering method uses ray-marching techniques to accumulate the density of the Easy Cloud. |
<ul> | <ul> | ||
[[File:EasyCld_11_QualityTab_RenderingMethod.png|none|284px|Render methods]] | [[File:EasyCld_11_QualityTab_RenderingMethod.png|none|284px|Render methods]] | ||
| − | * <u>2D: </u> This rendering method samples one point per pixel midway between the base and top of the cloud layer. | + | <!-- * <u>2D: </u> This rendering method samples one point per pixel midway between the base and top of the cloud layer. |
| − | * <u>3D (volumetric): </u>This rendering method uses ray marching to accumulate the density of the cloud layer. The clouds are based on procedural 3D textures. | + | * <u>3D (volumetric): </u>This rendering method uses ray marching to accumulate the density of the cloud layer. The clouds are based on procedural 3D textures. --> |
</ul> | </ul> | ||
* '''Ray-marching quality: '''This setting provides a way to reduce render times by evaluating fewer samples within the volume along the ray. In many circumstances the quality of a rendered image using the default value of 0.5 is almost indistinguishable to the quality at a value of 1.0 but at a faster render time. Using too low a value, such as 0.1 or less, can cause the shadows cast by the cloud layer onto itself, to appear lighter or more diminished. | * '''Ray-marching quality: '''This setting provides a way to reduce render times by evaluating fewer samples within the volume along the ray. In many circumstances the quality of a rendered image using the default value of 0.5 is almost indistinguishable to the quality at a value of 1.0 but at a faster render time. Using too low a value, such as 0.1 or less, can cause the shadows cast by the cloud layer onto itself, to appear lighter or more diminished. | ||
| Line 204: | Line 305: | ||
|} | |} | ||
</ul> | </ul> | ||
| − | * '''Sample jitter: '''This setting provides an offset for each ray-marched segment of the volume being sampled. A value of 0 means the sample point is located at the center of each ray-marched segment being evaluated, which may introduce | + | * '''Sample jitter: '''This setting provides an offset for each ray-marched segment of the volume being sampled. A value of 0 means the sample point is located at the center of each ray-marched segment being evaluated, which may introduce unwanted banding in the final rendered cloud layer. A value of 1, shifts the sample point along the ray, but still within the ray-marched segment being evaluated. This introduces noise into the final rendered cloud layer, however the anti-aliasing process averages all the neighboring rays together to create a better approximation of the volume being sampled. |
<ul> | <ul> | ||
{| | {| | ||
| Line 211: | Line 312: | ||
|} | |} | ||
</ul> | </ul> | ||
| − | * '''Receive shadows from surfaces: ''' | + | * '''Receive shadows from surfaces: '''This setting is disabled by default because generally speaking, cloud layers are positioned higher in altitude than the surrounding terrain and therefore would not receive shadows from the terrain. When cloud layers are positioned lower than the surrounding terrain and you want shadows to be cast from the terrain onto the cloud layers, enable the setting by clicking on the checkbox. Note, this may increase render times. |
<ul> | <ul> | ||
{| | {| | ||
| Line 222: | Line 323: | ||
{| | {| | ||
|- | |- | ||
| − | | [[File: | + | | [[File:EasyCld_51-2_QualityTab_SmallScale60.jpg|none|266px|Smallest scale = 60]] || [[File:EasyCld_52-2_QualityTab_SmallScale100.jpg|none|266px|Smallest scale = 100]] || [[File:EasyCld_53-2_QualityTab_SmallScale500.jpg|none|266px|Smallest scale = 500]] |
|} | |} | ||
</ul> | </ul> | ||
| Line 237: | Line 338: | ||
'''Settings:''' | '''Settings:''' | ||
<ul> | <ul> | ||
| − | * '''Acceleration cache: ''' This popup | + | * '''Acceleration cache: ''' This popup provides five options that may allow the Easy Cloud to render faster. The "Acceleration cache" is like a high resolution voxel buffer in which each option increases the size of the sample point by a factor of two. Unfortunately, this can also introduce unwanted artifacts into the rendered image, especially when the camera is looking towards the sun, and for this reason the recommended setting is <u>None (highest detail)</u>. The "Acceleration cache" only affects shadows and reflections cast by the Easy Cloud. |
| + | |||
<ul> | <ul> | ||
[[File:EasyCld_12_OptimisationTab_AccelerationCache.png|none|353px|Acceleration cache options]] | [[File:EasyCld_12_OptimisationTab_AccelerationCache.png|none|353px|Acceleration cache options]] | ||
| − | * <u>None (highest detail)</u> | + | <!-- * <u>None (highest detail)</u> |
* <u>Conservative acceleration: </u> | * <u>Conservative acceleration: </u> | ||
* <u>Optimal: </u> | * <u>Optimal: </u> | ||
* <u>More acceleration: </u> | * <u>More acceleration: </u> | ||
| − | * <u> Aggressive acceleration: </u> | + | * <u> Aggressive acceleration: </u> --> |
</ul> | </ul> | ||
| − | * '''Use 2D shadow map: ''' When enabled this setting | + | * '''Use 2D shadow map: ''' Shadow maps were originally designed to avoid long render times when extreme anti-aliasing values would not resolve noise issues in the shadows cast by a cloud layer. When enabled, this setting generates a 2D map for the cloud layer at the start of the render process. You can think of the shadow map as a 2D image of the cloud layer’s density values from the top view. Internally, Terragen positions the shadow map at approximately the center of the cloud layer on the “Y” axis and as rays are traced through the cloud layer the density values are used to modify the lighting. Shadow maps can be used to cast shadows onto the terrain, objects and other cloud layers, but not the cloud layer itself. While typically faster than ray tracing volumes, certain cloud types such as Easy Clouds, require a voxel buffer to be calculated anyways, so for these cloud types we recommend not using "2D shadow maps". |
| − | * '''Shadow map resolution: '''These values determine the | + | * '''Shadow map resolution: '''These values determine the width and height of the shadow map created for the cloud layer. Higher values take longer to calculate but result in more detail, while lower values tend to be softer and have less contrast, due to less detail. The cloud layer’s radius plays an important role in determining the level of detail of the shadow map. For example, a cloud layer with a radius value of 50,000 metres and mapped into 200 pixel by 200 pixel shadow map will appear softer than a cloud layer with a radius value of 20,000 metres mapped into the same resolution. |
<ul> | <ul> | ||
{| | {| | ||
| Line 257: | Line 359: | ||
</ul> | </ul> | ||
| − | * '''Shadow map blur radius: '''These values determine the blur radius in pixels to apply to the shadow map after it has been rendered, therefore the | + | * '''Shadow map blur radius: '''When a cloud layer is animated its shape can potentially change every frame which could introduce unwanted flickering into the shadows cast by it. The "Shadow map blur radius" was designed to reduce the flickering by blurring the shadow map for the cloud layer. These values determine the blur radius in pixels to apply to the shadow map after it has been internally rendered, therefore the "Shadow map resolution" values are important to take into consideration. For example, a "Shadow map blur radius" of 2 will have a greater softening effect on a "Shadow map resolution" of 100 pixels by 100 pixels compared to a Shadow map resolution of 1000 pixels by 1000 pixels. The higher the "Shadow map blur radius" value the softer, or more blurred, the shadow map will be. |
| + | <ul> | ||
| + | {| | ||
| + | |- | ||
| + | | [[File:EasyCld_18_ShadowMapBlurRadius0.jpg|none|400px|Blur radius = 0]] || [[File:EasyCld_19_ShadowMapBlurRadius0p5.jpg|none|400px|Blur radius = 0.5]] | ||
| + | |- | ||
| + | | [[File:EasyCld_20_ShadowMapBlurRadius1.jpg|none|400px|Blur radius = 1]] || [[File:EasyCld_21_ShadowMapBlurRadius2.jpg|none|400px|Blur radius = 2]] | ||
| + | |} | ||
| + | </ul> | ||
| + | * '''Use voxel buffer: '''When enabled, a voxel buffer is created based on the "Millions of voxels" value. For Easy Cloud presets the setting is automatically enabled and ghosted because these cloud types require the voxel buffer to calculate light scattering. | ||
| + | * '''Millions of voxels: '''Sets the maximum number of sample points, or voxels, that will be generated to form the voxel buffer. Higher values create more sample points, which results in having more detail in which to calculate shadow and lighting solutions. This can have a large effect on both render times and RAM use. | ||
<ul> | <ul> | ||
{| | {| | ||
|- | |- | ||
| − | | [[File: | + | | [[File:EasyCld_22_MillionVoxels0p2.jpg|none|266px|Millions of voxels = 0.02]] || [[File:EasyCld_23_MillionVoxels1M.jpg|none|266px|Millions of voxels = 1]] || [[File:EasyCld_24_MillionVoxels10M.jpg|none|266px|Millions of voxels = 10]] |
|} | |} | ||
</ul> | </ul> | ||
| − | * ''' | + | * '''Voxel buffer resolution: '''Automatically distributes the "Millions of voxels" in a grid-like pattern across the three axes of the voxel buffer. |
| − | + | * '''Accelerate empty space: '''When enabled, empty voxels in the voxel buffer are first identified in order that they may be skipped and not calculated during the render. This can result in render speed improvements on certain types of clouds such as those used globally. | |
| − | + | * '''Visualise voxels: ''' When enabled, the voxel buffer for the cloud layer is displayed in the 3D Preview and used for rendering the Easy Cloud. | |
| − | * '''Accelerate empty space: ''' | ||
| − | * '''Visualise voxels: ''' When enabled, the voxel buffer for the cloud layer is displayed in the 3D Preview and used for rendering the | ||
<ul> | <ul> | ||
{| | {| | ||
|- | |- | ||
| − | | [[File: | + | | [[File:EasyCld_26_VisualiseVoxelsOn.jpg|none|400px|Visualise voxels = On]] || [[File:EasyCld_27_VisualiseVoxelsOff.jpg|none|400px|Visualize voxels = off]] |
<!-- |- | <!-- |- | ||
|[[File:EasyCld_26_VisualiseVoxelsOn.jpg|none|200px|Millions of voxels = 0.02, Visualise voxels = On]] || [[File:EasyCld_27_VisualiseVoxelsOff.jpg|none|200px|Millions of voxels = 0.02, Visualise voxels = Off]] || [[File:EasyCld_28_VisualiseVoxelsOn.jpg|none|200px|Millions of voxels = 10, Visualise voxels = On]] || [[File:EasyCld_29_VisualiseVoxelsOff.jpg|none|200px|Millions of voxels = 10, Visualise voxels = Off]] --> | |[[File:EasyCld_26_VisualiseVoxelsOn.jpg|none|200px|Millions of voxels = 0.02, Visualise voxels = On]] || [[File:EasyCld_27_VisualiseVoxelsOff.jpg|none|200px|Millions of voxels = 0.02, Visualise voxels = Off]] || [[File:EasyCld_28_VisualiseVoxelsOn.jpg|none|200px|Millions of voxels = 10, Visualise voxels = On]] || [[File:EasyCld_29_VisualiseVoxelsOff.jpg|none|200px|Millions of voxels = 10, Visualise voxels = Off]] --> | ||
|} | |} | ||
</ul> | </ul> | ||
| − | * '''Use voxels for shadows: ''' | + | * '''Use voxels for shadows: '''When enabled, the voxel buffer for the cloud layer will be used for cast shadows. This can result in faster render times and avoid noisy shadows, but may produce shadows with less detail. |
| − | * '''Transition dist. (voxels): ''' | + | * '''Transition dist. (voxels): '''This setting, measured in voxels, is the transition point at which shadows are calculated using the cloud layer’s actual volume instead of voxels. This leads to more accurately cast shadows when the shadow rays are shorter, such as bouncing around inside the cloud or when close to the terrain. |
</ul><br /> | </ul><br /> | ||
Revision as of 22:36, 23 October 2020
Contents
Overview[edit]
Easy Clouds are a set of presets accessed via the "Add Cloud Layer" menu and based on Cloud Layer V3 technology that provides a quick and easy way to create real world cloud types such as Altocumulus and Cirrocumulus with extremely realistic results including subtle features, details and highly plausible cloud shapes.
Settings:
- Enable: When unchecked, or disabled, the cloud layer is completely turned off and will no longer contribute to the scene.
- Enable primary: When unchecked, or disabled, the cloud layer will not be visible to the camera and will not show up in renders. However, if the "Enable secondary" checkbox is enabled the cloud layer will still affect scene lighting and be visible in reflections.
- Enable secondary: When unchecked, or disabled, the cloud layer will not influence scene lighting or be visible in reflections.
- Move textures with cloud: When checked, or enabled, the fractal noise patterns that internally define the cloud layer moves with the cloud layer as it’s repositioned using the Centre setting. When unchecked, or disabled, repositioning the cloud layer causes a different part of the fractal noise pattern to be visible.
- Seed: The seed value controls the noise pattern generated. Each seed value generates a slightly different pattern. You can either set the value manually or use the Random Seed button at right to generate a random value.
- Mask by shader (BETA): When checked, or enabled, this shader is masked by the shader or function node assigned to this setting.
Main Tab[edit]
Settings:
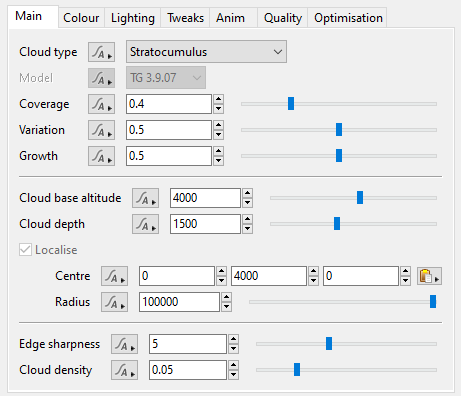
- Cloud Type: This popup menu contains options for three cloud types. Cumulus clouds have flat bases and are low-level clouds, generally less than 2,0000 metres in altitude. Altocumulus Castellanus clouds are named for the tower-like projections billowing upwards from their base, which can form as low as 2,000 metres or as high as 6,000 metres. Stratocumulus clouds are characterized by large, dark, rounded masses which are usually in groups, lines or wave-like patterns. Their individual elements are larger than those in Altocumulus and as a whole are usually at a lower height, below 2,000 metres.
- Model: This popup menu has two options that coincide with the development of Easy Clouds. Model TG 3.9.07 is a refinement of TG 3.9.04. In some situations, however, TG 3.9.04 can look better, and is especially good for producing rougher and more billowy clouds.
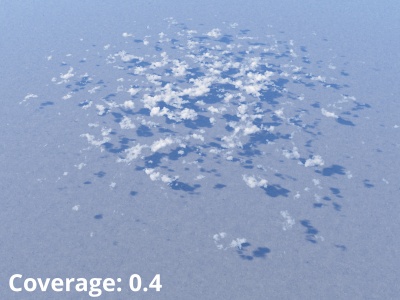
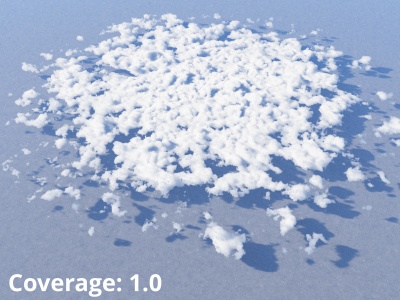
- Coverage: This setting controls the amount of clouds within the cloud layer. Low values reduce the amount of individual clouds and increase the amount of empty space between them. Increasing the value fills up the area with more individual clouds.
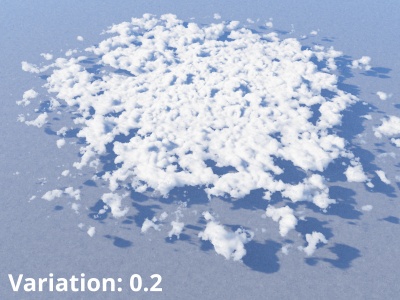
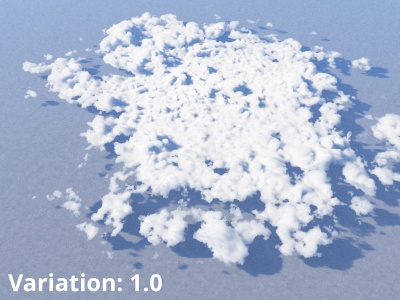
- Variation: This setting controls the visibility of very large scale noise patterns within the cloud layer. It can reduce the cloud’s density in some places and increase it in other places. Likewise, it can reduce the cloud’s coverage in some places and increase it in others. This parameter is useful for generating randomness and is most noticeable when viewing a large expanse of the cloud layer, and when the cloud layer covers an area much larger than the depth of the cloud. When working with smaller clouds it tends to push them in random directions.
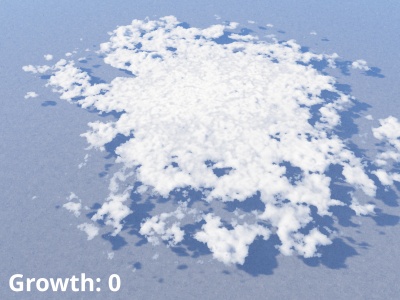
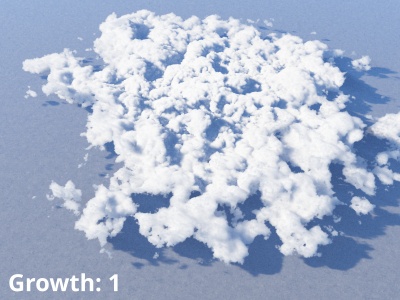
- Growth: This setting constricts or expands the individual clouds within the cloud layer. Lowering the value causes the clouds to appear to evaporate, losing size and becoming more transparent. Raising the value causes each cloud to expand, and become more dense and opaque.
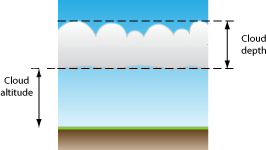
- Cloud base altitude: This setting is the altitude at the base of the Easy Cloud.
- Cloud depth: This setting controls the height, or depth, of the Easy Cloud starting from its base altitude. For example, if the "Cloud depth" was 1,000 metres and the "Cloud base altitude" was 500 metres, then the Easy Cloud would extend from 500 metres to 1,500 metres in height.
- Localized: For Easy Cloud presets this setting is enabled and can not be edited.
- Centre: This setting is the position coordinates of the cloud layer within the project. For Easy Clouds the “Y” axis value will attempt to sync to the "Cloud base altitude" and update automatically as it is changed.
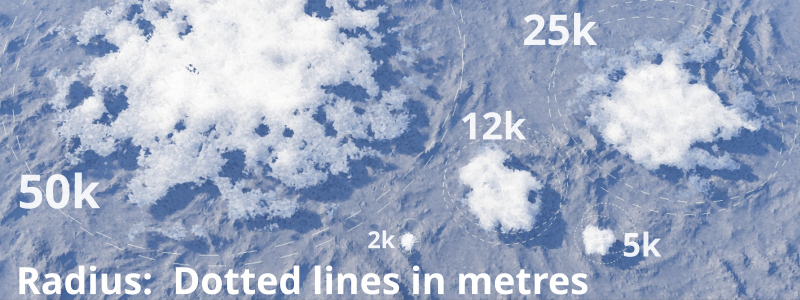
- Radius: This setting defines the maximum extent of the Easy Cloud layer.
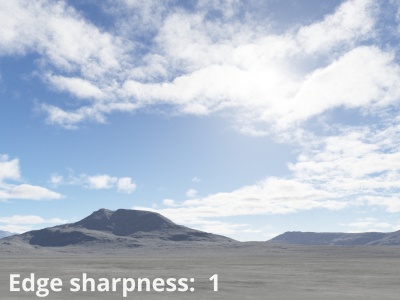
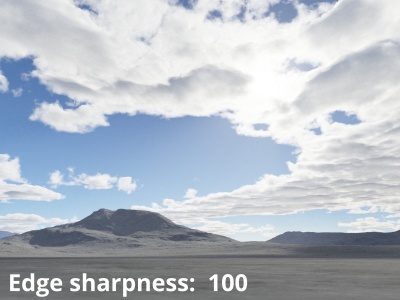
- Edge sharpness:
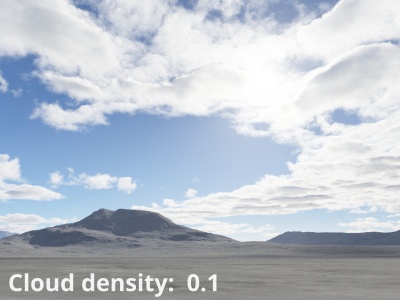
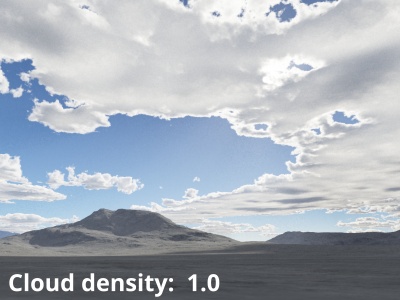
- Cloud density: Along with "Edge sharpness" this setting controls the transparency or opaqueness of the clouds within the cloud layer. Low values make the clouds look thin and let more light pass through them. Higher values make the clouds look thicker and denser, as well as darker because less light passes through them. Generally speaking we recommend using the "Cloud density setting" because the automatic sampling adjustments that derive from the "Ray-marching quality" are more strongly influenced by "Cloud density" than by "Edge sharpness". In other words, if you set "Cloud density" very high, the render quality will adjust accordingly to keep the noise levels the same, but if you do this with "Edge sharpness" it will not increase sampling to the same degree, meaning that you might have to increase the "Ray-marching quality" much higher than is typical for most scenes.
Examples:
Colour Tab[edit]
Settings:
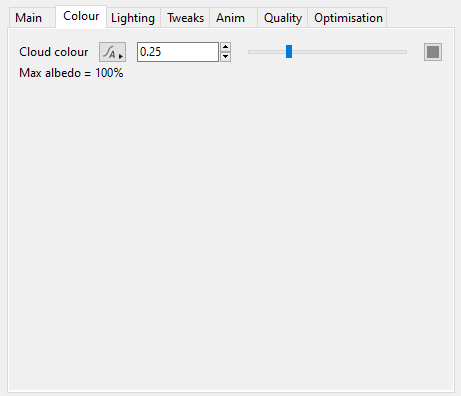
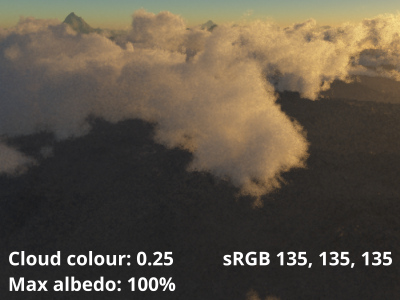
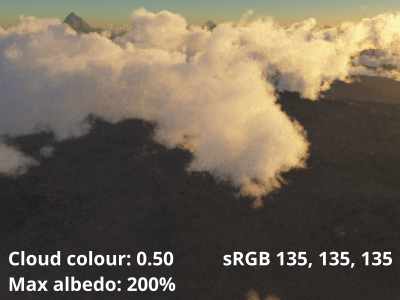
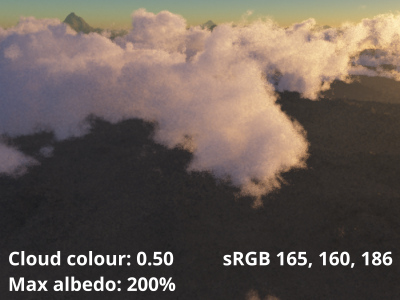
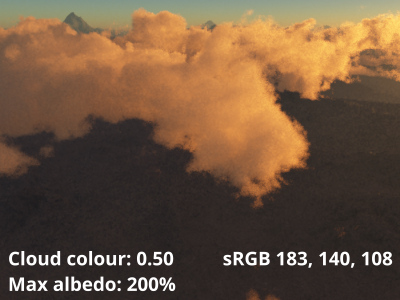
- Cloud colour: This setting controls the colour of the cloud. Displayed beneath the setting is a readout indicating the level of albedo, which is a measurement of reflected light. The maximum albedo possible In the real world is 100% and a "Cloud colour" of 0.25 can result in 100% albedo if the clouds are dense enough due to the way volumetric colours are calibrated in Terragen. For realistic looking cloud layers, it is recommended to keep the albedo value to around 100%.
Lighting Tab[edit]
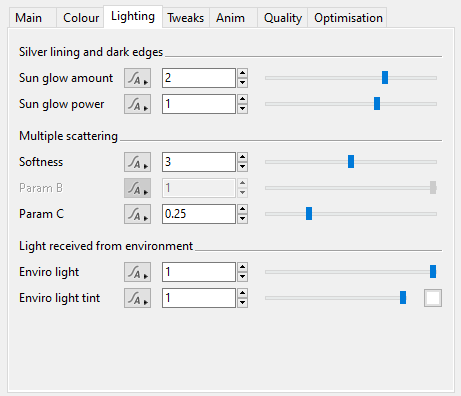
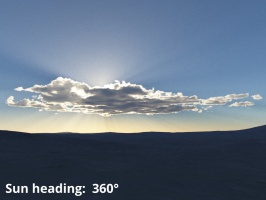
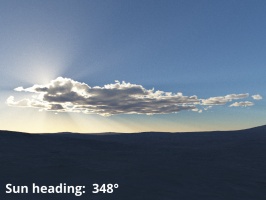
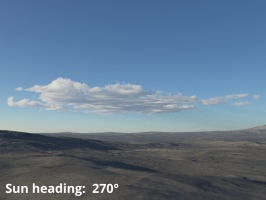
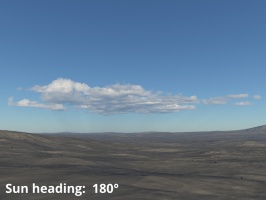
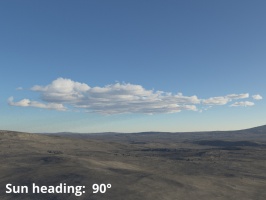
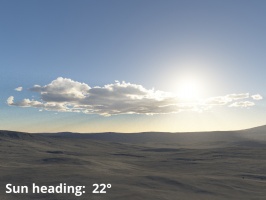
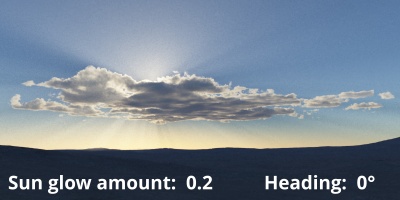
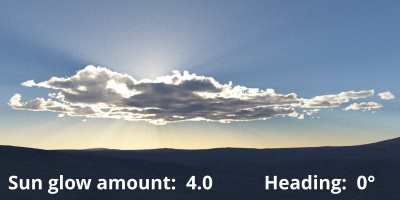
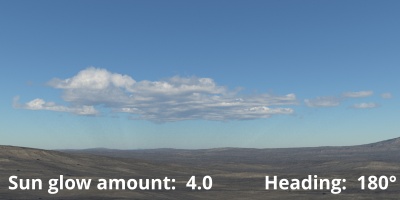
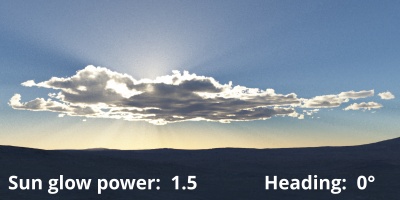
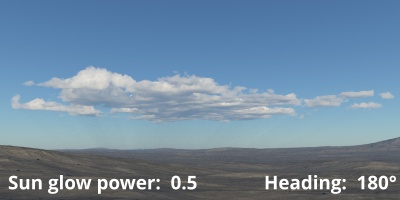
Silver lining and dark edges: The bright outline along the edge of the cloud known as the silver lining occurs when light is scattered by cloud droplets along the cloud's outer edge. This contrast between the change in brightness with respect to the angle of the sun, is most clearly seen when the Easy Clouds are back-lit by the sun. When the "Sun glow amount" and "Sun glow power" settings are set to 0, light is scattered uniformly in all directions decreasing the silver lining phenomenon.
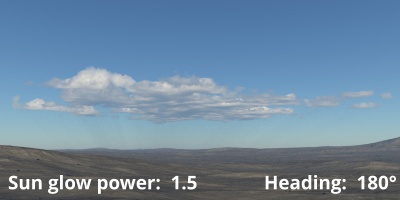
- Sun glow amount: When the sun is behind the cloud layer and opposite the observer (camera), increasing the "Sun glow amount" will scatter more light within the cloud, brightening the highlights of the cloud, especially in the area of the silver lining effect. When the sun is behind the observer, increasing the "Sun glow amount" causes more light to be absorbed by the cloud therefore less light to be scattered and the clouds look less bright.
- Sun glow power:
Multiple scattering: Easy Clouds calculate internal light by scattering rays through the voxels using principles from physically based rendering. Terragen’s cloud shader is optimized to approximate hundreds of scatters within the same volume, but can limit the number of bounces between separate cloud layers or surfaces.
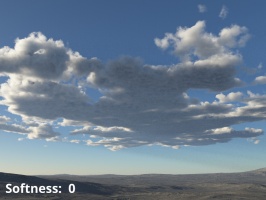
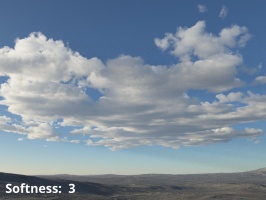
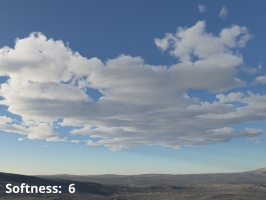
- Softness:
- Param B: This setting is not implemented in Easy Clouds and can not be edited.
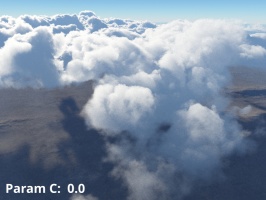
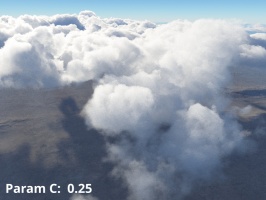
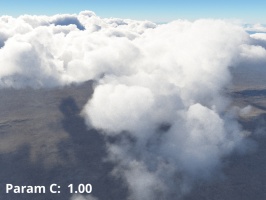
- Param C:
Light received from environment
- Enviro light: As of Terragen 4.5 this setting has no effect on the Easy Cloud.
- Enviro light tint: As of Terragen 4.5 this setting has no effect on the Easy Cloud.
Tweaks Tab[edit]
Settings:
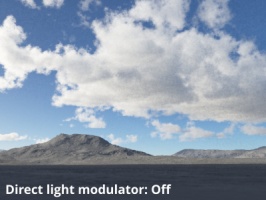
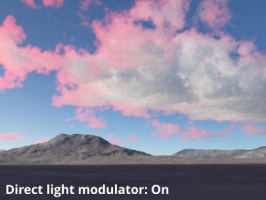
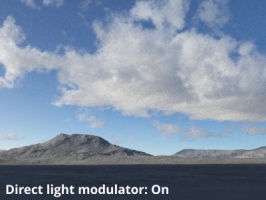
- Direct light modulator: The shader or function assigned to this setting is used as a multiplier to the direct lighting which illuminates the cloud layer, it has no effect on areas of the cloud illuminated by indirect lighting (global illumination). It can be used to modify the colour or brightness of a cloud layer where it encounters direct lighting.
- Environment light modulator: As of Terragen 4.5 this setting has no effect on the cloud layer.
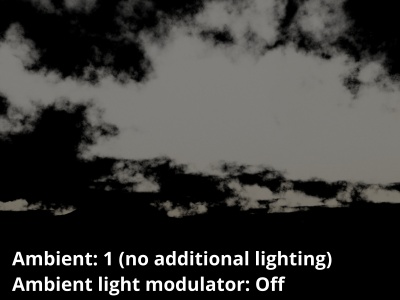
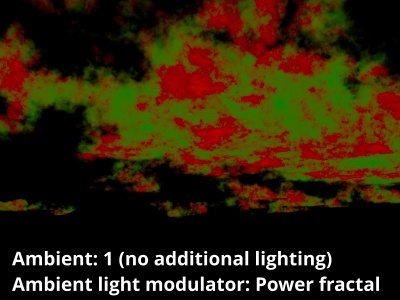
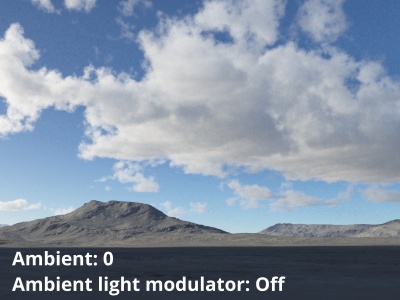
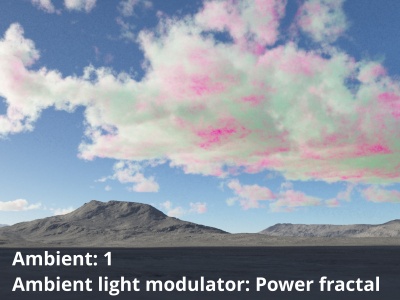
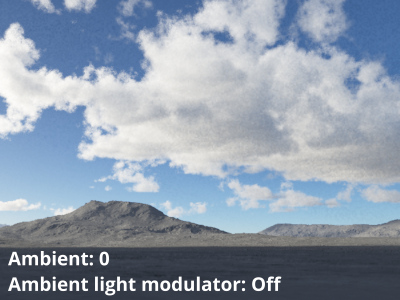
- Ambient light modulator: The shader or function assigned to this setting is used as a multiplier to the cloud layer’s Ambient setting. In order for the modulator to have an effect the Ambient value must be greater than 0.
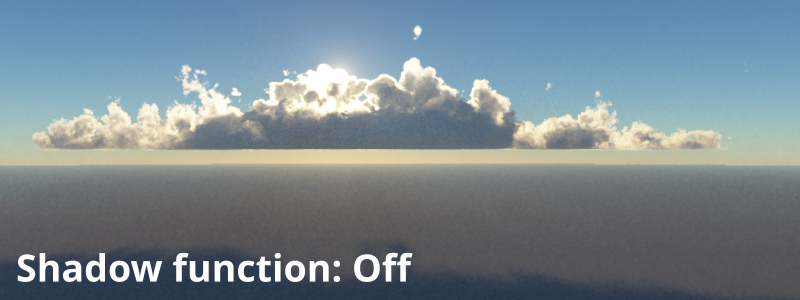
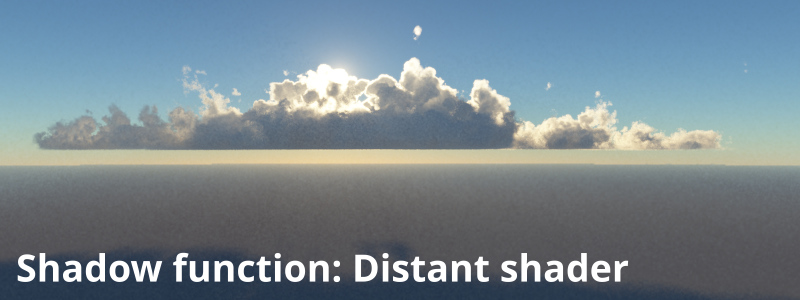
- Shadow function: This setting can be used to define additional regions of shadow on the Easy Cloud for any direct light sources that cast shadows. This may be useful to remove light in certain regions of the Easy Cloud when correct shadows of surfaces would be too expensive to calculate. Where the value is 1, or white, the Easy Cloud will receive no light contribution from light sources that have shadow casting enabled. Where the function is 0, or black, the Easy Cloud receives all the light from light sources. This function has no effect on the Enviro Light or light sources that do not have shadows enabled.
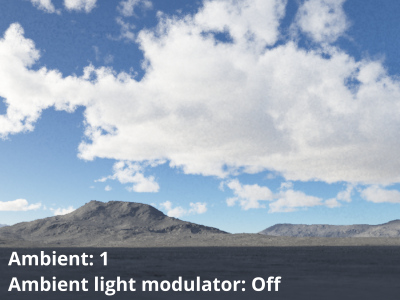
- Ambient: This setting defines a colour and intensity which is added to the lighting that illuminates the cloud layer. While disabled by default, so that only direct and indirect lighting (global illumination) affect the cloud layer, a practical example for using this setting would be to increase the overall brightness of the cloud layer. The colour and intensity of the Ambient setting can be modulated by the "Ambient light modulator".
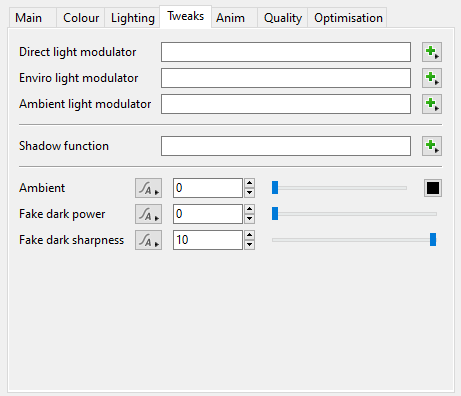
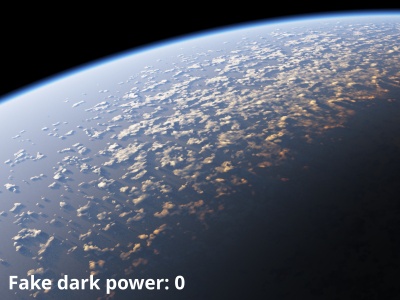
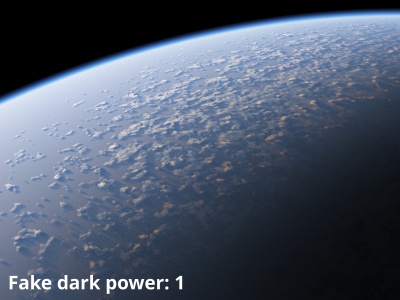
- Fake dark power: This setting is intended for planetary orbit views, as a way to artificially darken the cloud layer if it appears too bright, especially near the terminator, the line that divides the daylit side and the dark night side of a planetary body. Higher values increase the darkness of the cloud layers.
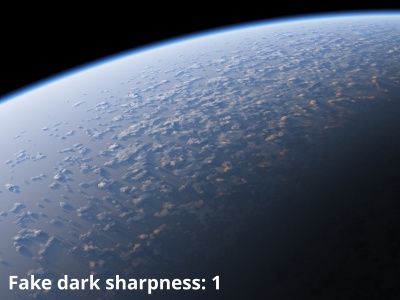
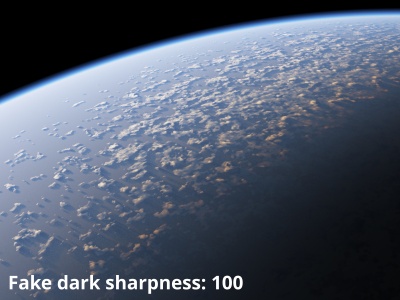
- Fake dark sharpness: This setting is intended for planetary orbit views, as a way to artificially adjust the falloff of the terminator line on the cloud layer. In order for this setting to have an effect, the "Fake dark power" must be greater than 0. Higher values result in a quicker falloff or sharper transition.
Anim Tab[edit]
Settings:
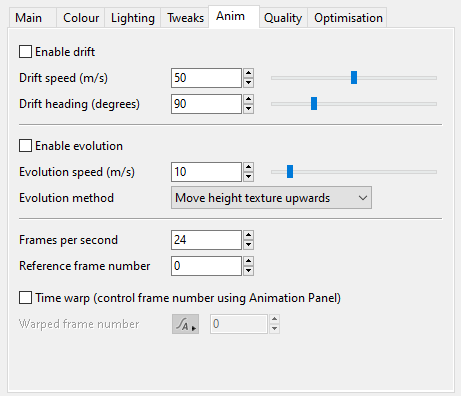
- Enable drift: When checked, allows the clouds to drift at the speed and heading defined by the "Drift speed (m/s)" and "Drift heading (degrees)".
- Drift speed (m/s): Determines the rate at which the clouds move. Note that the cloud layer itself does not drift.
- Drift heading (degrees): Determines the direction in which the clouds are moving. Note, that the cloud layer itself does not rotate to face in the direction of the "Drift heading (degrees).
- Enable evolution: When checked, allows the clouds to evolve at the rate of speed and in the direction as defined by the "Evolution speed (m/s)" and "Evolution method".
- Evolution speed (m/s): Determines how rapidly the shape of the cloud layer changes over time, by moving its internal textures in the direction defined by the "Evolution method". The larger the value the greater the shape changes each frame.
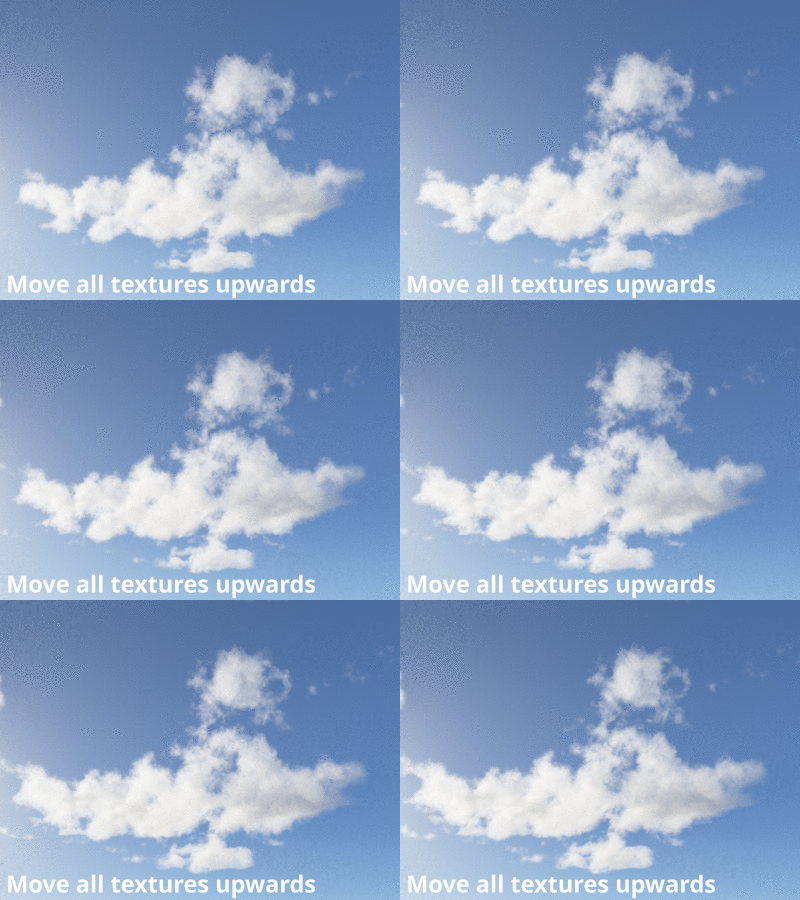
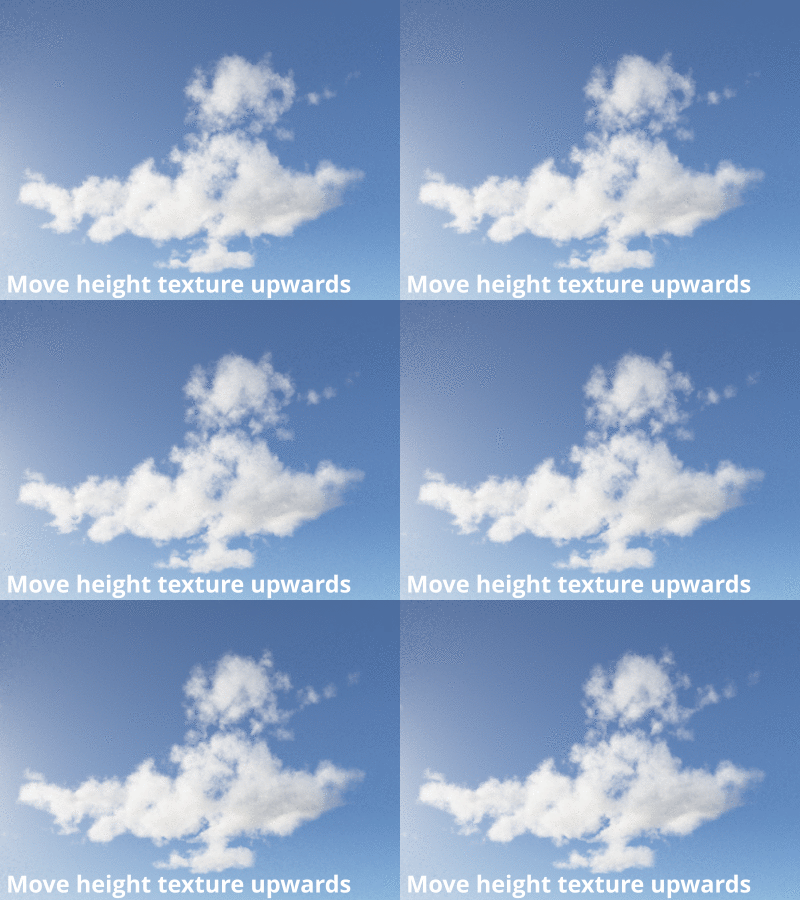
- Evolution method: This popup has four options that determine the direction in which the cloud shapes evolve. Move all textures upwards/downwards causes all the noise patterns that define the Easy Cloud to move up or down. Move height texture upwards/downwards cause only the “Y” axis component of the noise patterns to move in the direction chosen.
- Frames per second: Determines the frame rate for calculating cloud drift and evolution. For example, if a cloud were to drift 1 meter in 1 second at 24 frames per second, then the clouds would drift approximately 0.042 meters each frame. At a higher "Frames per second", the cloud would take more frames to move the 1 meter and appear to be drifting or evolving slower.
- Reference frame number: This is the frame at which changing the "Evolution speed (m/s)" and "Evolution method" have no effect. For example, if the reference frame value is 1, then frame 1 will look the same no matter what the "Evolution speed (m/s)" and "Evolution method" are set to. All other frames are calculated according to the time difference from this frame.
- Time warp (control frame number using Animation Panel): When checked, allows the "Drift speed (m/s)" and "Evolution speed (m/s)", which are constant values, to be driven by the "Warped frame number". For example, if the cloud drifted at a constant rate of 1 meter per second at 24 frames per second, you could make the cloud drift twice as slow by setting a keyframe for the "Warped frame number" at frame 1 with a value of 1, and a second keyframe at frame 48 with a value of 24. Note, the interpolation mode for the keyframes is set in the Animation panel, and in this example should be set to “Linear” to ensure that the cloud drifts and evolves at a consistent rate.
- Warped frame number: On any given frame the current value of this setting, whether animated or not, keyframed or interpolated, determines the frame for the "Drift speed (m/s)" and "Evolution speed (m/s)" of the cloud. For example, if the current frame is 100, and the "Warped frame number" is 2, the clouds will appear as they were evaluated on frame 2. In subsequent frames, if the "Warped fame number" remains at 2, the clouds will appear to remain in place and not drift or evolve. With the "Warped frame number" it is possible to create slow motion or time lapsed effects.
Example movies:
Quality Tab[edit]
Settings:
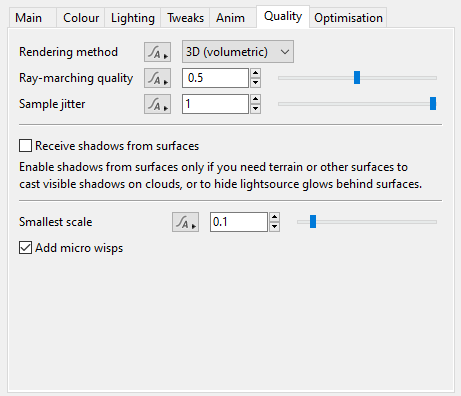
- Rendering method: This popup menu has two options which determine the way in which the cloud layer is rendered. Easy clouds are based on procedural 3D textures and volumetric data therefore the 2D rendering method, which samples one point per pixel midway between the base and top of the Easy Cloud, is not recommended. The 3D (volumetric) rendering method uses ray-marching techniques to accumulate the density of the Easy Cloud.
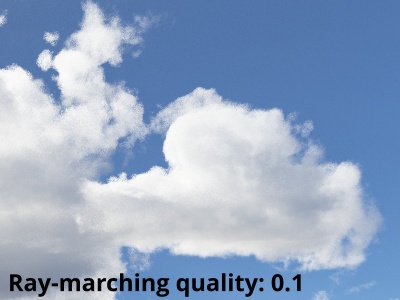
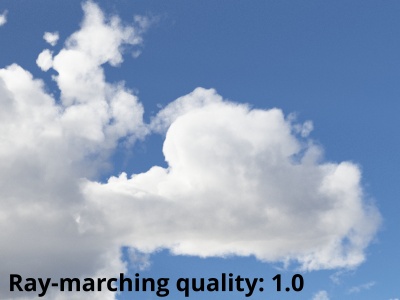
- Ray-marching quality: This setting provides a way to reduce render times by evaluating fewer samples within the volume along the ray. In many circumstances the quality of a rendered image using the default value of 0.5 is almost indistinguishable to the quality at a value of 1.0 but at a faster render time. Using too low a value, such as 0.1 or less, can cause the shadows cast by the cloud layer onto itself, to appear lighter or more diminished.
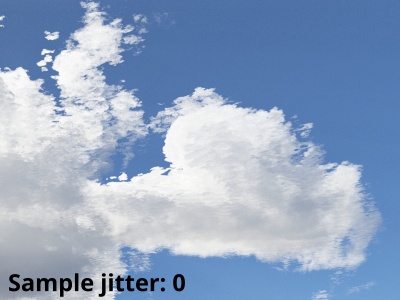
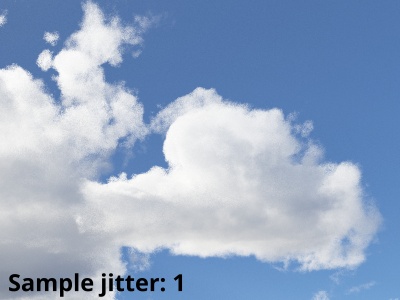
- Sample jitter: This setting provides an offset for each ray-marched segment of the volume being sampled. A value of 0 means the sample point is located at the center of each ray-marched segment being evaluated, which may introduce unwanted banding in the final rendered cloud layer. A value of 1, shifts the sample point along the ray, but still within the ray-marched segment being evaluated. This introduces noise into the final rendered cloud layer, however the anti-aliasing process averages all the neighboring rays together to create a better approximation of the volume being sampled.
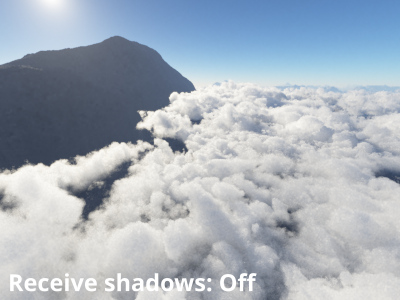
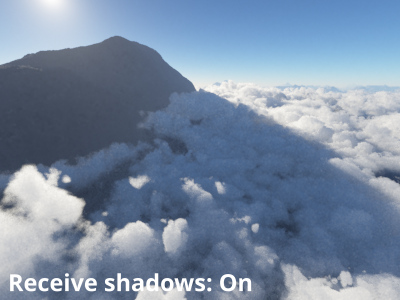
- Receive shadows from surfaces: This setting is disabled by default because generally speaking, cloud layers are positioned higher in altitude than the surrounding terrain and therefore would not receive shadows from the terrain. When cloud layers are positioned lower than the surrounding terrain and you want shadows to be cast from the terrain onto the cloud layers, enable the setting by clicking on the checkbox. Note, this may increase render times.
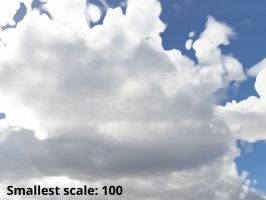
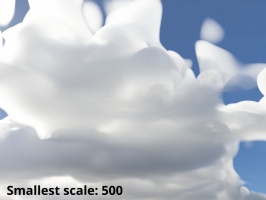
- Smallest scale: This setting controls the smallest scale in metres for the internal fractal patterns that make up the Easy Cloud layer. Each time the value is lowered by 0.5 an additional octave is created for every internal fractal pattern in the Easy Cloud layer, which in turn will increase render times.
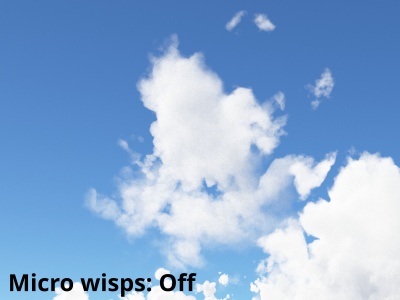
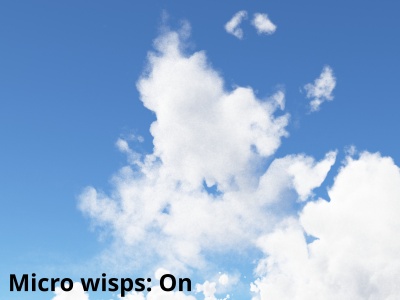
- Add micro wisps: When checked, or enabled, a fractal pattern is used internally by the Easy Cloud layer to introduce wisp-like detail into the edges of the clouds.
Optimisation Tab[edit]
Settings:
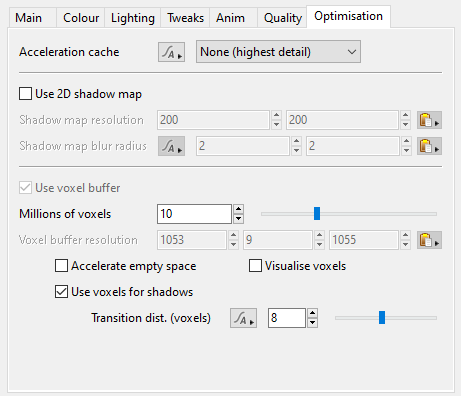
- Acceleration cache: This popup provides five options that may allow the Easy Cloud to render faster. The "Acceleration cache" is like a high resolution voxel buffer in which each option increases the size of the sample point by a factor of two. Unfortunately, this can also introduce unwanted artifacts into the rendered image, especially when the camera is looking towards the sun, and for this reason the recommended setting is None (highest detail). The "Acceleration cache" only affects shadows and reflections cast by the Easy Cloud.
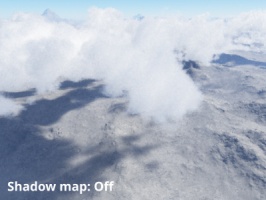
- Use 2D shadow map: Shadow maps were originally designed to avoid long render times when extreme anti-aliasing values would not resolve noise issues in the shadows cast by a cloud layer. When enabled, this setting generates a 2D map for the cloud layer at the start of the render process. You can think of the shadow map as a 2D image of the cloud layer’s density values from the top view. Internally, Terragen positions the shadow map at approximately the center of the cloud layer on the “Y” axis and as rays are traced through the cloud layer the density values are used to modify the lighting. Shadow maps can be used to cast shadows onto the terrain, objects and other cloud layers, but not the cloud layer itself. While typically faster than ray tracing volumes, certain cloud types such as Easy Clouds, require a voxel buffer to be calculated anyways, so for these cloud types we recommend not using "2D shadow maps".
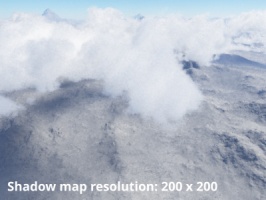
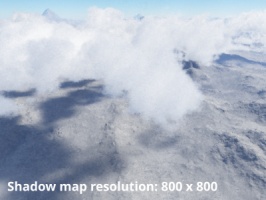
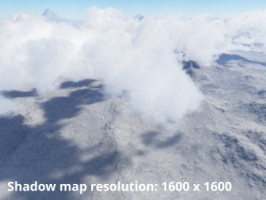
- Shadow map resolution: These values determine the width and height of the shadow map created for the cloud layer. Higher values take longer to calculate but result in more detail, while lower values tend to be softer and have less contrast, due to less detail. The cloud layer’s radius plays an important role in determining the level of detail of the shadow map. For example, a cloud layer with a radius value of 50,000 metres and mapped into 200 pixel by 200 pixel shadow map will appear softer than a cloud layer with a radius value of 20,000 metres mapped into the same resolution.
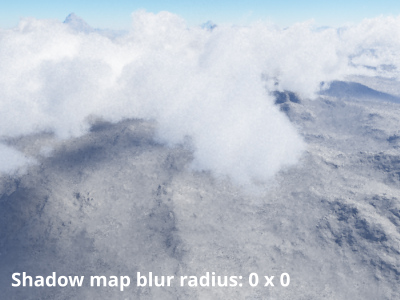
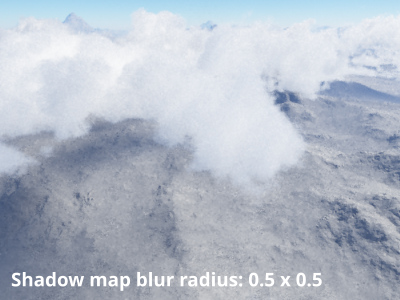
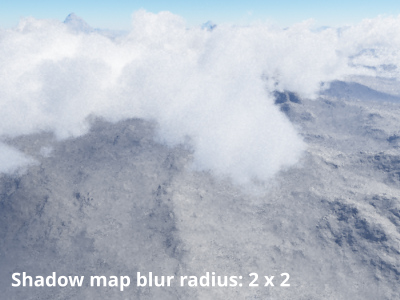
- Shadow map blur radius: When a cloud layer is animated its shape can potentially change every frame which could introduce unwanted flickering into the shadows cast by it. The "Shadow map blur radius" was designed to reduce the flickering by blurring the shadow map for the cloud layer. These values determine the blur radius in pixels to apply to the shadow map after it has been internally rendered, therefore the "Shadow map resolution" values are important to take into consideration. For example, a "Shadow map blur radius" of 2 will have a greater softening effect on a "Shadow map resolution" of 100 pixels by 100 pixels compared to a Shadow map resolution of 1000 pixels by 1000 pixels. The higher the "Shadow map blur radius" value the softer, or more blurred, the shadow map will be.
- Use voxel buffer: When enabled, a voxel buffer is created based on the "Millions of voxels" value. For Easy Cloud presets the setting is automatically enabled and ghosted because these cloud types require the voxel buffer to calculate light scattering.
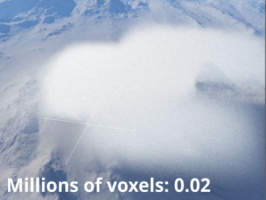
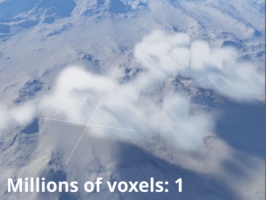
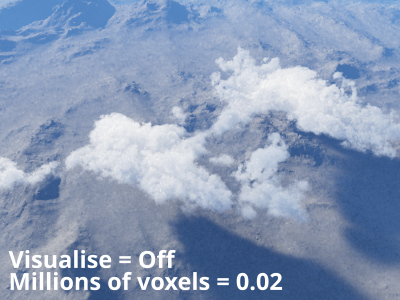
- Millions of voxels: Sets the maximum number of sample points, or voxels, that will be generated to form the voxel buffer. Higher values create more sample points, which results in having more detail in which to calculate shadow and lighting solutions. This can have a large effect on both render times and RAM use.
- Voxel buffer resolution: Automatically distributes the "Millions of voxels" in a grid-like pattern across the three axes of the voxel buffer.
- Accelerate empty space: When enabled, empty voxels in the voxel buffer are first identified in order that they may be skipped and not calculated during the render. This can result in render speed improvements on certain types of clouds such as those used globally.
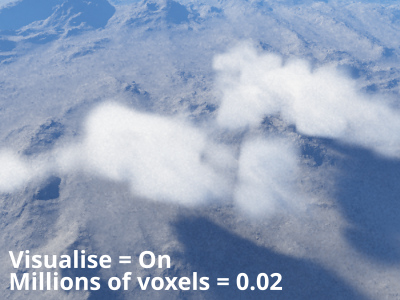
- Visualise voxels: When enabled, the voxel buffer for the cloud layer is displayed in the 3D Preview and used for rendering the Easy Cloud.
- Use voxels for shadows: When enabled, the voxel buffer for the cloud layer will be used for cast shadows. This can result in faster render times and avoid noisy shadows, but may produce shadows with less detail.
- Transition dist. (voxels): This setting, measured in voxels, is the transition point at which shadows are calculated using the cloud layer’s actual volume instead of voxels. This leads to more accurately cast shadows when the shadow rays are shorter, such as bouncing around inside the cloud or when close to the terrain.
A shader is a program or set of instructions used in 3D computer graphics to determine the final surface properties of an object or image. This can include arbitrarily complex descriptions of light absorption and diffusion, texture mapping, reflection and refraction, shadowing, surface displacement and post-processing effects. In Terragen 2 shaders are used to construct and modify almost every element of a scene.
A parameter is an individual setting in a node parameter view which controls some aspect of the node.
A single element of an image which describes values for color and/or intensity, depending on the color system which the image uses. Groups of ordered pixels together form a raster image.
A sample refers to a value or set of values at a point in time and/or space. The defining point of a sample is that it is a chosen value out of a continuous signal. In Terragen 2 it is usually a mathematical (procedural) function that is being sampled.
