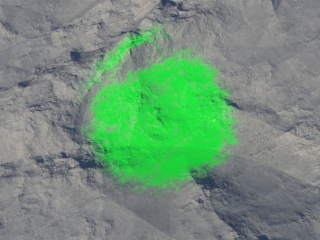
Simple Shape Shader
Overview[edit]
The Simple shape shader node creates simple shapes that can generate colour and displacement with a variety of effects applied to the edge of the shape. It is only applied in a straight-up-and-down Planar Y projection.
Node Type: Shader
Settings:
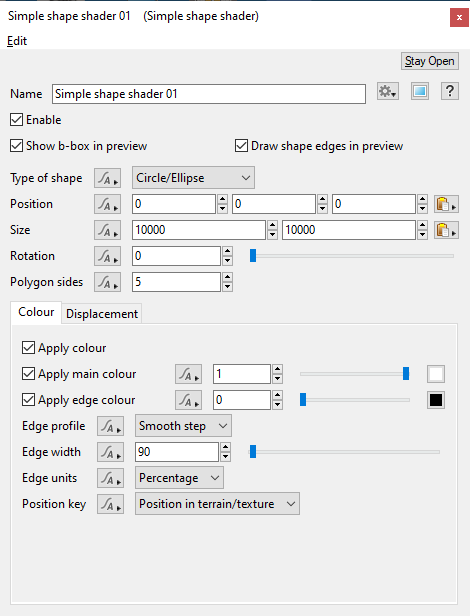
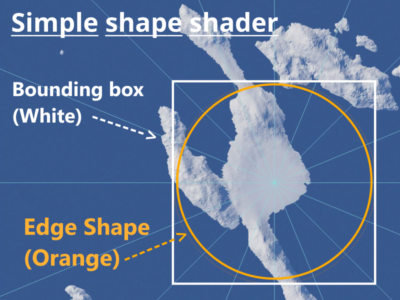
- Show b-box in preview: If this is checked the bounding box of the shape will be displayed in 3D Preview.
- Draw shape edges in preview: If this is checked an orange dotted outline of the shape will be displayed in the 3D Preview.
- Type of shape: This popup has 3 options to let you choose the type of shape generated by the shader. To create a triangle use a polygon with 3 sides.
- Position: This sets the position of the centre of the shape.
- Size: You can use this to set the width and height of the shape. Note, an ellipse is a circle where the height is a different size to the width.
- Rotation: This param sets the rotation of the shape around its centre. You can only rotate the array around the Y (upright) axis.
- Polygon sides: This setting lets you control the number of sides when Type of shape is set to "Polygon".
Colour Tab[edit]
Settings:
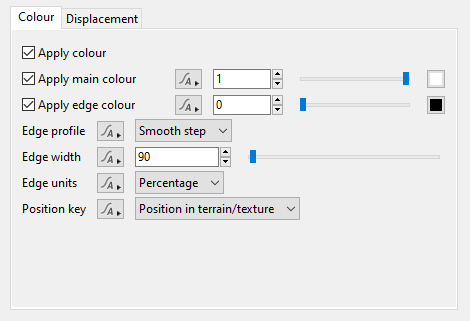
- Apply colour: If this is checked the shader will generate colour information.
- Apply main colour: This sets the colour for the shape.
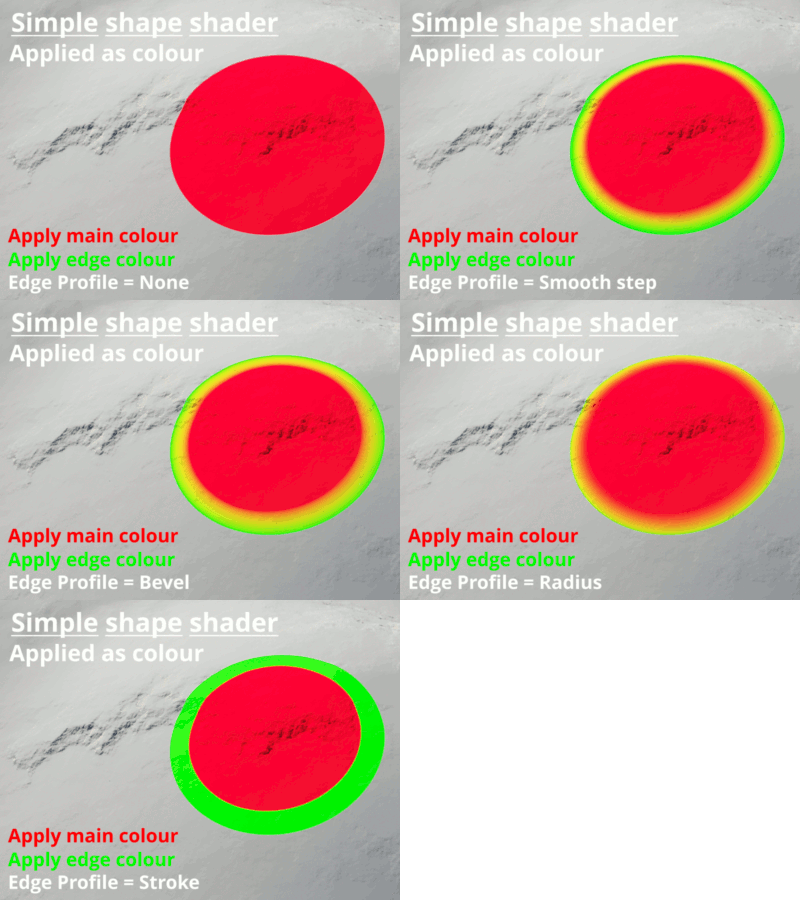
- Apply edge colour: The shader can apply a separate colour to the edge of the shape. To show the edge colour the Edge profile popup needs to be set to something other than "None" and the Edge width needs to be more than “0”.
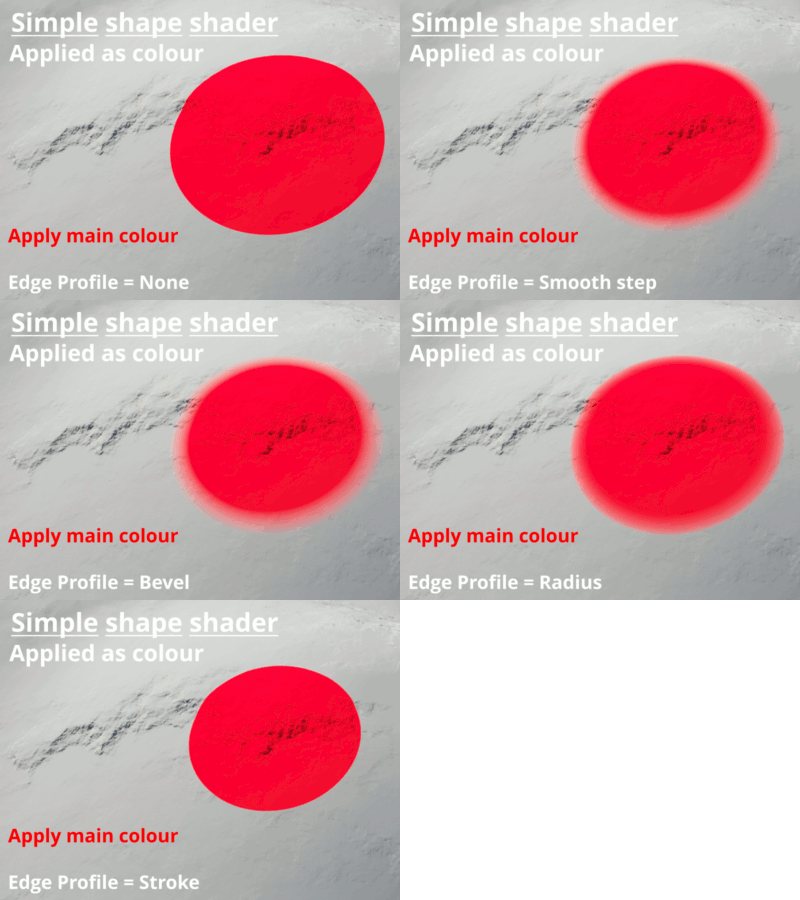
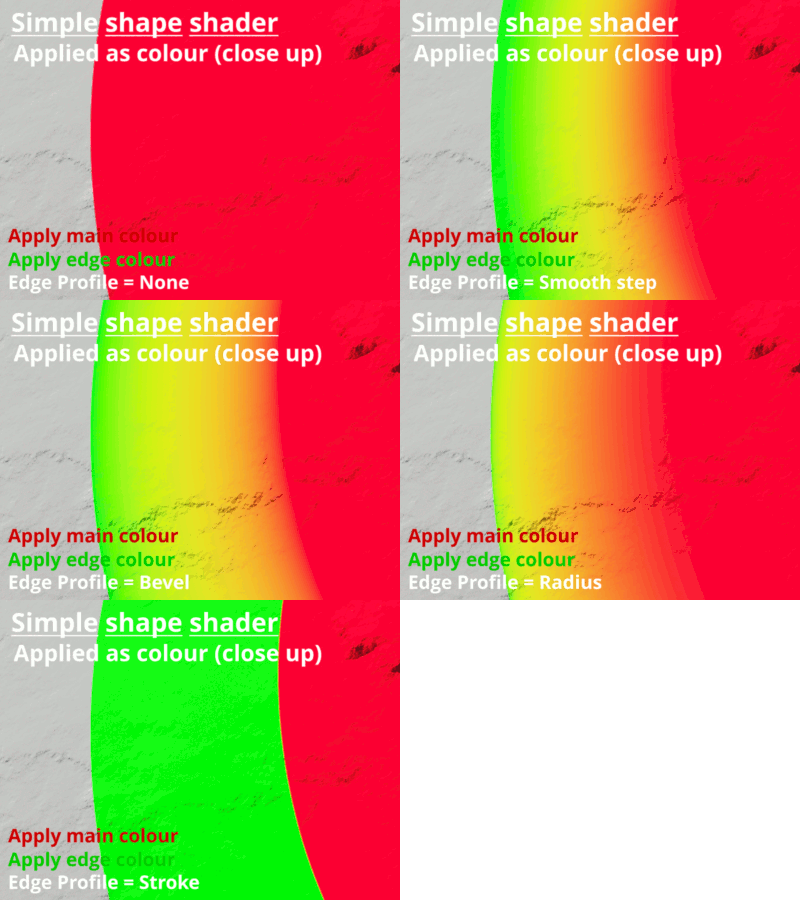
- Edge profile: This popup has 5 options which control the edge profile or blending which is applied to the edge of the shape.
- None: No edge profile is used.
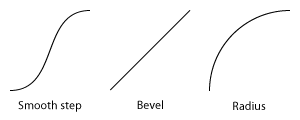
- Smooth Step: Creates a smooth transition along the length of the edge and the interior of the shape, to the extent defined by the Edge width param.
- Bevel: Creates a straight line or linear ramp along the length of the edge and the interior of the shape, to the extent defined by the Edge width param.
- Radius: Makes a quarter circle shape along the length of the edge and the interior of the shape, to the extent defined by the Edge width param.
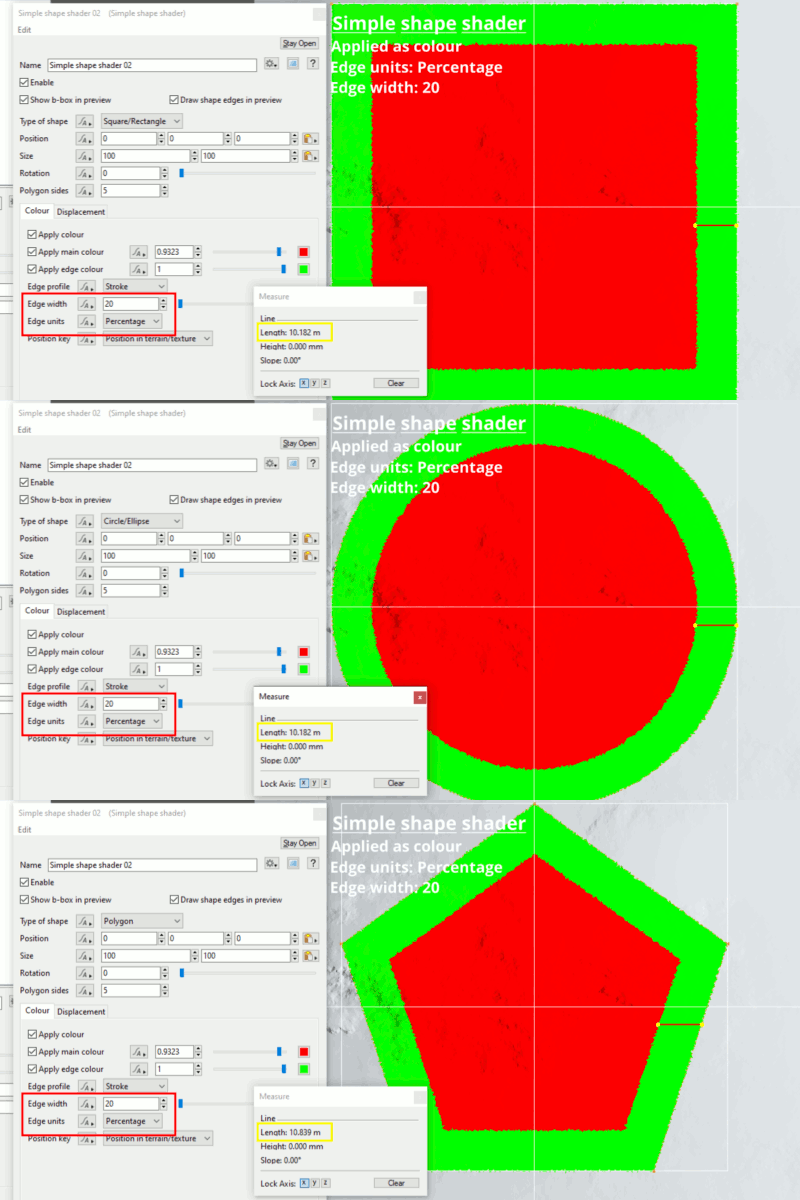
- Stroke: Creates a solid stroke or border around the inside of the shape to the extent defined by the Edge width param. The stroke can only be used in colour mode.
- Edge width: This param lets you set the width of the edge area of the shape in Edge units. To show the edge colour the Edge profile popup needs to set to something other than "None".
- Edge units: This popup has two options.
- Metres: Choosing this option sets the Edge width value to meters.
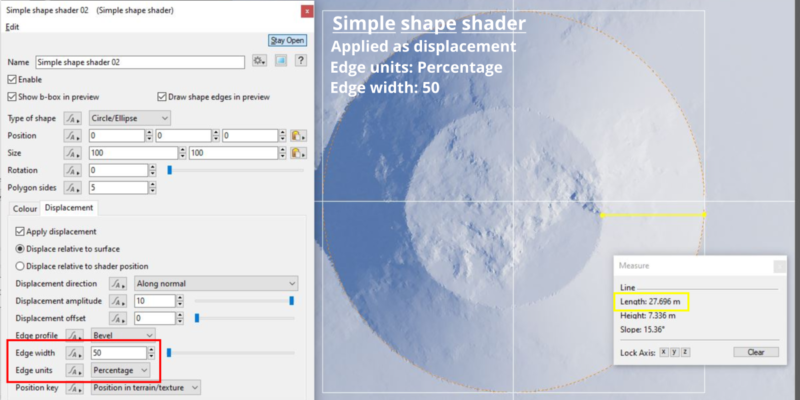
- Percentage: Choosing this option uses the Edge width value as a percentage of the maximum area allowed for an edge, which is half of the area defined by the Size param. For example, if the Size width and height values are 100 meters and the Edge width value is 10, then the edge would be 5 meters or 10 percent of 50 meters.
- Position key: This popup has two options.
- Final Position: This param setting depends on its usage, as displacement or non-displacement (colour). For displacement the Final position means the most recently known displacement of the surface relative to this nodes location in the node network pipeline. It only knows upstream shaders from its location. When used for non-displacement (colour) purposes, it knows the upstream and downstream shaders. This is because displacement is calculated before non-displacement.
- Position in Terrain / Texture: Uses the texture coordinates which were generated for the surface. On terrains these coordinates are initially set to the position on the flat planet from which the terrain is displaced, but may be updated by “Compute Terrain” or “Tex Coords From XYZ” nodes to provide fully 3D texture coordinates. Texture coordinates can also be modified by downstream transform shaders and warp shaders, whereas Final position is not affected by these.
|
 |
 |
|
Displacement Tab[edit]
Settings:
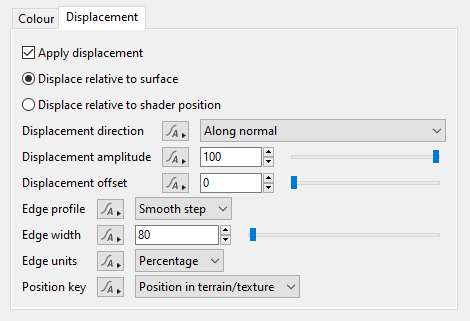
- Apply Displacement: If this is checked the shader will generate displacement information.
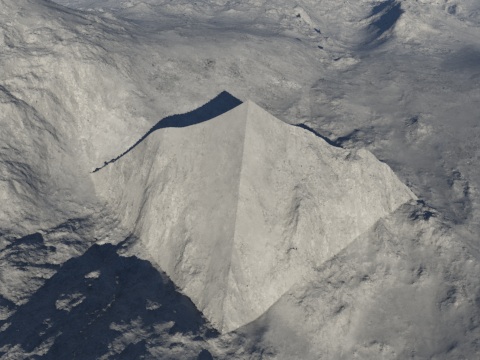
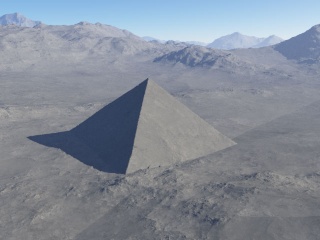
- Displace relative to surface: This is how displacement was always applied in TG2. The shader looks at the position of the surface underneath and then applies displacement to that, which means if the surface is lumpy that lumpiness flows through into the shape created by the shader. In this case the shader was making a pyramid and the pyramid shape has been distorted by the underlying terrain. It also integrates smoothly with the terrain around the edges.
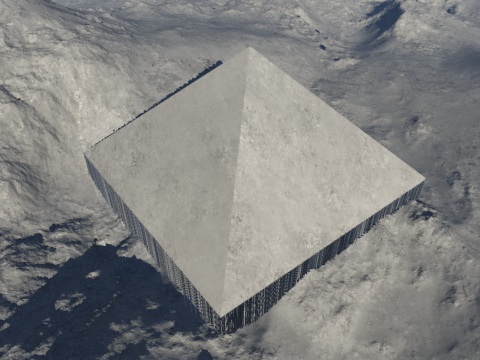
- Displace relative to shader position: Ignores the underlying surface and always displaces from the shader position. Currently this means that displacement is applied relative to the Y coordinate of the shader position. As you can see from the image below this means that the displaced shape is generated exactly by the shader and not distorted. In this case the shader Y position is 10. You can see there is a "wall" around the bottom of the shape. This accounts for the difference between the edge of the shader (at 10m) and the underlying terrain, which is lower than along 10m along the two edges we can see.
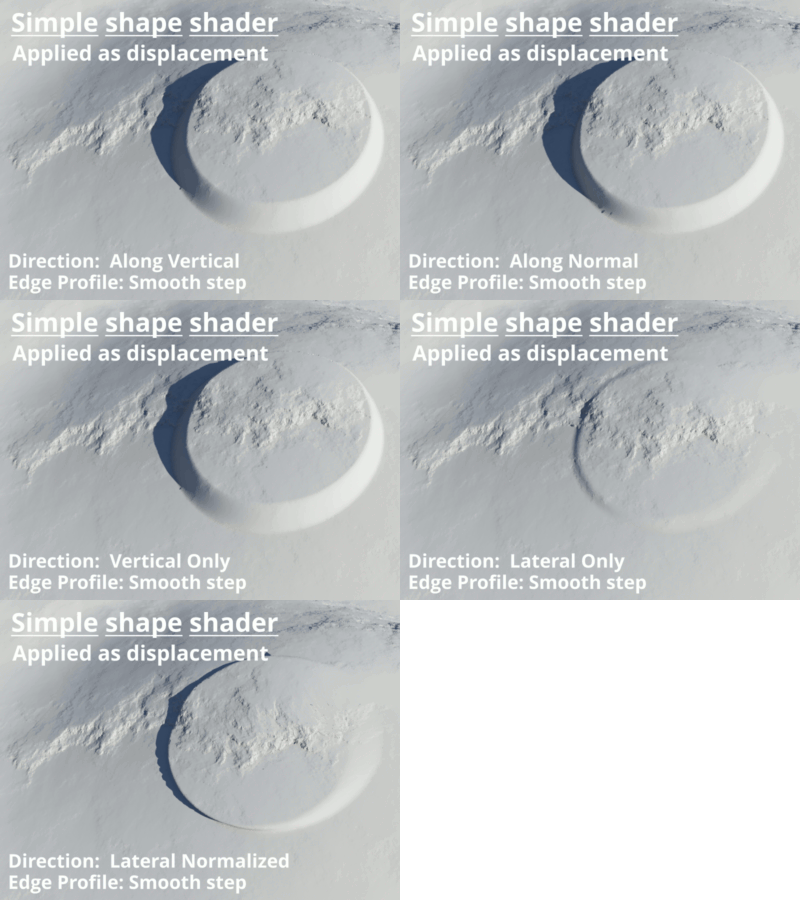
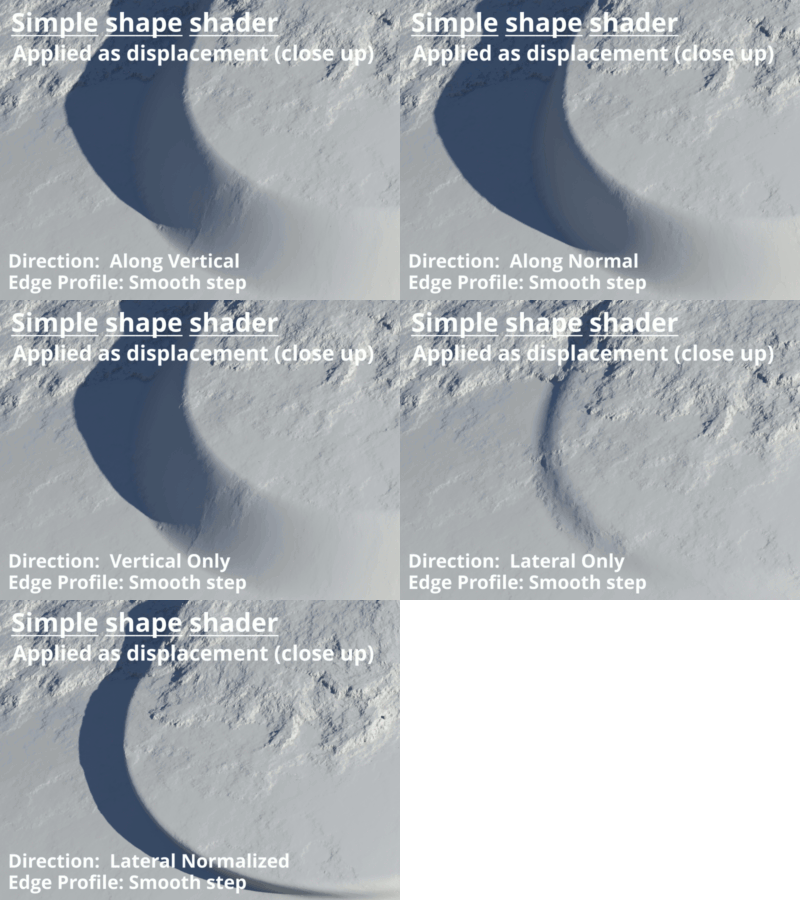
- Displacement direction: This popup has 5 options.
- Along Vertical: Displacement will happen along the original normals of the underlying object (i.e. the planet or a model) prior to any displacement having been applied.
- Along Normal: Displacement will happen along the current surface normal.
- Vertical only (requires computed normal): Displacement only happens along the normal of the underlying object (i.e. the planet or a model). The displacement is scaled by the difference between the object normal and the surface normal. Displacement is reduced as the angle between the normals approaches 90°.
- Lateral only (requires computed normal): Displacement only occurs in the lateral plane, or in other words perpendicular to the normal of the underlying object.
- Lateral normalized (requires computed normal): This is the same as Lateral only but the normal is normalised, that is, scaled so it has a length of 1.
- Displacement amplitude: The amount of displacement in metres.
- Displacement offset: The starting offset of the displacement in metres.
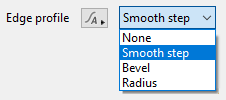
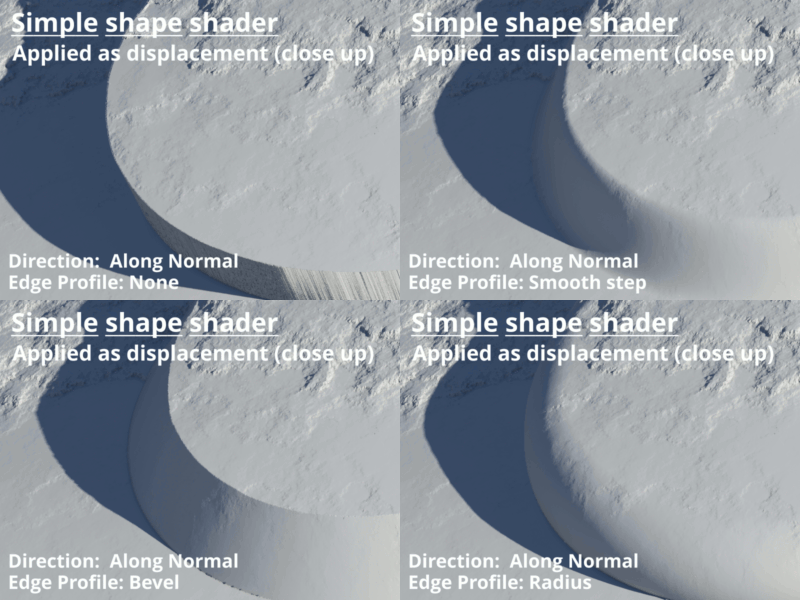
- Edge profile: This popup has 4 options to control the shape of the profile applied along the edge of the displacement. Note, that the “Stroke” edge profile is not available for displacement.
- None: No edge profile is used.
- Smooth Step: Creates a smooth transition along the length of the edge and the interior of the shape, to the extent defined by the Edge width param.
- Bevel: Creates a straight line or linear ramp along the length of the edge and the interior of the shape, to the extent defined by the Edge width param.
- Radius: Makes a quarter circle shape along the length of the edge and the interior of the shape, to the extent defined by the Edge width param.
- Edge width: This param lets you set the width of the edge area of the shape in Edge units. To show the displaced edge profile, the Edge profile popup needs to be set to something other than "None".
- Edge units: This popup has two options.
- Metres: Choosing this option uses the Edge width value as meters.
- Percentage: Choosing this option uses the Edge width value as a percentage of the maximum area allowed for an edge, which is half of the area defined by the Size param. For example, if the Size width and height values are 100 meters and the Edge width value is 10, then the edge would be 5 meters or 10 percent of 50 meters.
- Position key: This popup has two options.
- Final Position: This param setting depends on its usage, as displacement or non-displacement (colour). For displacement the Final position means the most recently known displacement of the surface relative to this nodes location in the node network pipeline. It only knows upstream shaders from its location. When used for non-displacement (colour) purposes, it knows the upstream and downstream shaders. This is because displacement is calculated before non-displacement.
- Position in Terrain / Texture: Uses the texture coordinates which were generated for the surface. On terrains these coordinates are initially set to the position on the flat planet from which the terrain is displaced, but may be updated by “Compute Terrain” or “Tex Coords From XYZ” nodes to provide fully 3D texture coordinates. Texture coordinates can also be modified by downstream transform shaders and warp shaders, whereas Final position is not affected by these.
 |
|

|
Examples[edit]
These are project files showing some different ways of using the Simple shape shader. The projects are explained in greater detail in the Comments section of the project settings. To view this click the Project Settings button in the bottom left of the main window. You might need to right click and choose "Save as" (Windows) or option-click (Mac) on the project file links to download them directly and prevent them opening in your browser.
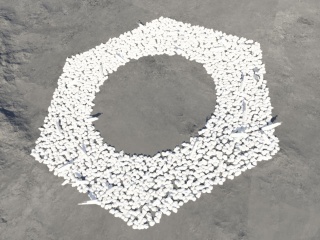
- Population density: This project shows how to use a Simple shape shader to control the density of a population. This example combines two Simple shape shaders using a Merge shader to make a more complex shape.
- Displacement: This project is an example of using the Simple shape shader to create displacement on the terrain.
- Surface layer blending: This project shows how to use a Simple shape shader to control the blending of a surface layer.
Media:simple_shape_shader_population_density.tgd
Media:simple_shape_shader_displacement.tgd
A shader is a program or set of instructions used in 3D computer graphics to determine the final surface properties of an object or image. This can include arbitrarily complex descriptions of light absorption and diffusion, texture mapping, reflection and refraction, shadowing, surface displacement and post-processing effects. In Terragen 2 shaders are used to construct and modify almost every element of a scene.
Literally, to change the position of something. In graphics terminology to displace a surface is to modify its geometric (3D) structure using reference data of some kind. For example, a grayscale image might be taken as input, with black areas indicating no displacement of the surface, and white indicating maximum displacement. In Terragen 2 displacement is used to create all terrain by taking heightfield or procedural data as input and using it to displace the normally flat sphere of the planet.
The bounding box is a box which surrounds (or bounds) an object or shader. This box shows the maximum extents of the item inside it. Sometimes abbreviated as "b-box".
