Spotlight
Contents
Overview[edit]
Spotlight nodes provide a directional light source which can also be scaled. It is useful for creating beams or shafts of light.
Settings:
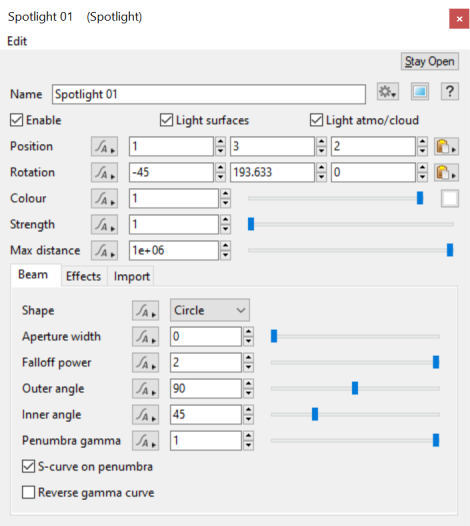
- Name: This setting allows you to apply a descriptive name to the node, which can be helpful when using multiple Spotlight nodes in a project.
- Enable: When checked, the spotlight is enabled and will contribute lighting information to the scene. When unchecked, the spotlight is completely turned off and will no longer contribute to the scene.
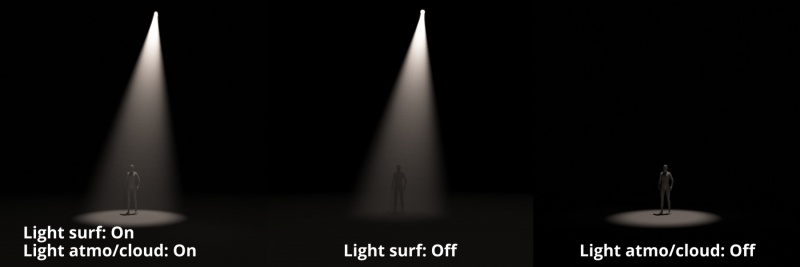
- Light surfaces: When checked, the light will illuminate the surfaces of the terrain or objects in the scene.
- Light Atmo/Cloud: When checked, the spotlight will illuminate the atmosphere and cloud layers.
- Position: This setting allows you to position the spotlight along the XYZ axis.
- Rotation: This setting allows you to rotate the spotlight’s pitch, heading and bank along its XYZ axis.
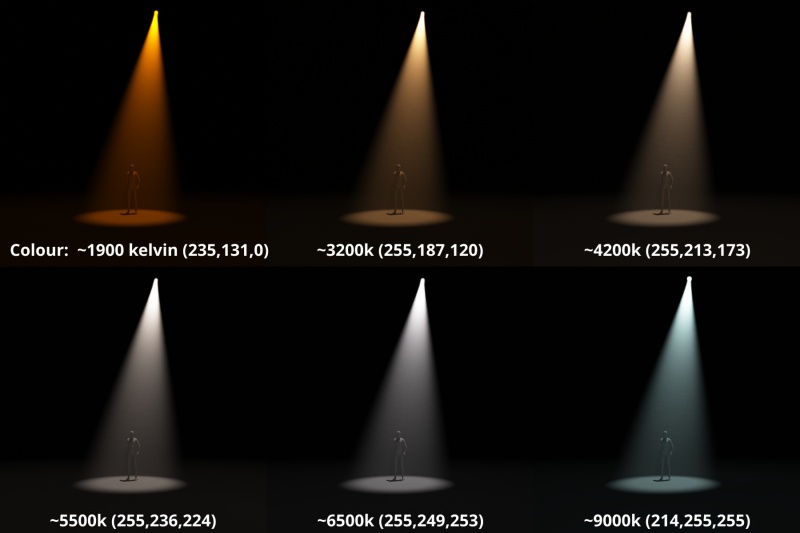
- Colour: This setting controls the colour of the light emanating from the spotlight.
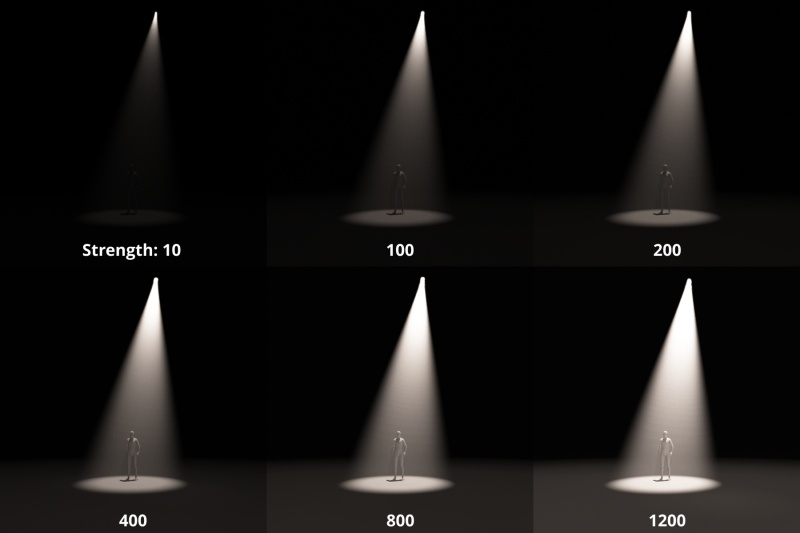
- Strength: This setting controls the intensity of the spotlight.
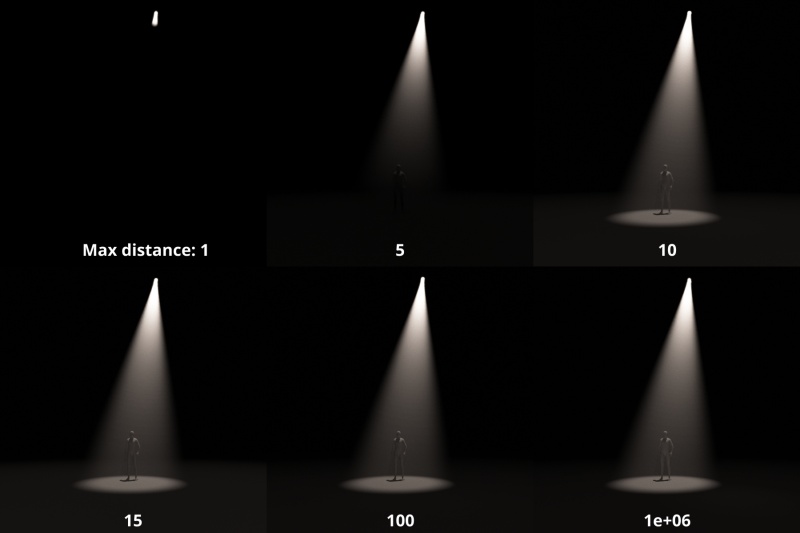
- Max Distance: This is the maximum distance calculated for light rays emanating from the spotlight. Note that this value does not affect the falloff of the light over the maximum distance.
Beam Tab[edit]
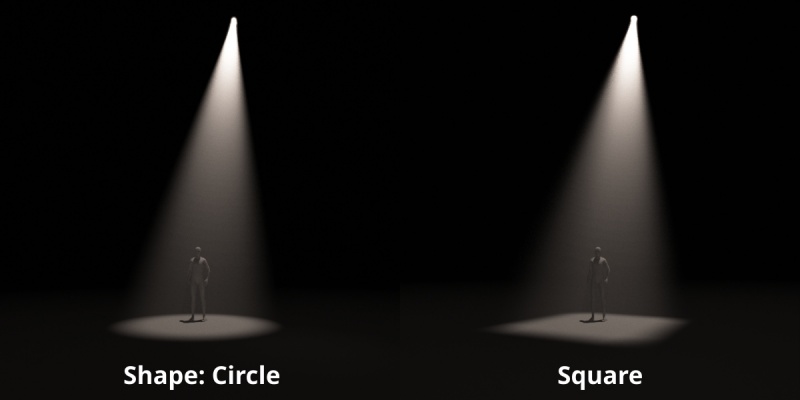
- Shape: This pop-up provides two options which determine the shape of the spotlight’s aperture and therefore beam.
- Circle: Selecting this option causes the shape of the beam to be circular.
- Square: Selecting this option causes the shape of the beam to be square.
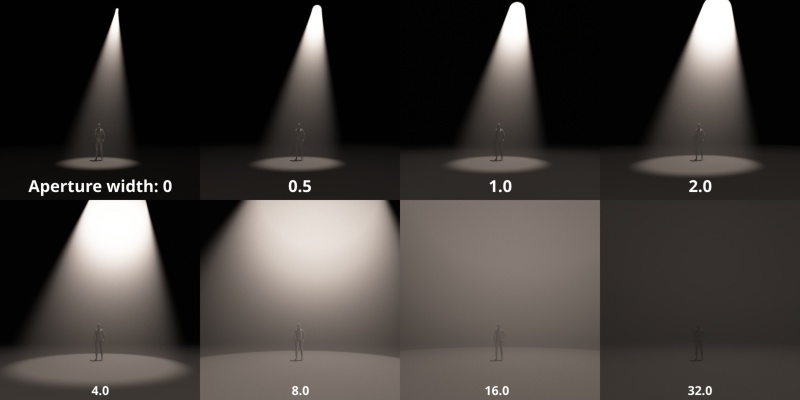
- Aperture width: This setting controls the size of the aperture which emits light. Note in the example image below, as the value increases the size of the aperture gets larger, and light gets fainter as it is dispersed through a larger area.
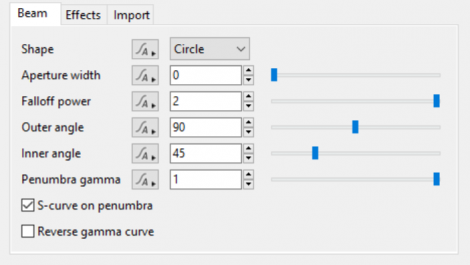
- Falloff power: This setting controls the exponent used to determine the attenuation, or falloff, of the light. A value of 0 is no falloff, a value of 1 is inverse-linear, the default value of 2 is equivalent to the inverse-square law, and a value of 3 would be inverse-cubed, etc.
- Outer angle: This setting describes the angle created by an imaginary line projecting from the center of the Spotlight to the outer edge of the Spotlight in degrees. Reducing the angle makes the beam narrower, while increasing the angle expands and widens the beam.
- Inner angle: This setting describes the angle created by an imaginary line projecting from the center of the Spotlight to the inner edge of the Spotlight in degrees. The appearance of light is strongest within this angle, and falls off between this value and the Outer angle value. The closer the Inner angle value is to the Outer angle value the sharper the light beam will appear.
- Penumbra gamma: This setting brightens the beam of light between the Inner and Outer Angle values.
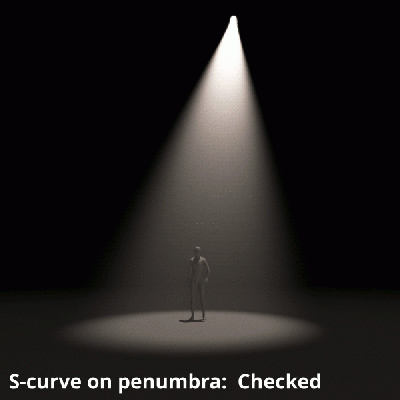
- S-curve on penumbra: When checked, an “S” curve is applied to the falloff area between the Inner angle and Outer angle of the Spotlight’s beam.
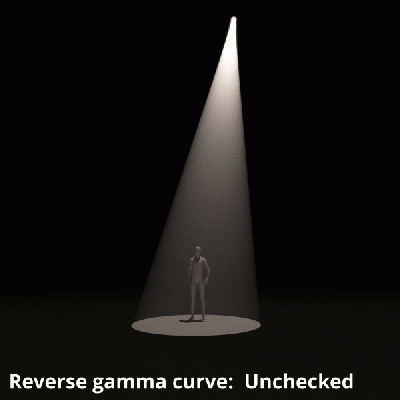
- Reverse gamma curve: When checked, the gamma is reversed.
Effects Tab[edit]
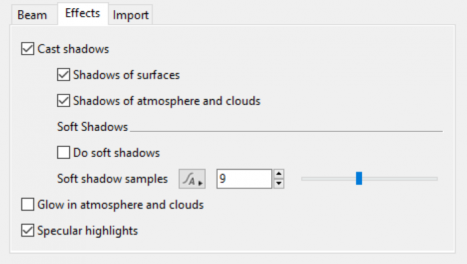
- Cast Shadows: When checked, the Spotlight will cast shadows. When unchecked, it will not cast shadows.
- Shadows of surfaces: When checked, the Spotlight casts shadows of surfaces. When unchecked, the spotlight will not cast shadows from an object's surfaces.
- Shadows of atmosphere and clouds: When checked, the Spotlight casts shadows for atmosphere and cloud layers. When unchecked, the spotlight will not cast shadows for cloud layers or the atmosphere.
- Do soft shadows: When checked and the Spotlight’s Aperture value is greater than 0, the Spotlight will soften the shadow edges according to the Soft shadow samples value.
- Glow in atmosphere and clouds: When checked a glow effect is applied to the atmosphere and clouds within the Spotlight beam.
- Specular highlights: When checked, diffuse and specular lighting for a surface illuminated by the Spotlight will be rendered. When unchecked, only diffuse lighting is rendered.
Import Tab[edit]
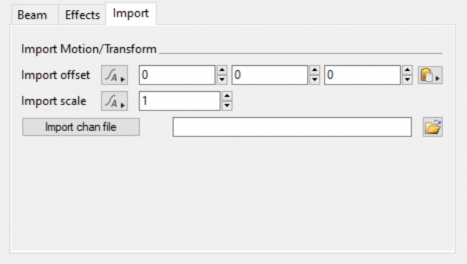
These parameters apply to .chan/.mov and FBX import.
- Import offset: This setting allows you to offset the positions imported from the file. As an example, you might want the positions imported from the file to be moved 10 metres in the X direction. To do that enter 10 for the X coordinate and import the file.
- Import scale: You can use this setting to scale values imported from the file.
- Import Chan file: This param specifies the file to be imported. When you a choose a new file you will be prompted to import the file. If you choose not to import it immediately you can click the Import chan File button to perform the import.
A single object or device in the node network which generates or modifies data and may accept input data or create output data or both, depending on its function. Nodes usually have their own settings which control the data they create or how they modify data passing through them. Nodes are connected together in a network to perform work in a network-based user interface. In Terragen 2 nodes are connected together to describe a scene.
