Difference between revisions of "Default Shader 4.5"
| Line 105: | Line 105: | ||
* <u>Beckmann TG 2</u> is available for legacy and backwards compatibility with projects created in older vesions of Terragen. This option is not as physically correct as the others. When roughness is high it overestimates reflections of environment/indirect light (ignores self shadowing) and underestimates reflections of direct lights. | * <u>Beckmann TG 2</u> is available for legacy and backwards compatibility with projects created in older vesions of Terragen. This option is not as physically correct as the others. When roughness is high it overestimates reflections of environment/indirect light (ignores self shadowing) and underestimates reflections of direct lights. | ||
| − | * <u>Beckmann TG 4.5</u> uses | + | * <u>Beckmann TG 4.5</u> uses the Beckmann microfacet distribution like Beckmann TG 2 but has some improvements to make it more physically correct. Reflected energy is more consistent between direct light and environment/indirect light. It also uses a fast approximation of multiple scattering when roughness is high, which reflects more light according to base colour (for metals) and Fresnel settings (for both metals and non-metals). This has the effect of increasing colour saturation in metals when roughness is high. For direct lights it uses a shadowing-masking function that produces a "rounder" falloff when roughness is high. |
| − | * <u>GGX</u> uses | + | * <u>GGX</u> uses the GGX microfacet distribution and shadowing-masking function. This produces a longer tail to highlights and more closely resembles a diffuse reflection when roughness is high. This makes it more predictable when using roughness or glossiness maps. Our implementation of GGX also uses a fast approximation of multiple scattering when roughness is high, which reflects more light according to base colour (for metals) and Fresnel settings (for both metals and non-metals). This has the effect of increasing colour saturation in metals when roughness is high. GGX is the default option for new projects, but existing projects will load with their own model for backwards compatibility. |
</ul> | </ul> | ||
Revision as of 02:21, 16 December 2020
Contents
Overview[edit]
The Default shader is primarily designed for use with imported 3D assets from third-party applications. It is an extremely flexible shader capable of defining new surface materials or allowing you to assign existing texture maps to its attributes. With the release of Terragen 4.5 the shader’s settings, tabs and layout has been updated to maximize compatibility with Metallic / Roughess, and Specular / Glossiness workflows based on the Physically Based Rendering (PBR) model.
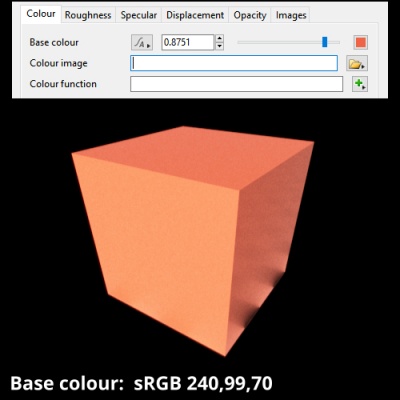
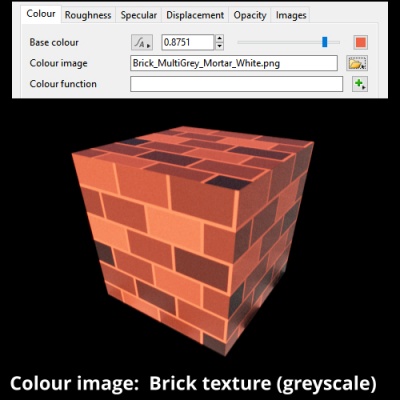
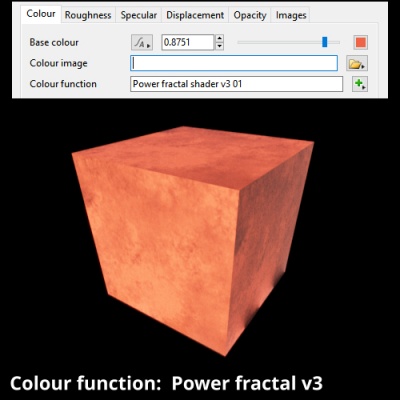
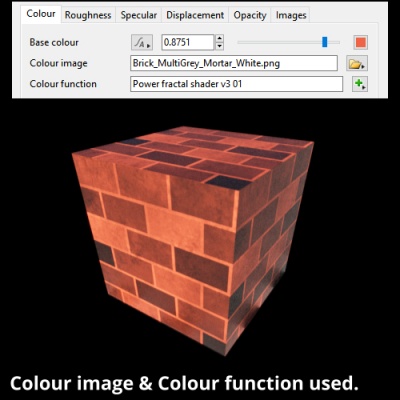
Just as in prior versions of the shader, many of its common settings are grouped together, such as the “Base colour”, “Colour image” and “Colour function” settings. It’s important to understand that when settings are grouped together like this their colour component values are multiplied with each other to determine the final colour as in the example below.
When applying texture maps containing “final colour” values for an asset, such as a uv mapped character, a hero object, or Megascans object, the “Base colour” value should be set to 1.0. If you wish to darken or tint the “final colour” values you can change the “Base colour” as needed.
Colour Tab[edit]
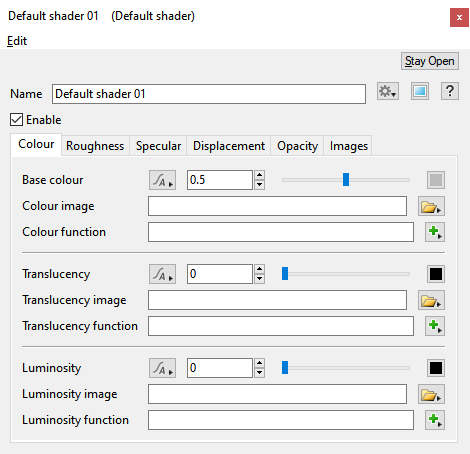
Base colour
For a Metallic/Roughness workflow you can use the base colour to define the colour (albedo) of both metals and non-metals. Metallic surfaces have specular reflections that use the base colour as their main reflectivity colour. Non-metallic surfaces have a diffuse base layer that uses the base colour as its diffuse reflectivity.
For a Specular/Glossiness workflow, use the base colour to set the diffuse colour only. In this workflow the base colour should be set to 0.0 for raw metallic surfaces that have no diffuse reflectivity. For non-metal surfaces, including dirt and grime that may rest upon a raw metal surface, the colour values represent the colour of the diffuse material.
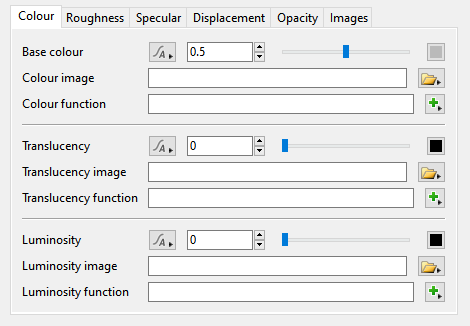
- Base colour: This setting provides access to the Colour Picker window in order to specify a base colour for the surface. The adjustment slider can be used to modify the brightness of the colour value.
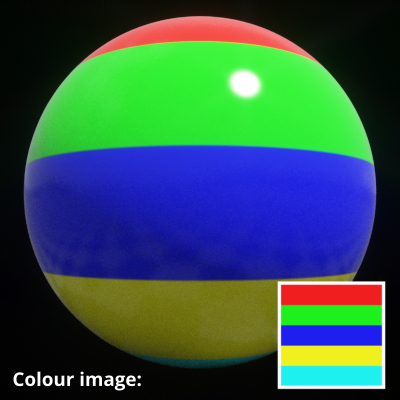
- Colour image: This setting allows you to assign an image map to the surface’s colour channels. The image map is projected onto the surface as defined on the Images tab.
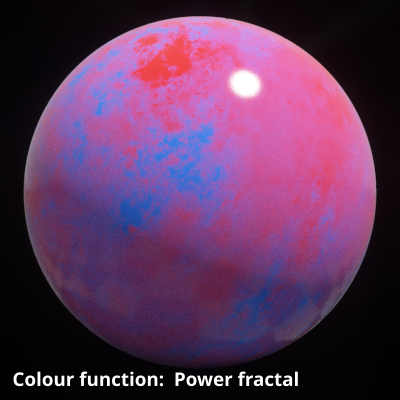
- Colour function: This setting allows you to assign shader or function nodes to the surface’s colour channels.
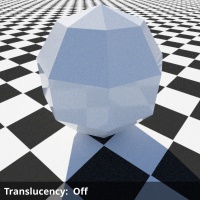
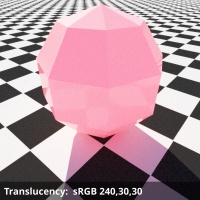
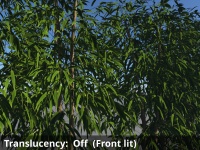
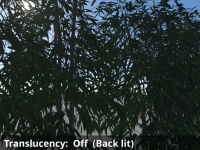
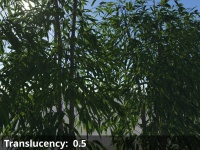
Translucency
Translucency is the effect of light filtering through a surface. For example you might use translucency on a leaf texture to simulate light passing through it. It's not the same thing as opacity and is explained in more detail here. The three settings of the translucency group are multiplied together to determine the final amount of translucency of the surface.
- Translucency: This setting specifies the amount of translucency a surface has, and acts as a multiplier to the "Translucency image" and "Translucency function" settings. Translucency is the effect of light filtering through a surface, and more information may be found here.
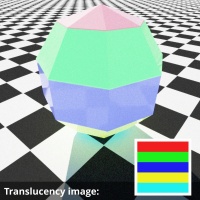
- Translucency image: This setting allows you to assign an image map to control the amount and location of translucency on the surface. The image map is projected onto the surface as defined on the Images tab.
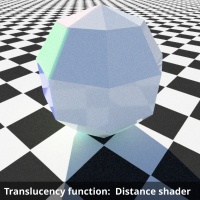
- Translucency function: This setting allows you to assign shader or function nodes to control the amount and location of translucency on the surface.
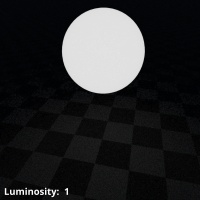
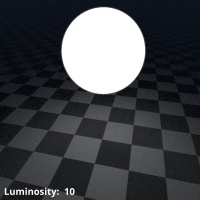
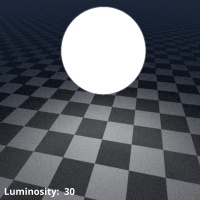
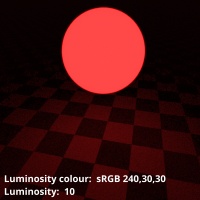
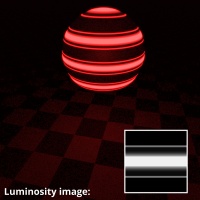
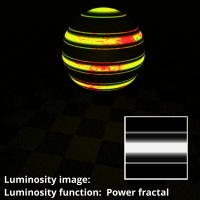
Luminosity
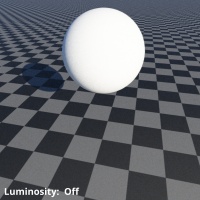
Luminosity is the effect of a surface’s self illumination or glow. See the Surface Layer - Luminosity Tab page for a more detailed information about using the luminosity settings.
- Luminosity: This setting provides access to the Colour Picker window in order to specify a colour or amount (greyscale) of luminosity for the surface. The adjustment slider can be used to adjust the level of luminosity.
- Luminosity image: This setting allows you to assign an image map to control the amount and location of luminosity on the surface. The image map is projected onto the surface as defined on the Images tab.
- Luminosity function: This setting allows you to assign shader or function nodes to control the amount and location of luminosity on the surface.
Roughness Tab[edit]
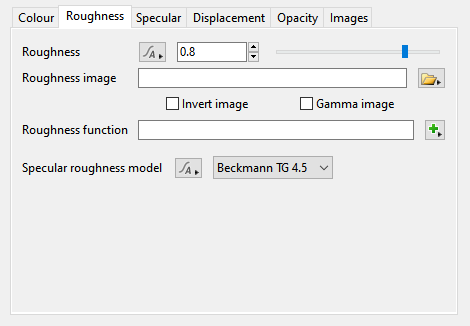
Settings on this tab control the smoothness of a surface. All the settings are multiplied together and evaluated to determine the final roughness value. When the combined values evaluate to 0 a perfectly smooth surface will result and reflections will be sharp and mirror-like. Rougher surfaces are the result of values closer to 1.0 and will make reflections appear more blurry.
Settings:
- Roughness: This value should be set to 0 for perfectly smooth surfaces and up to 1.0 for rougher surfaces.
- Roughness image: This setting allows you to specify an image file to use for roughness.
- Invert image: When enabled, or checked, the image assigned to the “Roughness image” is inverted, i.e. black becomes white.
- Gamma image: When enabled, or checked, assumes the image assigned to the “Roughness image” is in sRGB colour space and needs to be converted to linear colour space.
- Roughness function: This setting allows you to assign shader or function nodes to determine the surface’s roughness value.
- Specular roughness model: This popup menu has three options for choosing the type of specular roughness model used on the surface.
- Beckmann TG 2 is available for legacy and backwards compatibility with projects created in older vesions of Terragen. This option is not as physically correct as the others. When roughness is high it overestimates reflections of environment/indirect light (ignores self shadowing) and underestimates reflections of direct lights.
- Beckmann TG 4.5 uses the Beckmann microfacet distribution like Beckmann TG 2 but has some improvements to make it more physically correct. Reflected energy is more consistent between direct light and environment/indirect light. It also uses a fast approximation of multiple scattering when roughness is high, which reflects more light according to base colour (for metals) and Fresnel settings (for both metals and non-metals). This has the effect of increasing colour saturation in metals when roughness is high. For direct lights it uses a shadowing-masking function that produces a "rounder" falloff when roughness is high.
- GGX uses the GGX microfacet distribution and shadowing-masking function. This produces a longer tail to highlights and more closely resembles a diffuse reflection when roughness is high. This makes it more predictable when using roughness or glossiness maps. Our implementation of GGX also uses a fast approximation of multiple scattering when roughness is high, which reflects more light according to base colour (for metals) and Fresnel settings (for both metals and non-metals). This has the effect of increasing colour saturation in metals when roughness is high. GGX is the default option for new projects, but existing projects will load with their own model for backwards compatibility.
Specular Tab[edit]
Metalness
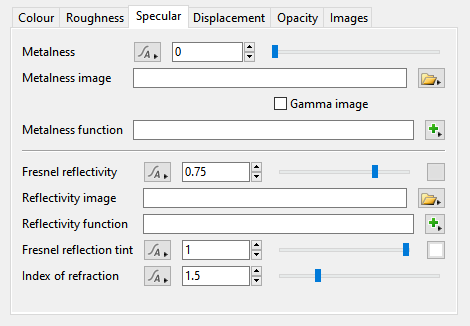
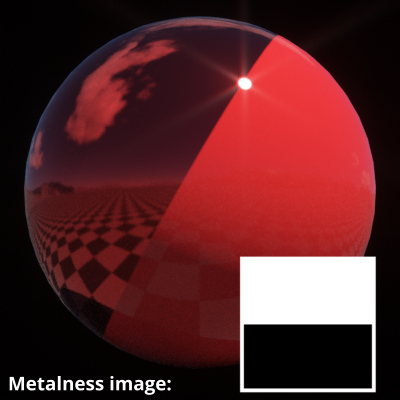
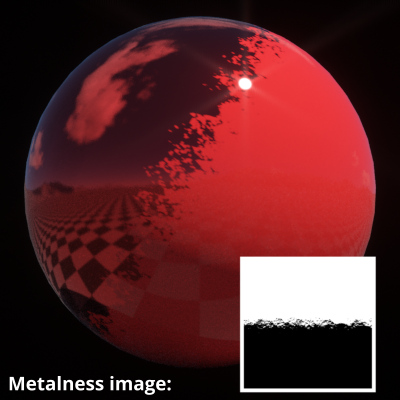
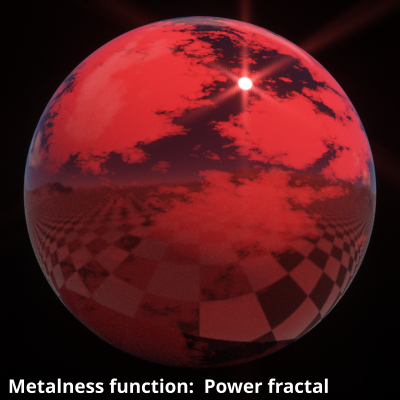
Generally speaking, a surface is either metal or it’s not. The combined (multiplied) values of the “Metalness”, “Metalness image”, “Gamma image” and “Metalness function” settings should always evaluate to 1.0 for a metal material or 0.0 for a non-metal. Note, greyscale values can be used to denote where non-metal materials, such as dirt or grime occur on the metal surface.
- Metalness: This value should be set to 1.0 for metal surfaces or 0 for non-metallic surfaces.
- Metalness image: This setting allows you to specify an image file to use for metalness. White pixel values (255,255,255) in sRGB colour space should be used for metal and black pixel values (0,0,0) for non-metal.
- Gamma image: When enabled, or checked, assumes the image assigned to the “Metalness image” is in sRGB colour space and needs to be converted to linear colour space.
- Metalness function: This setting allows you to assign shader or function nodes to determine the surface’s metalness value. A value of 1.0 (sRGB 255,255,255) indicates a metal material and a value of 0 indicates a non-metal material.
Fresnel
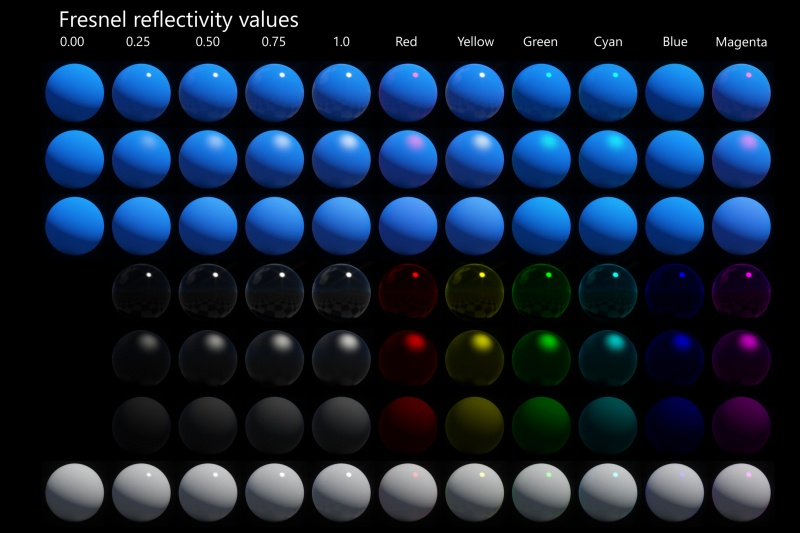
The Fresnel effect states that the amount of light reflected from a surface depends on the viewing angle at which it is perceived. The classic example of this is the reflections on a body of water. Looking straight down towards your feet, you can see directly through the water to any terrain beneath. This would be considered zero degrees or F0. Gazing outwards towards the horizon, perpendicular to the water surface, you see the reflected sky more intensely on the surface of the water. In the PBR shading model a reflection becomes almost 100% at an incident angle of ninety degrees.
- Fresnel reflectivity: This sets the intensity of the Fresnel effect. In Terragen 4.5 this defaults to 0.75.
- Reflectivity image: This setting allows you to specify an image file to use for the intensity of the Fresnel effect and where it is visible on the surface.
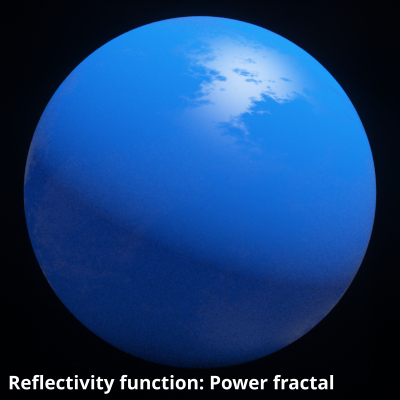
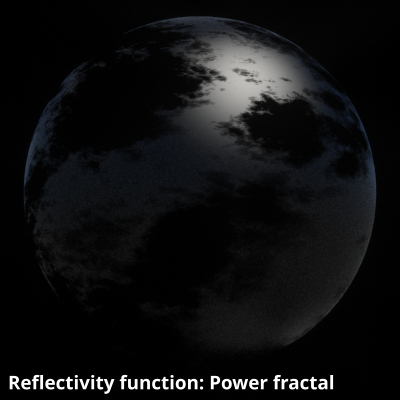
- Reflectivity function: This setting allows you to assign shader or function nodes to control the intensity of the Fresnel effect and where it is visible on the surface.
- Fresnel reflection tint: This setting allows you to tint the colour of the reflected light in the area defined by the Fresnel effect.
- Index of refraction: When a ray of light passes through one medium to another, such as through a glass vessel into water, it changes direction. The IOR is a way of optically measuring this phenomenon, for example water has an IOR of 1.33 and glass has an IOR of 1.52. In Terragen 4 the IOR setting controls the reflectivity curve. Higher values make the reflections more visible.
Displacement Tab[edit]
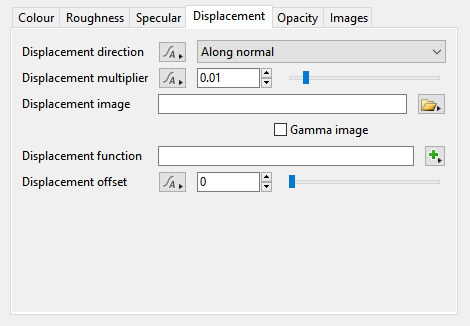
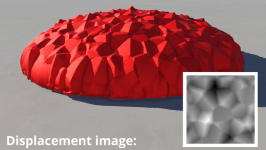
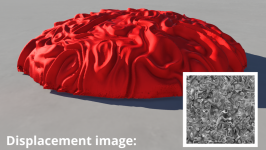
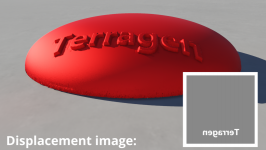
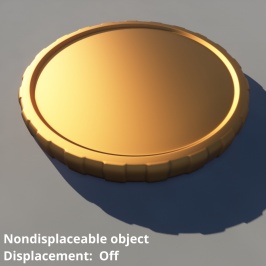
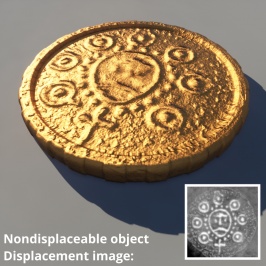
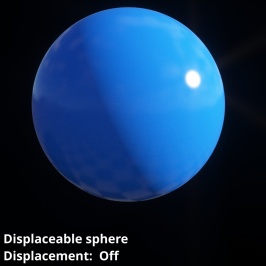
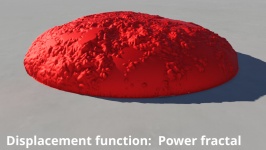
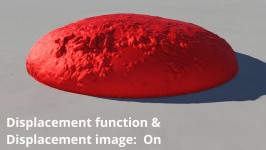
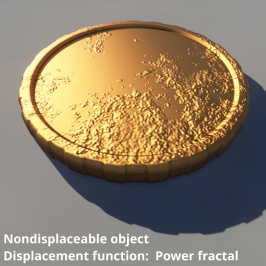
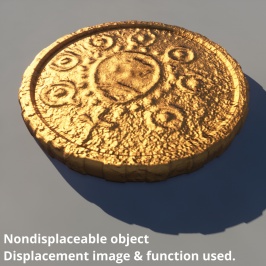
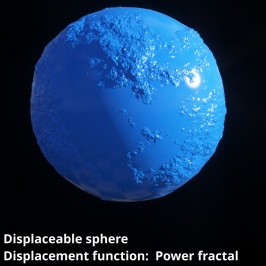
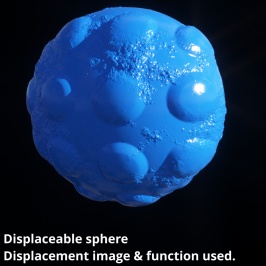
The settings found under this tab allow you to control the three dimensional displacement of the surface. Displacement is only applied if an image is specified in the “Displacement image” setting, or shader or function nodes assigned to the “Displacement function” setting.
Settings:
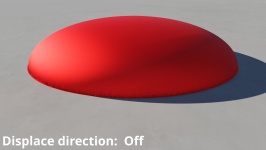
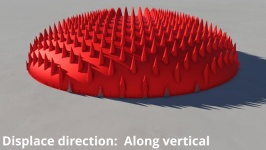
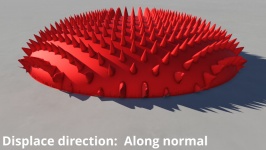
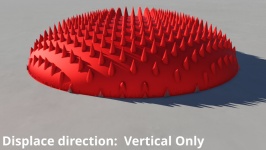
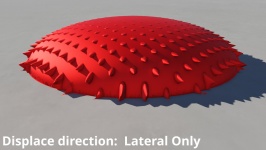
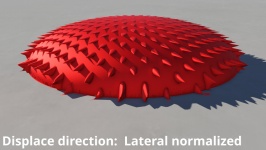
- Displacement direction: This popup menu has 5 options which let you choose the direction the displacement is applied in. Options that indicate “(requires computed normal)” require a Compute Terrain or Compute Normal node to be connected somewhere above the Default shader node in the network to work properly. These three options are primarily used to displace terrain. For displacing 3D objects, such as an imported geometry in OBJ format, it is recommended to use the "Along normal" option.
- Along vertical: Displacement happens along the normal of the underlying planet or 3D object.
- Along normal: Displacement happens along the current surface normal.
- Vertical only (requires computed normal): Displacement only happens along the normal of the underlying planet or 3D object. The displacement is scaled by the difference between the object normal and the surface normal. Displacement is reduced as the angle between the normals approaches 90°.
- Lateral only (requires computed normal): Displacement only occurs in the lateral plane, that is perpendicular to the normal of the underlying object.
- Lateral normalized (requires computed normal): This is the same as “Lateral only” but the normal is normalised, that is scaled so it has a length of 1.
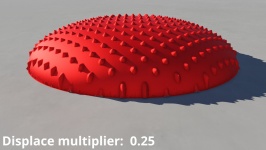
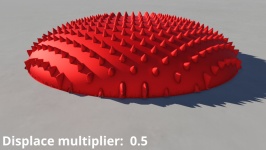
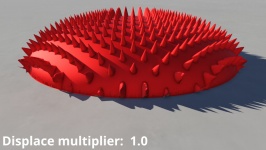
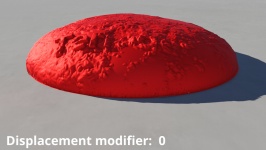
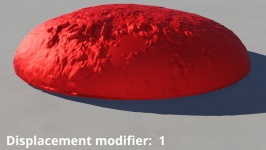
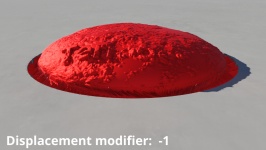
- Displacement multiplier: This multiplies the displacement values coming from the "Displacement function" input. A value of 1 leaves the incoming values unchanged. A value of 2 would make the incoming values twice as large. A value of 0.5 would make them half as large. Negative values will invert the displacement.
- Displacement image: This setting allows you to specify an image file to use for displacement. The luminance of the image pixels is used to generate displacement.
- Gamma image: When enabled, or checked, assumes the image assigned to the “Displacement image” is in sRGB colour space and needs to be converted to linear colour space.
- Displacement function: This setting allows you to assign shader or function nodes to use as displacement for the surface.
- Displacement offset: This value is added to incoming displacement values after they are multiplied by the “Displacement multiplier” setting. This creates the effect of offsetting the displacement by a set amount along the “Displacement direction”. Positive values push the displacement out so it looks almost as if it was sitting on a plinth. Negative values will sink the displacement back into the surface. It doesn't reverse the displacement, it's more like creating a hole in the surface and then applying the displacement to the bottom of the hole.
Opacity Tab[edit]
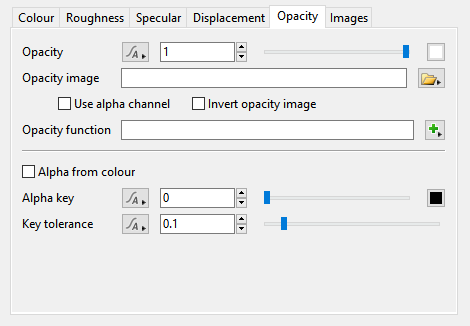
The Opacity tab has settings which effect the opacity of the shader. It might help to think of opacity as being the opposite of transparency.
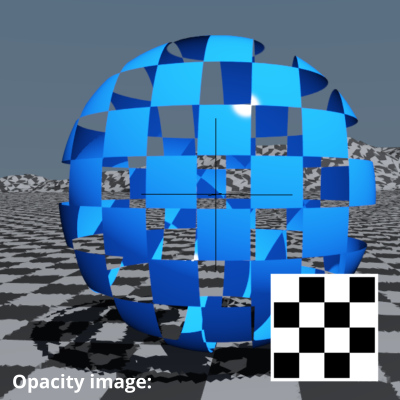
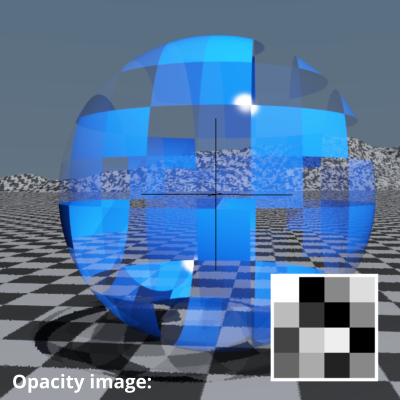
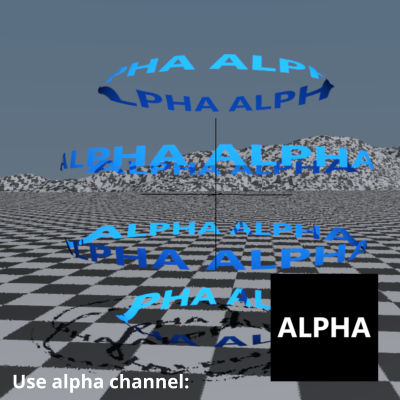
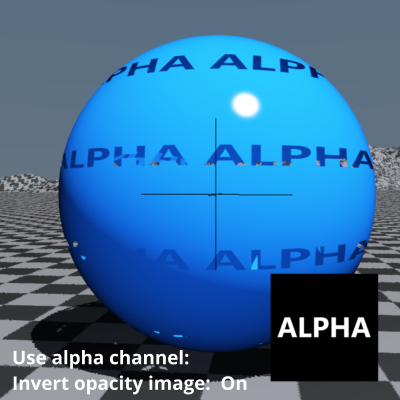
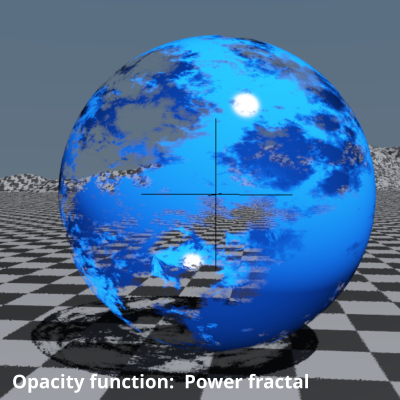
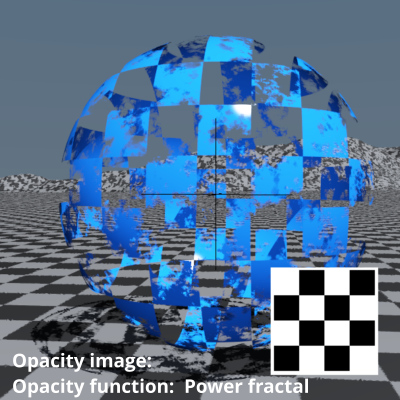
In the example images below, the 3D Preview pane's RTP mode has been enabled in order to illustrate the Opacity settings. For renders, Opacity is currently limited to either an on or off state.
Settings:
- Opacity: This sets the overall opacity of the shader. A value of 1 means the shader is fully opaque. A value of 0 means the image is fully transparent.
- Opacity image: This setting allows you to specify an image file to use for opacity. The luminance of the image pixels is used to determine the level of opacity.
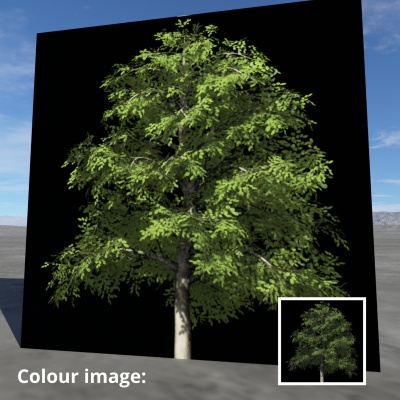
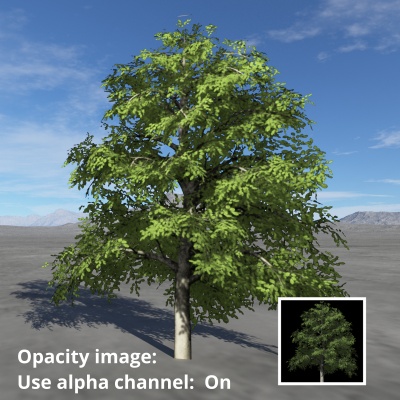
- Use alpha channel: When enabled, or checked, the alpha channel from the specified image file will be used for opacity rather than the colour channels.
- Invert opacity image: When enabled, or checked, the image assigned to the “Opacity image” is inverted, i.e. black becomes white.
- Opacity function: This setting allows you to assign shader or function nodes to determine a surface’s level of opacity.
- Alpha from colour: When enabled, or checked, the level of opacity is based on the colours from the “Colour image” and “Colour function” that match the “Alpha key” colour and “Key tolerance” settings. This may be useful if you don't have a dedicated opacity map or alpha channel.
- Alpha key: This setting determines the colour used to generate the level of opacity. Colour values from the “Colour image” and “Colour function” that match this value will create an opacity value of 0. For example, if you have a leaf texture on a solid coloured background but don't have an alpha channel or opacity map, you could set the "Alpha key" to the background colour.
- Key tolerance: This setting provides a threshold by which you can expand the colour chosen in the “Alpha key” setting to include similar shades of colour.
Images Tab[edit]
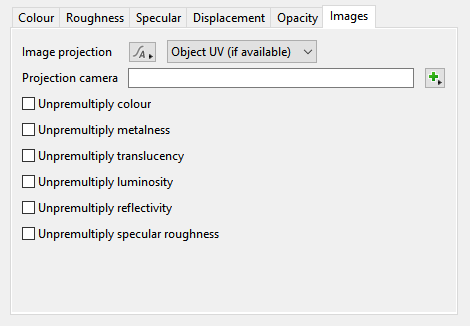
This tab contains the global settings for any image assigned to the settings of this shader. All images use the same global settings settings, in other words if an object has uv coordinates and the “Image projection” is set to “Object UV (if available)” then all images used within this shader will be projected onto the object’s uv coordinates. If further adjustments are needed, you can apply a “Transform input” shader downstream of the Default shader node.
Settings:
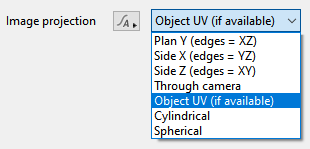
- Image projection: This popup menu has seven options pertaining to how the images are projected or applied by the shader. All of the images used by the shader are projected according to this parameter.
- Plan Y (edges = XZ): Images are projected vertically along the Y axis in world space and images are tiled to 1 metre in scale. To adjust the scale of the image, add a “Transform input” shader node downstream of the Default shader node.
- Side X (edges = YZ): Images are projected horizontally along the X axis in world space and images are tiled to 1 metre in scale. To adjust the scale of the image, add a “Transform input” shader node downstream of the Default shader node.
- Side Z (edges = XY): Images are projected horizontally along the Z axis. in world space and images are tiled to 1 metre in scale. To adjust the scale of the image, add a “Transform input” shader node downstream of the Default shader node.
- Through camera: Images are projected through the camera specified in the “Projection camera” setting.
- Object UV (if available): Images are mapped using the 3D object’s UV coordinates, if they're available.
- Cylindrical: Images are projected from a virtual cylinder around the object towards the central axis of the cylinder.
- Spherical:
- Projection camera: The camera assigned to this setting is used for the “Through camera” image projection. If no camera is specified the camera rendering the scene is used.
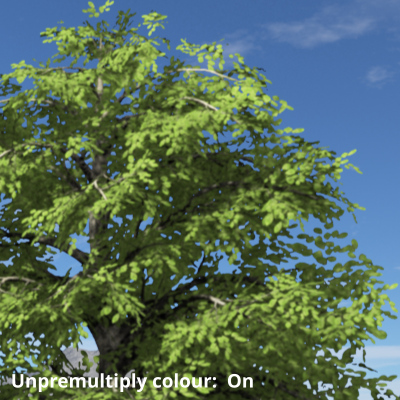
The Unpremultiply checkboxes below correspond to the image settings. For example, the Unpremultiply colour checkbox applies to the “Colour image” setting on the Colour tab. When enabled, or checked, the image is unpremultiplied. Some images use premultiplied alpha channels and may give incorrect results if they're not unpremultiplied. If an image doesn't have an alpha channel you don't need to enable these checkboxes
- Unpremultiply colour: When enabled, or checked, the image assigned to the "Colour image" setting on the Colour tab is unpremultiplied.
- Unpremultiply metalness: When enabled, or checked, the image assigned to the "Metalness image" setting on the Specular tab is unpremultiplied.
- Unpremultiply translucency: When enabled, or checked, the image assigned to the "Translucency image" setting on the Colour tab is unpremultiplied.
- Unpremultiply luminosity: When enabled, or checked, the image assigned to the "Luminosity image" setting on the Colour tab is unpremultiplied.
- Unpremultiply reflectivity: When enabled, or checked, the image assigned to the "Reflectivity image" setting on the Specular tab is unpremultiplied.
- Unpremultiply roughness: When enabled, or checked, the image assigned to the "Roughness image" setting on the Roughness tab is unpremultiplied.
A shader is a program or set of instructions used in 3D computer graphics to determine the final surface properties of an object or image. This can include arbitrarily complex descriptions of light absorption and diffusion, texture mapping, reflection and refraction, shadowing, surface displacement and post-processing effects. In Terragen 2 shaders are used to construct and modify almost every element of a scene.
A single element of an image which describes values for color and/or intensity, depending on the color system which the image uses. Groups of ordered pixels together form a raster image.
Literally, to change the position of something. In graphics terminology to displace a surface is to modify its geometric (3D) structure using reference data of some kind. For example, a grayscale image might be taken as input, with black areas indicating no displacement of the surface, and white indicating maximum displacement. In Terragen 2 displacement is used to create all terrain by taking heightfield or procedural data as input and using it to displace the normally flat sphere of the planet.
Literally, to change the position of something. In graphics terminology to displace a surface is to modify its geometric (3D) structure using reference data of some kind. For example, a grayscale image might be taken as input, with black areas indicating no displacement of the surface, and white indicating maximum displacement. In Terragen 2 displacement is used to create all terrain by taking heightfield or procedural data as input and using it to displace the normally flat sphere of the planet.
This is essentially the brightness of the colour. Terragen converts RGB colours to greyscale by taking the luminance of the colour.
A single object or device in the node network which generates or modifies data and may accept input data or create output data or both, depending on its function. Nodes usually have their own settings which control the data they create or how they modify data passing through them. Nodes are connected together in a network to perform work in a network-based user interface. In Terragen 2 nodes are connected together to describe a scene.
A parameter is an individual setting in a node parameter view which controls some aspect of the node.
