Glass Shader
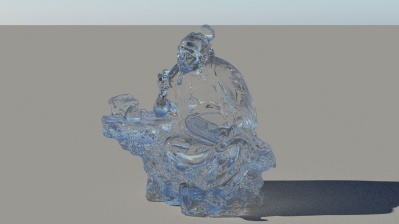
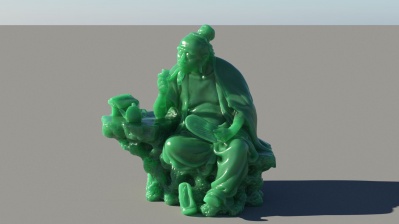
An imported OBJ object with the Glass Shader applied, rendered by the Path Tracer. With default settings (left), and subsurface scattering (right).
The Glass Shader is similar to the Water Shader, but it simplifies the UI by removing some water-specific features and it includes extra settings which are often needed for objects made of glass or other materials with a glass-like appearance.
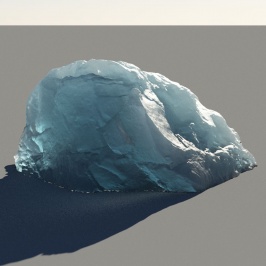
The Glass Shader can render subsurface scattering (SSS) which makes it useful for a wide range of materials that have this effect. Ice, smoky glass, ceramic and skin are examples of materials which have SSS. When using SSS, the results are best when rendering with Path Tracing.
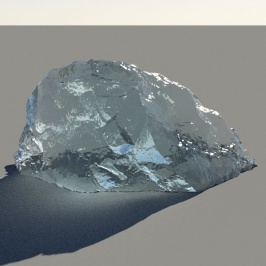
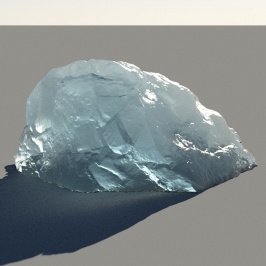
An object with the Glass Shader applied, rendered by the Path Tracer.
Main Tab[edit]
Settings
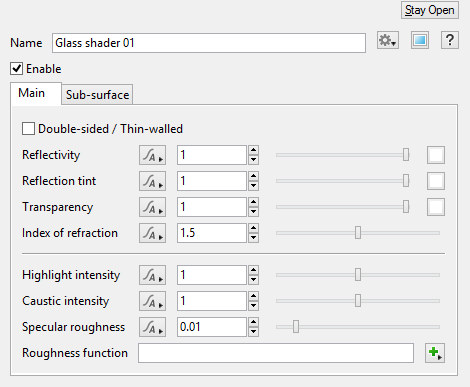
- Double-sided / Thin-walled: This is intended to be used on open objects that don't have a far side to close the volume. For example, if you are rendering a window that is represented by a single surface, not two, you should turn this ON. It has the name "double-sided" because it renders thin surfaces as though they are both sides of the object. It has the following effects:
- Prevents refraction. Light passes through the glass in a straight line.
- Prevents distance-based absorption and subsurface scattering. Rays passing through the surface exit the sub-surface medium immediately.
- With path tracer in v4.4 and above: Approximates a couple of "virtual" internal reflections with negligible ray length to simulate a thin pane of glass.
- Reflectivity: The ability of the surface to reflect light at glancing angles when roughness is low. At glancing angles this proportion is also removed from the transmitted (refracted) light so that it respects laws of energy conservation. In other words, reflectivity controls the blend between reflections and refractions at glancing angles when roughness is low.
- Reflection tint: A multiplier for the light that is reflected after reflectivity has been calculated. It does not affect the blend between reflections and transmissions, it simply changes the brightness or colour of the reflections as though there is an absorbent material on the surface.
- Index of refraction: This is a physical property of the surface that affects how reflectivity is calculated, not just refraction. Index of refraction (IOR) affects the reflectivity at perpendicular angles or on rough surfaces. It also affects how much the light is refracted (bent) when it is transmitted into the object. IOR should be at least 1. When the IOR is 1, no reflection occurs and light is fully transmitted into the object without being refracted. The higher the IOR, the more light is reflected, the less light is transmitted and the more refraction occurs on the transmitted light. For water this should be about 1.33 and for glass it should be between 1.45 and 1.9 (usually around 1.5). IOR is rarely higher than 4.0 in real materials. However, you might want to go higher than this to simulate metals. A higher index of refraction can be used to produce higher reflectivity at perpendicular angles, but this is essentially just a cheat and is not a physically-based way to render metal.
- Highlight intensity: A multiplier for the brightness of reflected light from direct light sources only (e.g. Sunlight, Light Source, Spotlight), not indirect reflections. In Terragen 4.4 and above, this also affects the brightness of direct light sources when they're visibly refracted through the surface. For reflections, the only correct value in a physically-based render is 1, but the specular reflection models are not perfect so it's reasonable to change this slightly.
- Caustic intensity: In the real world, light reflecting off or refracting through shiny objects can cause caustics to form on surrounding objects. In the Glass Shader, the term "caustics" is a bit more specific. It means only those caustics that are reflection/refractions of direct light sources (e.g. the sun), and only those that land on diffuse surfaces or interact with rough reflections/refractions. "Caustic intensity" controls the brightness of the caustics that this Glass Shader projects onto other objects. Caustics are difficult to sample, so they create unwanted noise in path traced renders and flickering in anything that caches lighting. Terragen tries to improve this by only roughly approximates caustics so they are easier to sample. Despite this they can still be difficult to render well, so "Caustic intensity" lets you control their intensity or turn them off entirely.
- Roughness / Specular roughness: The microscopic (or subpixel) roughness of the surface. This roughness causes reflections and refractions to look blurry or diffuse, and it changes the apparent size of highlights from bright sources (due to over-exposure). When rendering with the Standard Renderer the roughness only affects reflections/refractions of direct light sources such as the sun. When rendering with the Path Tracer the roughness is applied more correctly, affecting the blurriness of all kinds of reflections and refractions from the surface.
Examples of roughness affecting not just reflections but also refractions, on an object with subsurface scattering.
- Roughness function: Connection to a shader, shader network or function network that acts as multiplier to the roughness value. For example, this could be an Image Map Shader that loads a roughness map (or an inverted glossiness map).
Sub-surface Tab[edit]
Settings
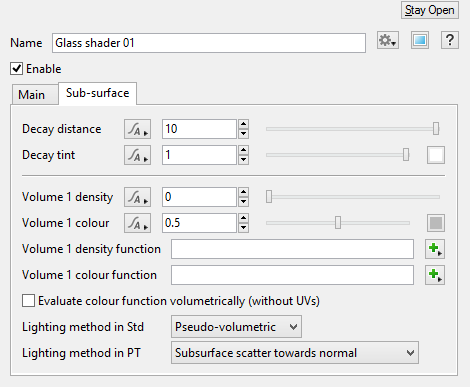
- Decay distance: Light traveling through the glass is absorbed using an exponential decay. "Decay distance" is how far (in metres) the light will travel before about 37% of its energy remains (if "Decay tint" is pure white). At twice the decay distance, only 14% of the light remains. Only 5% of the energy makes it to three times the decay distance. If "Decay tint" is anything other than pure white, light is absorbed at shorter distances than this.
- Decay tint: An RGB multiplier for the Decay distance. Mathematically it works by multiplying the decay distance separately for the red, green and blue components of the light, but the results are much more interesting. Intuitively you might think of it as the colour of the light that reaches the decay distance, but it can produce an interesting range of hues and saturations that depend on how far the light travels. For realistic results you might want to use pale colours because they automatically become richer where the light travels further than the decay distance.
Examples of "Decay distance" and "Decay tint". "Decay tint" is set to a pale red colour, the same colour in each example.
- Volume density: How "dense" the microscopic particles are which scatter light back out of the object as well as reduce the light passing through it. This produces the effect we call subsurface scattering (SSS). You might think of it as the amount of droplets in a cloud, the quantity of air bubbles in ice, or the proportion of milk in a cup of tea. This density is relative to the "Decay distance"; when Decay distance is short, the absolute density of scattering particles will be higher. It works this way so that the "Volume density" controls the balance of scattering in relation to absorption, making it easier to control the colour of the SSS effect with a wide variety of decay distances.
- Volume colour: The colour of the particles that scatter light back out of the object. This isn't exactly the albedo of the particles, it's the colour of the cumulative effect of multiple scattering (although that is only approximated).
Examples of "Volume density" and "Volume colour". "Volume colour" is set to a pale red colour. Only the density varies.
- Volume density function: Connection to a shader, shader network or function network that acts as multiplier to the density value. For example, this could be an Image Map Shader that loads a "cloudiness" map or "bubble density" map. This can provide a richer visual result than simply modulating the colour.
The tea-with-milk analogy is apt. Black tea mostly absorbs light without scattering it. It can be simulated with an orange-red decay tint. When milk is added it produces a light tan colour. The colour results from the balance (volume density) of the white milk (volume colour = white) to the tea (decay distance, decay tint = orange-red). If you use a volume density function you can also texture-map this balance, and this creates a rich spectrum of hues from only two colours. It is more visually interesting than just a linear mixture of the two colours.
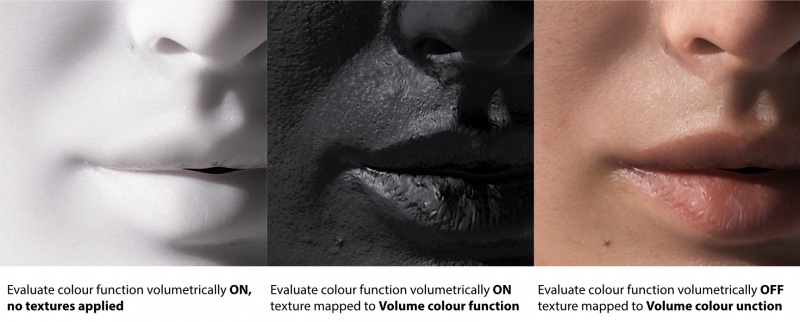
- Volume colour function: Connection to a shader, shader network or function network that acts as an RGB multiplier to the volume colour. For example, this could be an Image Map Shader that loads a subsurface scattering texture.
- Evaluate colour function volumetrically (without UVs):
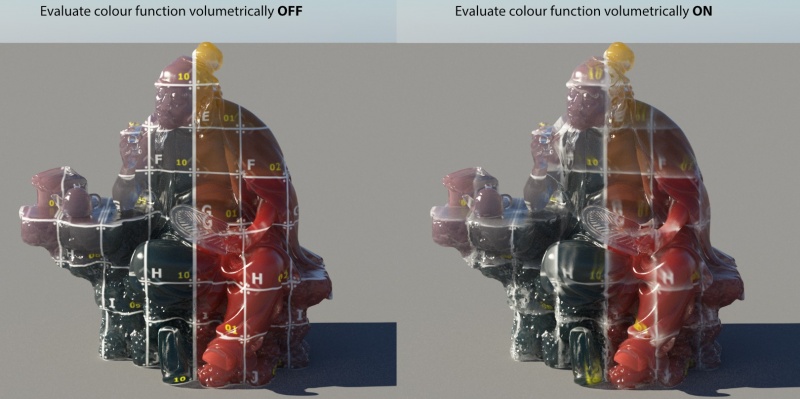
Two different settings of "Evaluate colour function volumetrically". In both examples the texture is projected along on the Z axis but they are evaluated differently by the renderer.
If the volume colour is driven by a UV-mapped texture, "Evaluate colour function volumetically" must be turned OFF to preserve the UVs.
- Lighting method in Std: The method used to simulate subsurface scattering when rendering with the Standard Renderer. This has only one mode called "Pseudo-volumetric".
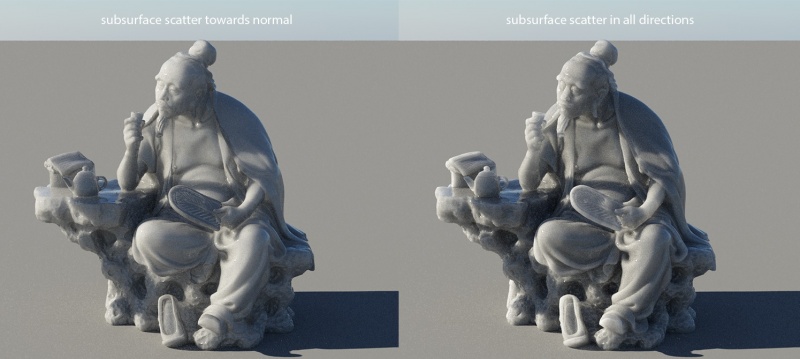
- Lighting method in PT: The method used to simulate subsurface scattering when rendering with the Path Tracer. It has 3 options:
- Hard surface approximation: A fast preview of the subsurface effects, approximated with diffuse lighting at the surface.
- Subsurface scatter towards normal: A reasonably fast approximation of SSS that is designed for rendering water, but is also good for simple, flat objects such as a table or a slab of marble where the edges are not seen. It may also be useful for a variety of objects where the decay distance is small compared to the curvature of the object.
- Subsurface scatter in all directions: The slowest option, this is designed to accurately scatter light through a closed object, especially when it is back-lit. Light passes more realistically through edges and thin parts of the object, and it may also create deeper shadows where appropriate.
See Also[edit]
A sample refers to a value or set of values at a point in time and/or space. The defining point of a sample is that it is a chosen value out of a continuous signal. In Terragen 2 it is usually a mathematical (procedural) function that is being sampled.
A shader is a program or set of instructions used in 3D computer graphics to determine the final surface properties of an object or image. This can include arbitrarily complex descriptions of light absorption and diffusion, texture mapping, reflection and refraction, shadowing, surface displacement and post-processing effects. In Terragen 2 shaders are used to construct and modify almost every element of a scene.
