With RPC, adding nodes to your Terragen project is simple. There’s just one catch: they tend to land all in the same spot, forcing you to untangle them in the interface. That is, until now…
The Remote Procedure Call (RPC) feature debuted in Terragen 4.6.31 introduced a new way to add nodes to a project. Behind the scenes, as each new node is created and added to the project, it is positioned in the UI at the current center of the Node Network view.
Generally speaking, when one or two nodes are added to the project in this manner, it’s easy enough to select the new nodes in the UI and move them where you want them to be.
But as some users have pointed out, when you add a lot of new nodes in this manner, it can be somewhat painful to have to select each node and reposition it to a more desirable location in the UI.
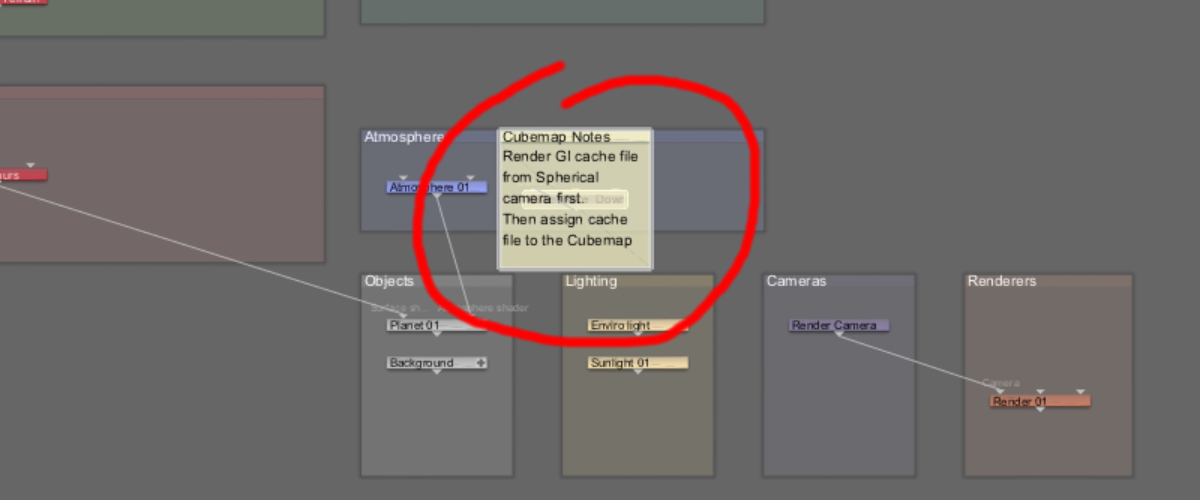
For example, the image above shows the results after running the Cubemap Cameras script. The script adds six new Camera nodes, a Render node and a Note node to the project all at once. As you can see, the newly created nodes are centered in the Node Network view and stacked on top of one another.
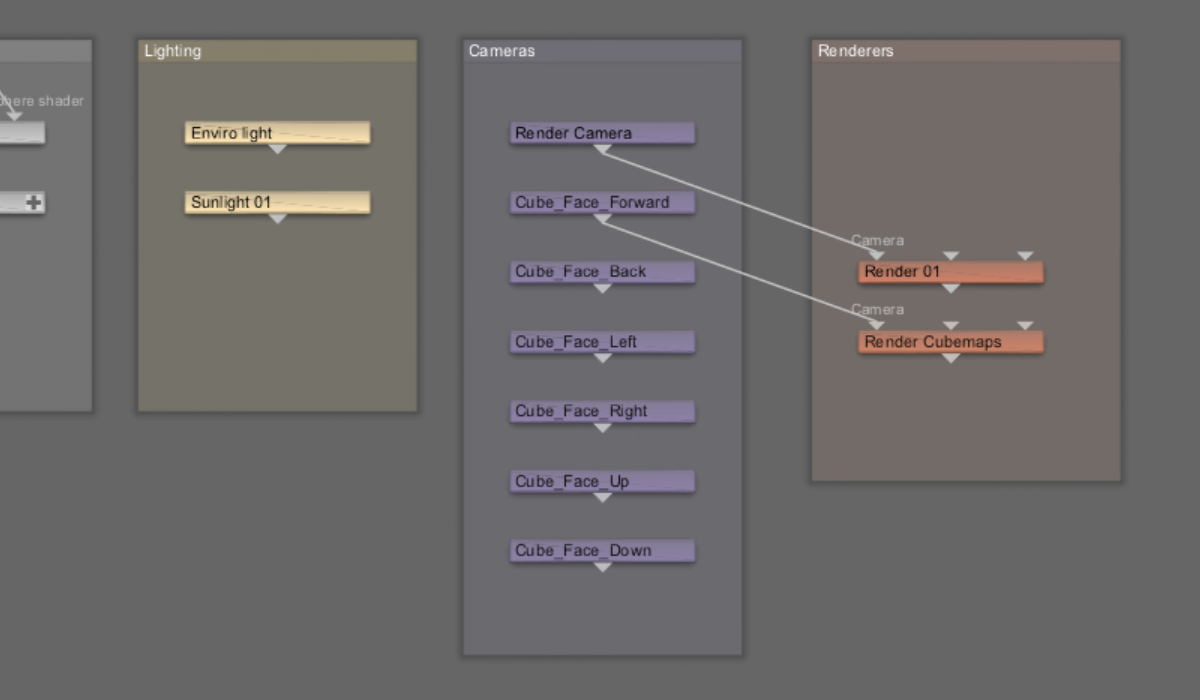
Wouldn’t it be great if all the Camera nodes were positioned in the existing Camera group, and the Render node in Render group, and perhaps the Note node could be positioned somewhere in the UI that didn’t overlap the other nodes? Sort of like this…
To help address this issue, we’ve included a new script to the Redmaw TG Toolkit called node_network_layout.py. This script is not run by itself, rather it gets imported into another script , like the Cubemap Cameras script, and is run whenever a new node is created. The script attempts to position the newly created node more logically in the Node Network view.
Let’s take a look at a simple coding example to see how the script can help us out.
The code block below adds one camera to the current Terragen project and assigns it to the Camera group.
import terragen_rpc as tg
project = tg.root()
new_camera = tg.create_child(project, "camera")
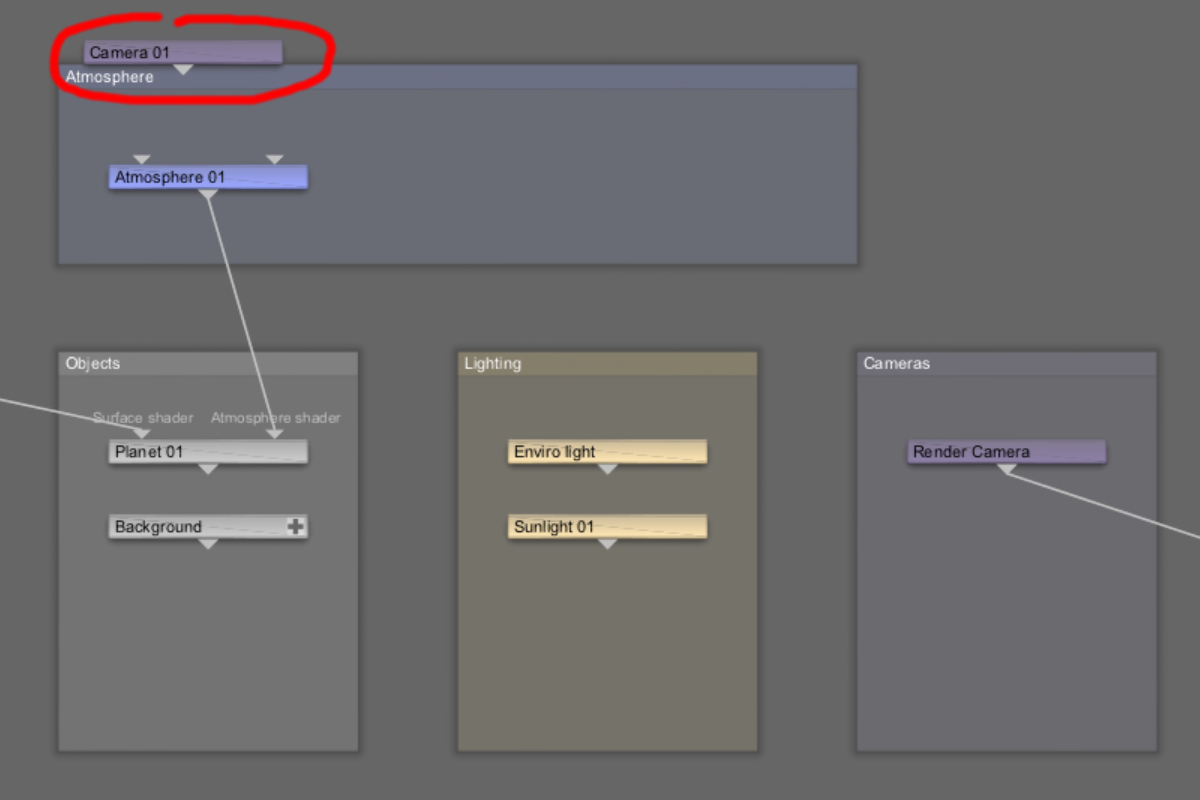
new_camera.set_param("gui_group", "Cameras")The image below shows the result of running the block of code. A new camera, Camera 01, has been added to the scene, but it is not positioned within the Cameras group like the Render Camera is. This is because the RPC process positioned the node in the center of the Node Network view.
Now, let’s import the node_network_layout.py script (or module) into the code block and rerun it.
import terragen_rpc as tg
from node_network_layout import auto_position_node
project = tg.root()
new_camera = tg.create_child(project, "camera")
new_camera.set_param("gui_group", "Cameras")
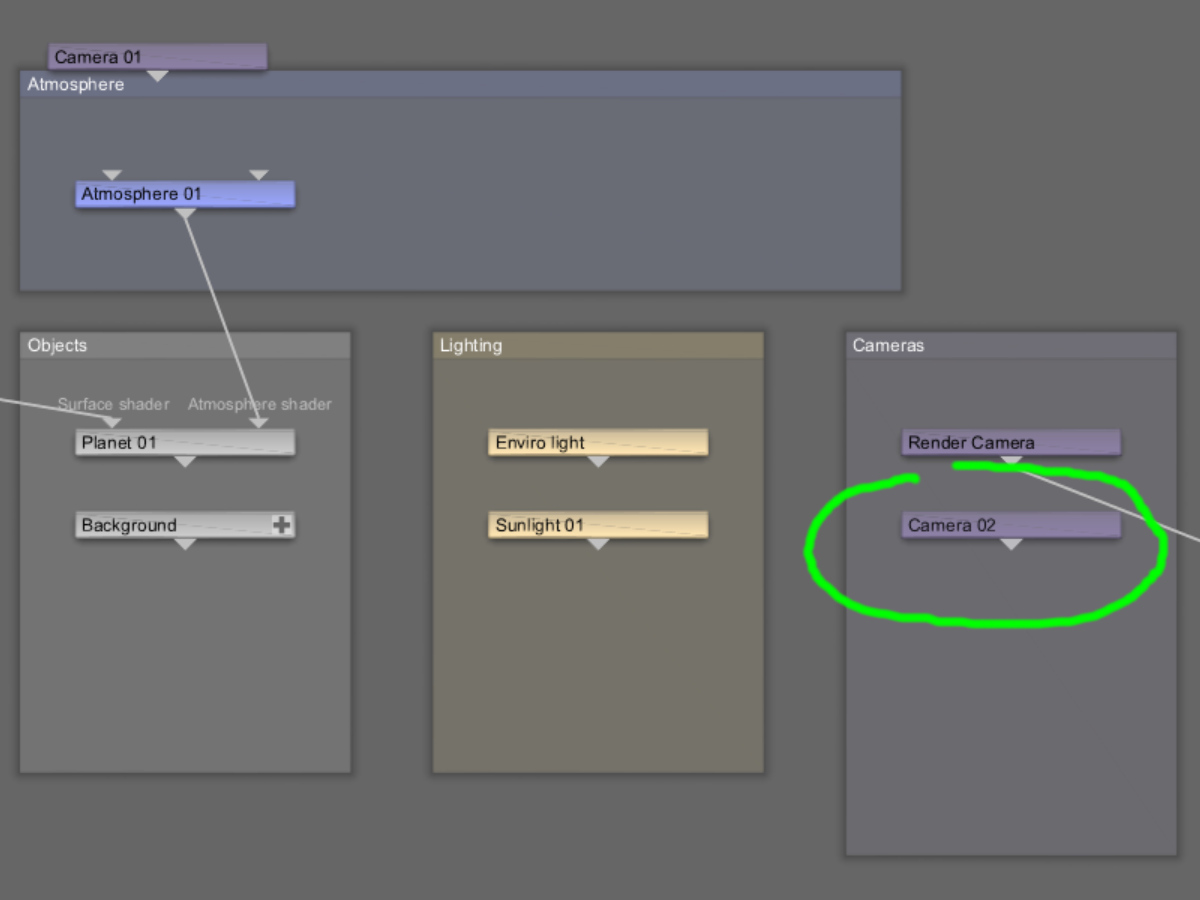
auto_position_node(new_camera, "camera")The image below shows the result. The newly created camera, Camera 02, is properly positioned in the Cameras group.
Let’s break down how the example code block is using the node_network_layout module in order to properly position the camera node in the UI.
The second line of code imports the “auto_position_node” function from the node_network_layout.py file into our example block of code. This means that we can “call” on that function anywhere in our block of code.
from node_network_layout import auto_position_nodeThe last line of code calls the function and passes two arguments to it. An “argument” is information or data that the function needs. The first argument, new_camera, identifies the node we want to position in the UI. The second argument “camera” tells the function what type of node it is.
auto_position_node(new_camera, "camera")Behind the scenes, the node_network_layout script does a few things, like determining if the node belongs to a specific group, and if that group exists. It looks to see what nodes already exist in the Node Network and where they’re positioned. Based on all that, it finds a place to position the newly created node somewhere more suitable than the center of the Node Network view and stacked on top of the previous node.
There’s only one caveat. In order to see the newly created nodes in their new positions, you have to manually refresh Terragen’s UI. Typically, this means clicking on one of the toolbar buttons, like “Node Network”, which will redraw the UI and show the nodes in their update positions. Future versions of the RPC feature will address having to manually refresh the UI.
In the short term, we hope that you find using this module in your scripts will help alleviate some of the headache associated with manually repositioning the newly created nodes added via the RPC method.
The script is included with the Redmaw TG Toolkit which you’ll find by clicking here.
Happy Coding!