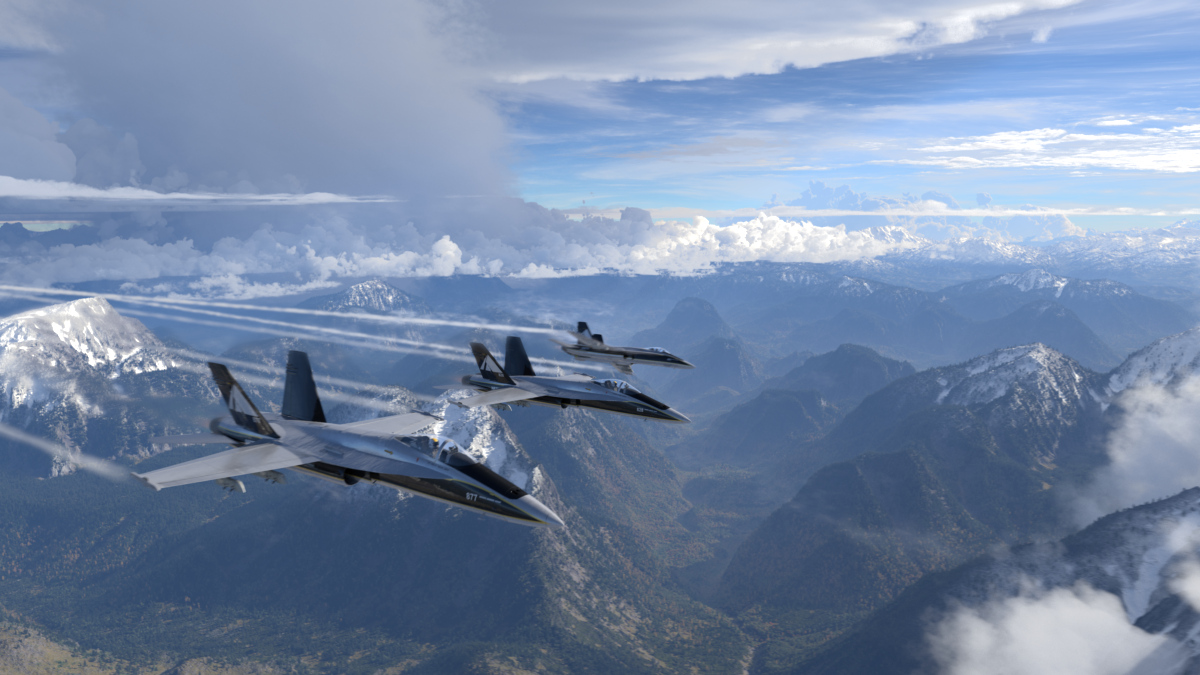
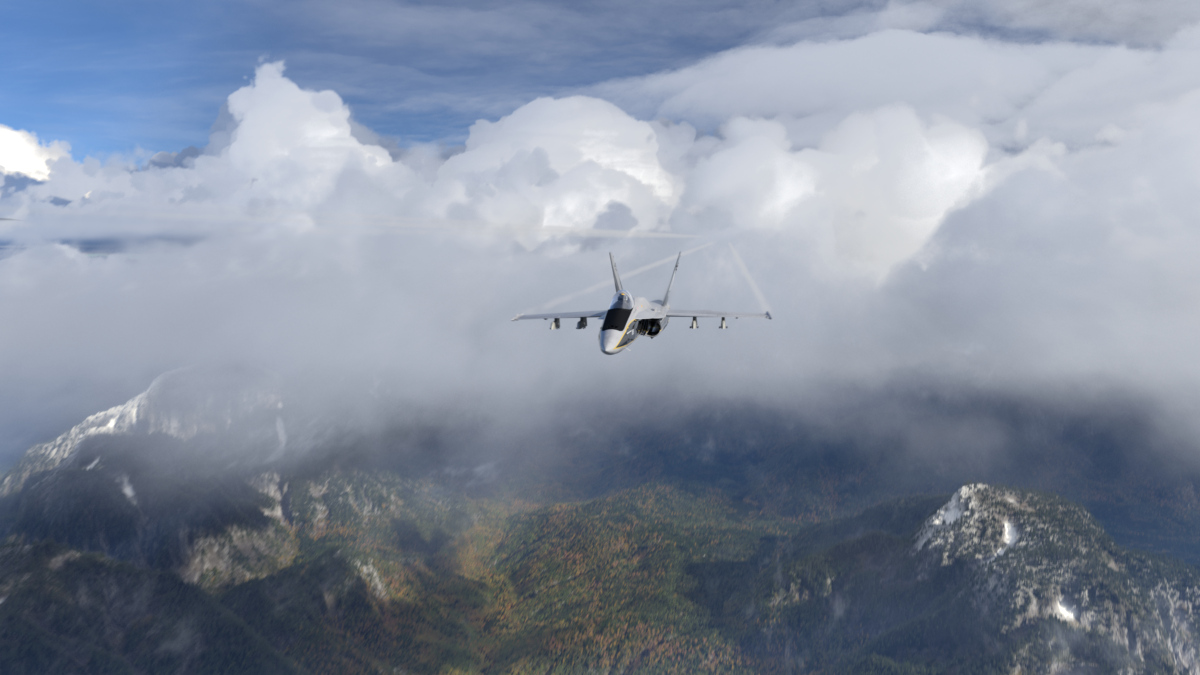
In part 1 of this blog series, we took a look at how to prepare a Terragen 4 project for rendering on a cloud based render farm. In this post we’ll take a step-by-step approach and submit the project to our official render farm, Pixel Plow.
Submitting your Terragen project file for rendering.
To illustrate the cloud rendering pipeline we’ll walk through the process of submitting a Terragen project file to Pixel Plow for rendering. This process requires you to manually set a number of the render parameters via the Pixel Plow Agent, for example the Output images filename and path. For some parameters this can be useful, as it provides a way to override a project’s settings. However, not all render settings are available through the agent, so it’s still good practice to set up your Terragen project with its final render settings prior to submitting it to the render farm. This includes pretty much all the parameters found on the Renderers tab.
Downloading and installing the Pixel Plow Agent.
When you’re ready to render your project you’ll use the Pixel Plow Agent to submit the scene. You can download the latest version of the Pixel Plow Agent application at www.pixelplow.com
After registering you’ll be sent a Welcome email containing an identification code. Enter that code into the field labeled “Please enter the agent ID from your welcome email (a 20+ digit number)” and press the “OK” button. An indicator will appear near the bottom of the window verifying your account.
![]()
![]()
When you launch the Pixel Plow Agent application the Home window will open and you’ll have access to notices and account information.
![]()
![]()
Since we want to submit a Terragen project to the render farm, click on the “Submit Job” button at the top of the window.
Here you have access to several versions of Terragen, including legacy versions 2.5 and 3.4. Selecting one of the versions will update the links near the bottom of the page that tell you specifically which versions of Terragen and its plugins are deployed across the render farm. Pixel Plow supports both the officially released build of Terragen 4 and may offer a Frontier build of Terragen 4 as well. Frontier builds of Terragen often include new features that may not yet be production ready.
![]()
![]()

Clicking on the link labeled “Preparation directions for Terragen jobs” brings up a page in your web browser that serves as an overview to submitting the project to the render farm.

Finally, click on the blue “Choose scene file” button to open a file requester dialog and choose the Terragen project file you wish to render on the render farm.
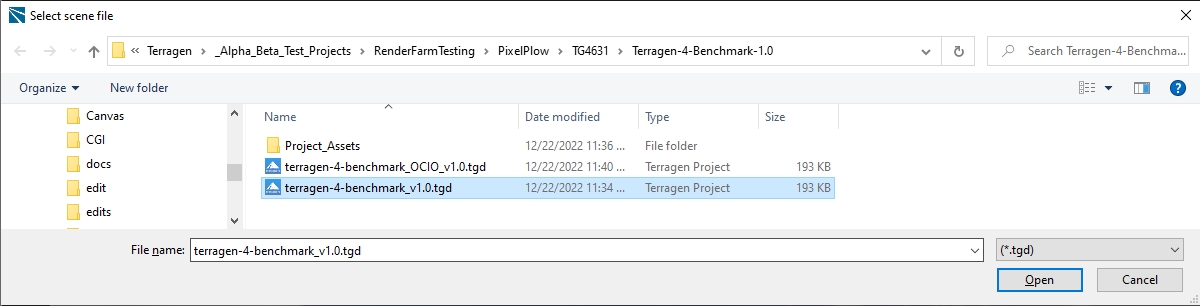
Behind the scenes, Pixel Plow will check the Terragen project file making sure that relative paths are used for the project assets and their textures. Should it find any questionable assets, it will alert you to them and offer you a chance to exit the submission process in order to address the issues.
![]()
![]()
With the Terragen project now loaded into the Agent the following parameters become available.
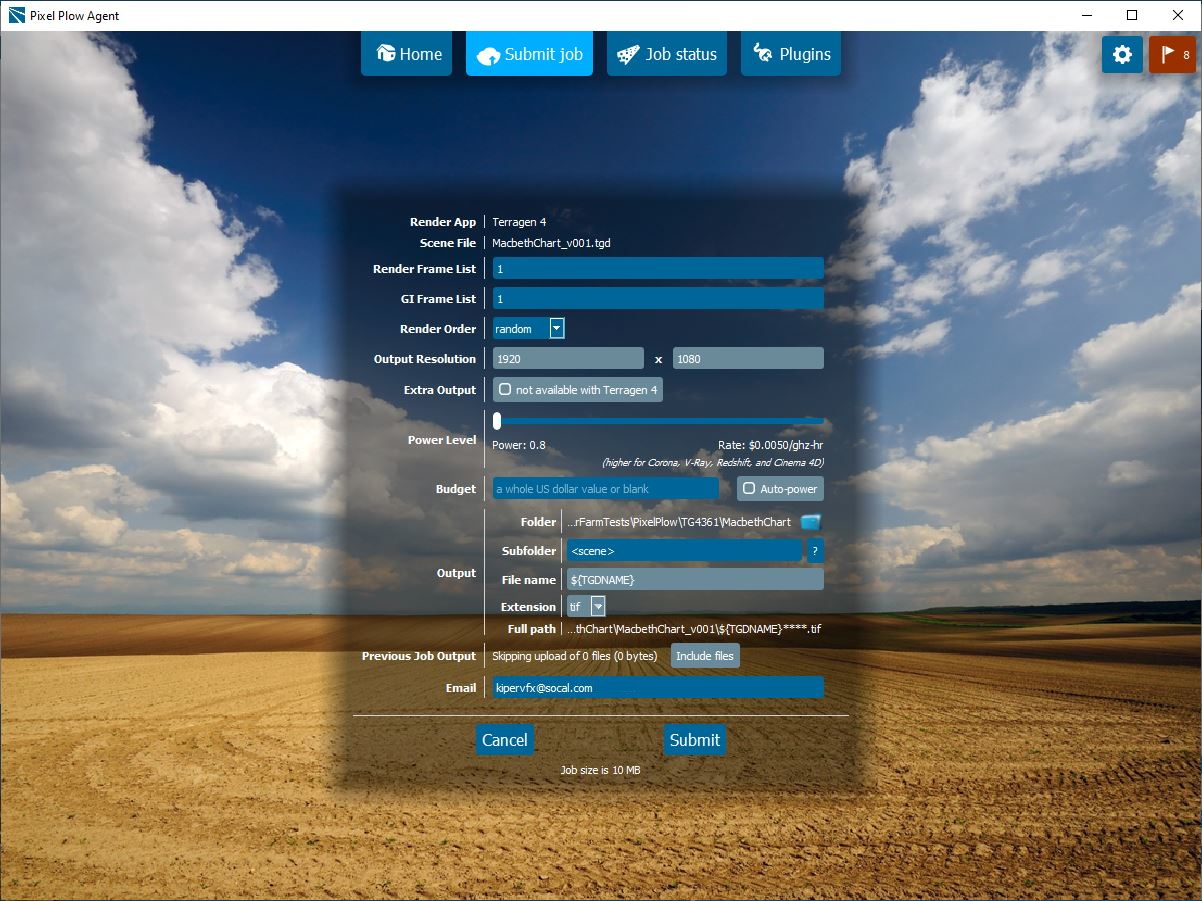
Render App: The version of Terragen you’ve selected for rendering the project.
Scene File: The Terragen project file name.
Render Frame List: The frame range you wish to render. This defaults to the Project setting’s Start frame and End frame. This field can contain a single frame number, a frame range separated by a “:”, “-“, or “to”, or any combination of the two separated by commas. If you desire to render every nth frame in a range, you may specify that by using any of the following notation: “1:100 by 5”, “1-100-5”, “1 to 100 by 5”, and similar.
GI Frame List: The frame range of the GI cache files you wish to render. This parameter is only available when the renderer’s “Write to GI cache file” parameter is checked. The frame range formatting is the same as the Render Frame List. For additional information about how Pixel Plow renders the GI cache files, please click here. When referring to this link, please note that the information regarding the GI for Easy Clouds is outdated. Global Illumination for Easy Clouds can be included in a cache file by checking the “Cloud v3, Easy Cloud” check box in the project’s Render GI Settings window.
Render Order: When set to “Sequential” the frame range will be rendered in numerical order starting with the lowest number in the range. This parameter defaults to “Random” because it increases the effectiveness of the cost estimate feature when rendering frames or tiles.
Output Resolution: The width and height of the images to be saved. This defaults to the width and height values of the Master renderer in the project file, and currently can not be changed.
Extra Output: At present, this parameter displays “Not available with Terragen 4” and does not allow any modification. However, the Pixel Plow render farm will in fact save Extra Output as long as the “Extra Output Images” parameter has been checked in the project and a file path has been assigned. Extra Output files are saved to the same folder and subfolder as defined in the Output settings below, regardless of the file path set in the project. If “Create subfolders” is checked in the project, subfolders will also be created.
Power Level: This controls how many nodes are exposed to your job at any given time. When the farm is not burdened, the lowest power level corresponds to a handful of nodes, and the highest power level corresponds to roughly half of the nodes in the farm. When the combination of the power levels of all jobs running on the farm exceeds the number of nodes in the farm, the power level of each job is proportionally reduced. That means the power setting also functions like a priority setting when the farm is heavily loaded. Please keep this in mind when choosing a power level.
Budget: This parameter allows you to define a monetary limit for your job in whole US dollars, which can be useful if you wish to automatically prevent the job from exceeding your defined threshold. The job will be run until the budget you specified is reached, then your job will be suspended and you will be notified by email. When you are notified by email of a job going over budget, and you elect to cancel the job, you will only be charged the amount you budgeted.
Auto-Power: When enabled, this causes Pixel Plow to automatically adjust the Power level of your job up or down to complete the job as quickly as possible based on your budget. Use of Auto-Power requires a budget to be defined as well as the random frame render order. The Power setting chosen on the slider will be the initial Power level of the job, and Auto-Power will only adjust the Power setting once the system begins generating a Cost Expected. More information about Auto-Power is discussed in the “Managing your job queue” article.
Output Folder: This is the location where the rendered frames will be delivered to when they are complete. It is strongly advised to choose a folder on a local drive of your machine. Rendered frames will be silently delivered back to your machine as they are completed.
Output Subfolder: You may enter selected “terms” in this field which will create subfolders for the output sequence. The terms are replaced by certain definitions, for example, the term <scene> will be replaced by the project name. For a complete list of terms, click on the “?” button to the right.
Output Filename: This field displays the contents of the master Render node’s “Output image filename” parameter. It is read-only, and can not be changed.
Output Extension: This field displays the chosen file format of the “Output image filename” parameter. It is read-only, and can not be changed.
Output Full Path: This field displays the full path for the output file, including any subfolders you’ve defined.
Previous Job Output: The “Include files” button is currently inactive for Terragen projects. If rendered output from a previous job has been saved to the same folder as the Terragen project files, then it will be uploaded as part of the content for the submitted file. Generally speaking, it’s best to avoid saving the rendered output from a previous job to the same folder as the Terragen project files.
Email: Enter any email addresses, separated by commas, for notifications pertaining to your render job.
Cancel: Clicking this button will cancel the job submission and return you to the Submit Job page.
Submit: Clicking this button will submit the job to the render farm. When the job begins uploading, the agent automatically switches to the Job Status tab. It’s not necessary to keep this window open for the render service to work.
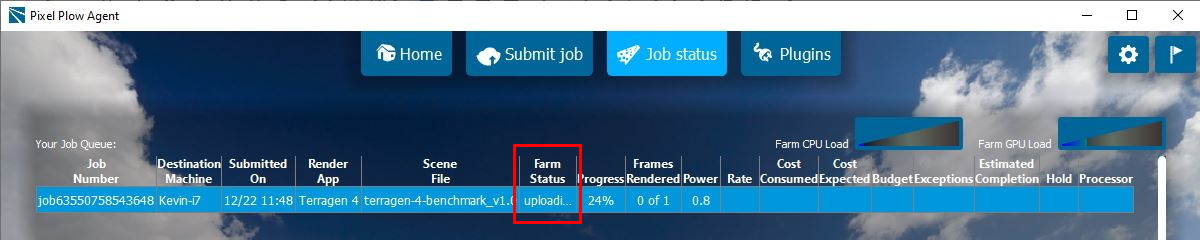
When you click the Submit button, your project folder will begin to be uploaded to the Pixel Plow server and the Agent’s Job Status window will open showing you the progress.
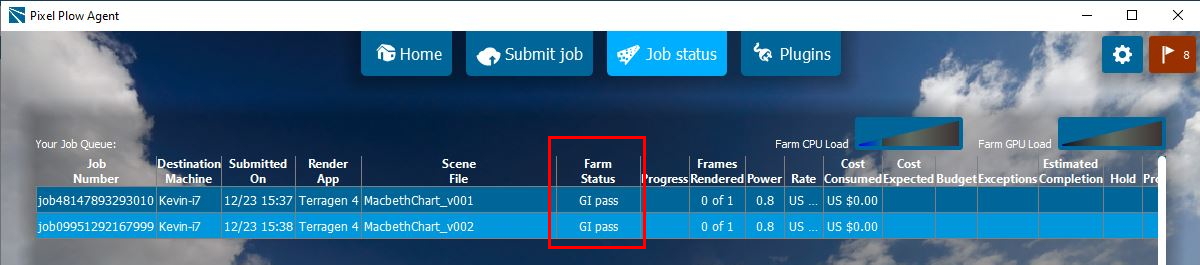
Once the upload has completed, the job will be queued and start rendering as render nodes become available. The GI pass is calculated first.
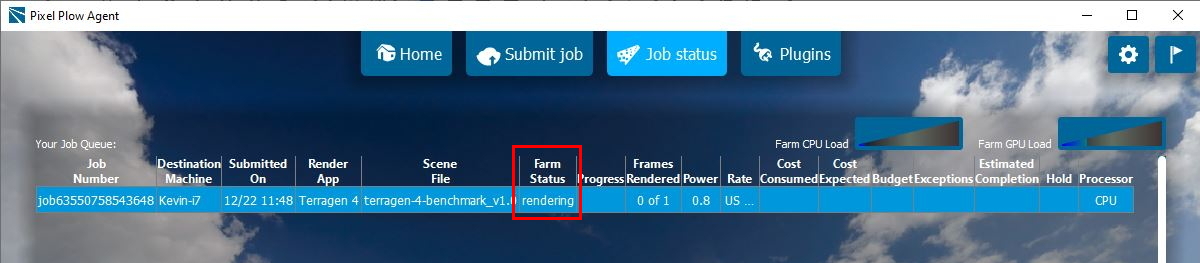
Then the render will begin.
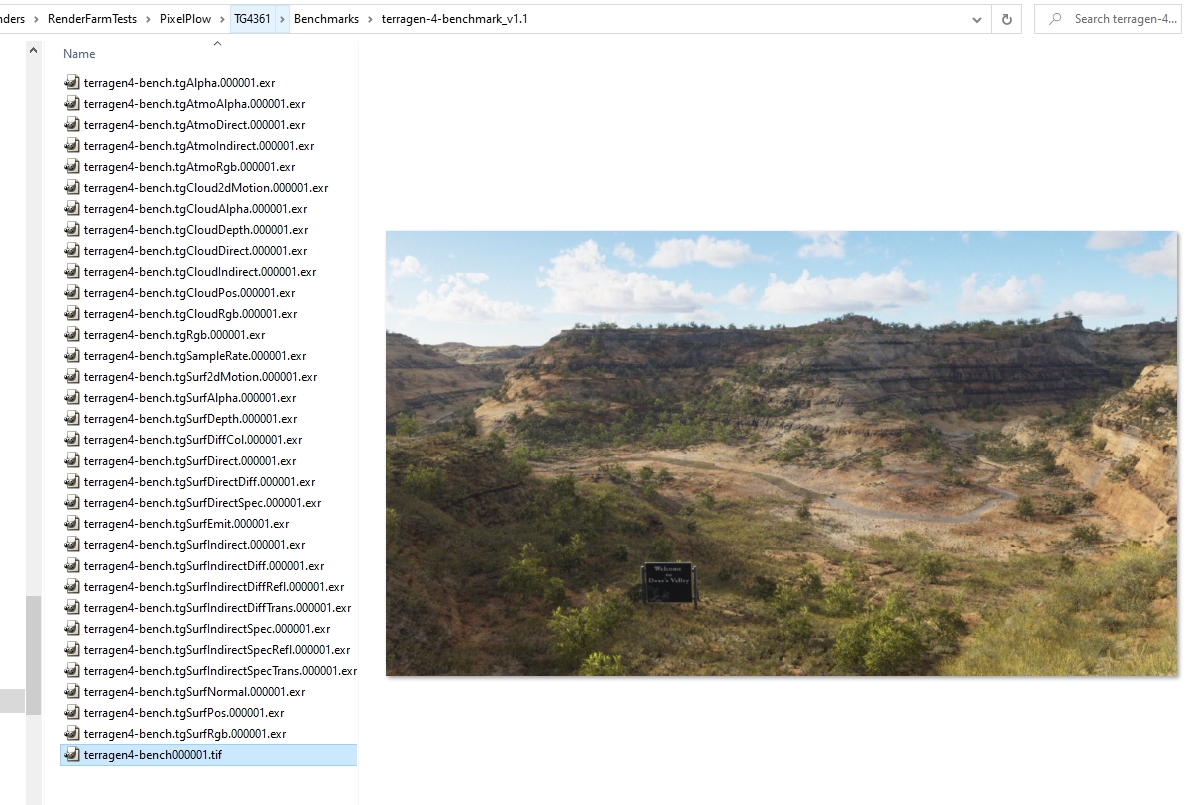
As the frames are rendered, they’ll begin to download to the output folders you’ve specified.
When the render is completely done you’ll receive an email alerting you to that fact and additional information such as the cost involved with the render, and length of time the process took.

In conclusion
In part 1 of these two posts we’ve looked at how to prepare your Terragen 4 project for rending in the cloud, and in this post walked through a step-by-step submission process to an online render farm. We hope you can see the advantages to using cloud render farm services over a single workstation, especially for rendering image sequences or very large resolution still frames.