Outsourcing your renders to a render farm can save you time when rendering long animation sequences, or when you need to render images at much higher quality or resolution. In this two-part post, we’ll explore the process for submitting your Terragen project to an online render service.
So you’ve spent a lot of time perfecting your Terragen scene, making test renders on the critical areas of your project, ensuring the parameter values for anti-aliasing, motion blur, noise thresholds, etc. are working precisely as you intend them to; and now it’s time to submit your masterpiece to render “in the cloud”!
The first and perhaps most important step in submitting your Terragen project file to any render farm service is to make sure it’s set up properly. Terragen includes several tools to help with this, including the “Animation Check” button found under the Renderers Sequence/Output tab, and the “Export Gathered Project” feature found under the File menu. In this post, we’ll focus on both these features, and in the following “Part 2” post provide a step-by-step guideline to submitting the Terragen project file to our official render farm partner, Pixel Plow. You can read Part 2 here.
Animation Check
Located on the Sequence/Output tab of each Renderer is the “Animation Check” button.
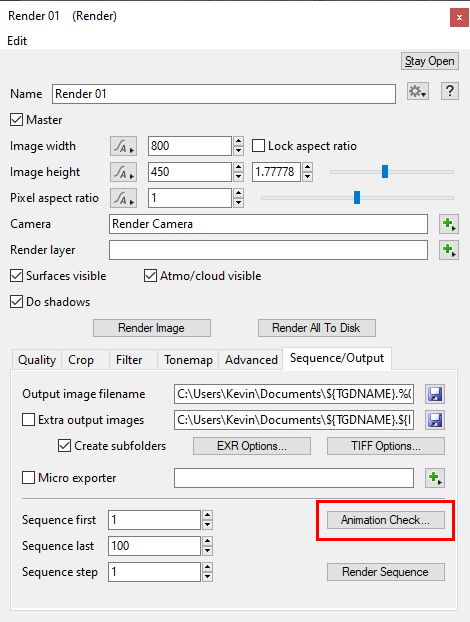
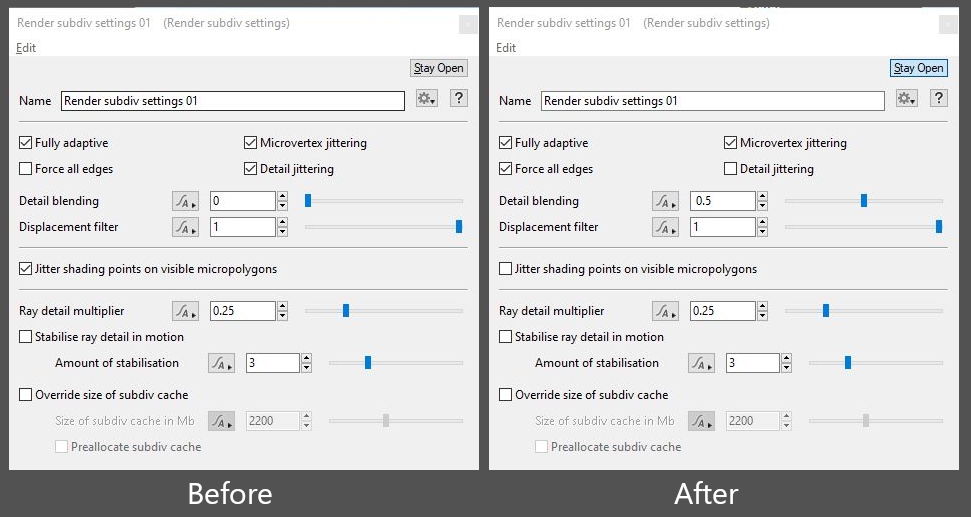
When clicked, Terragen will perform a check to see if certain parameters on the Renderer’s Advanced tab are set to optimal settings for an animated shot, and if not, offer to change the parameters for you automatically.
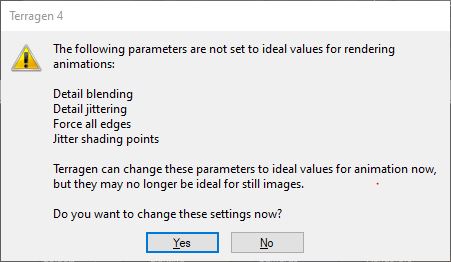
Clicking the “Yes” button sets the “Detail blending” parameter to 0.5, disables “Detail Jittering” and “Jitter shading points”, and enables “Force all edges”.
For an even more comprehensive overview of Terragen’s render settings found under the Advanced tab, please refer to the online documentation here and watch the Terragen for VFX: Part 24 – Render Settings Quality & Details video.
Export Gathered Project
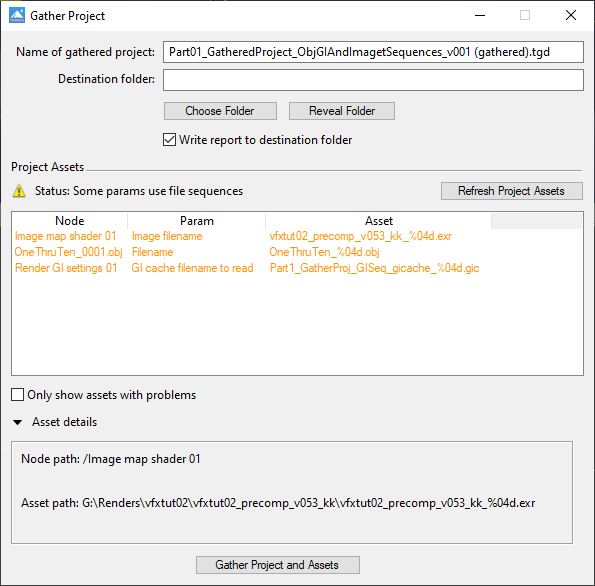
In a nutshell, this feature creates a new project file and copies all the assets used in the project, such as 3D objects and texture maps, to a subfolder. File paths to the copied assets are reflected in the new project file, making the assets “relative” to the location of the new project file.
For example, if the texture map, MyTexture.jpg, was previously located in the filepath “D:\MyProjects\Images\”, a copy of the asset would be placed in the “Project_Assets” subfolder of the gathered project, and the filepath in the new project file would point to “Project_Assets/MyTexture.jpg” asset.
This process works for most assets, but there are a couple of situations to be aware of because they require you to manually copy the assets to the subfolder. These include:
- Asset sequences (objects, images, caches)
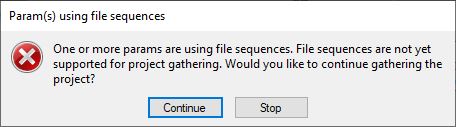
- In Terragen variables such as “%04d” can be used as a form of shorthand to denote sequences of objects, images or cache files. When Terragen encounters these variables it evaluates them as 0001, 0002, 0003 and so on. During the export process Terragen warns you that a sequence is in use, but allows you to continue with the export process.
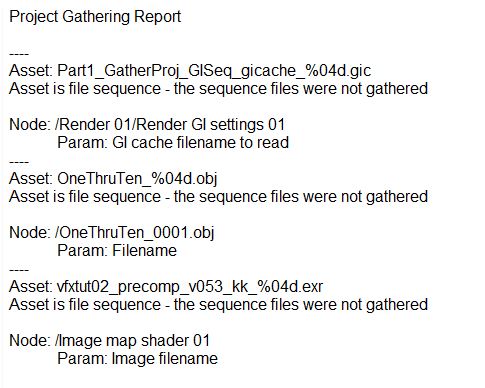
- Terragen will NOT copy the sequence to the Project_Assets folder. You’ll need to manually copy the sequence to the Project_Assets folder and reassign the sequence to the affected nodes in the gathered project.
- Object sequences (OBJ Reader, TGO Reader, LWO Reader)
- Manually copy the object sequence to the Project_Assets folder, then replace the original object sequence in the gathered project with the object sequence in the Project_Assets folder, via the Object > File Read > Filename parameter.
- GI cache file sequences (Render GI Settings)
- When the variable “%04d” is not used, the gathering process will copy only the file specified in the “Read GI cache file(s)” parameter. All other files need to be manually copied to the Project_Assets folder.
- Image sequences (Image Map shader)
- When the variable “%04d” is not used, the gathering process will copy only the file specified in the node’s “Image filename” parameter, for example. All other image files in the sequence need to be manually copied to the Project_Assets folder.
- Object sequences (OBJ Reader, TGO Reader, LWO Reader)
- Terragen will NOT copy the sequence to the Project_Assets folder. You’ll need to manually copy the sequence to the Project_Assets folder and reassign the sequence to the affected nodes in the gathered project.
- The MTL files associated with OBJ files are not copied to the Project_Assets folder, and may be ignored. These are ASCII based material template library files that describe the surface properties of the 3D object file. Terragen uses the MTL files to initialize the Default shader’s values assigned to an object’s surface the first time it is loaded into a project. After that it is no longer needed; moreover, if the Default shader’s values were modified, you wouldn’t want the MTL file to overwrite the modifications the next time the gathered project is loaded.

In the folder where the gathered project is saved, Terragen will output a text file summarizing the results of the export process.
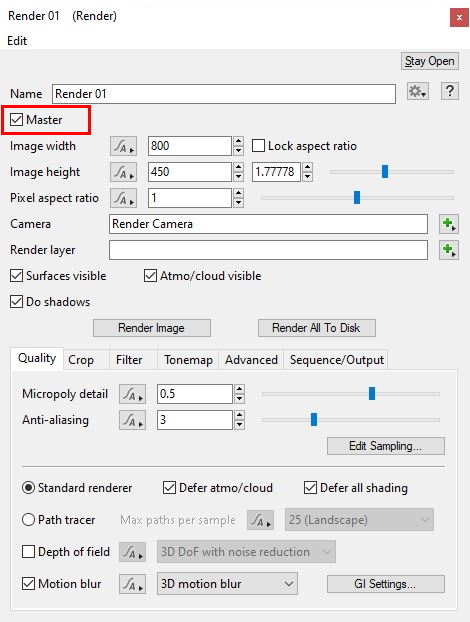
Choose a Master Render
A Terragen project may contain multiple renderers, but only one will be designated as the Master renderer via the “Master” parameter. Some render farms may ignore renderers not set to Master, while some render controllers, like Deadline, allow you to choose which renderer to use at the time the project is submitted, regardless of the Master setting. If the render controller does not allow you to select which renderer to use, the renderer with its Master parameter enabled is the one that will render. This means you’ll need to save a separate Terragen project for each renderer you want to submit to the render farm, and enable the correct Render node’s Master parameter.
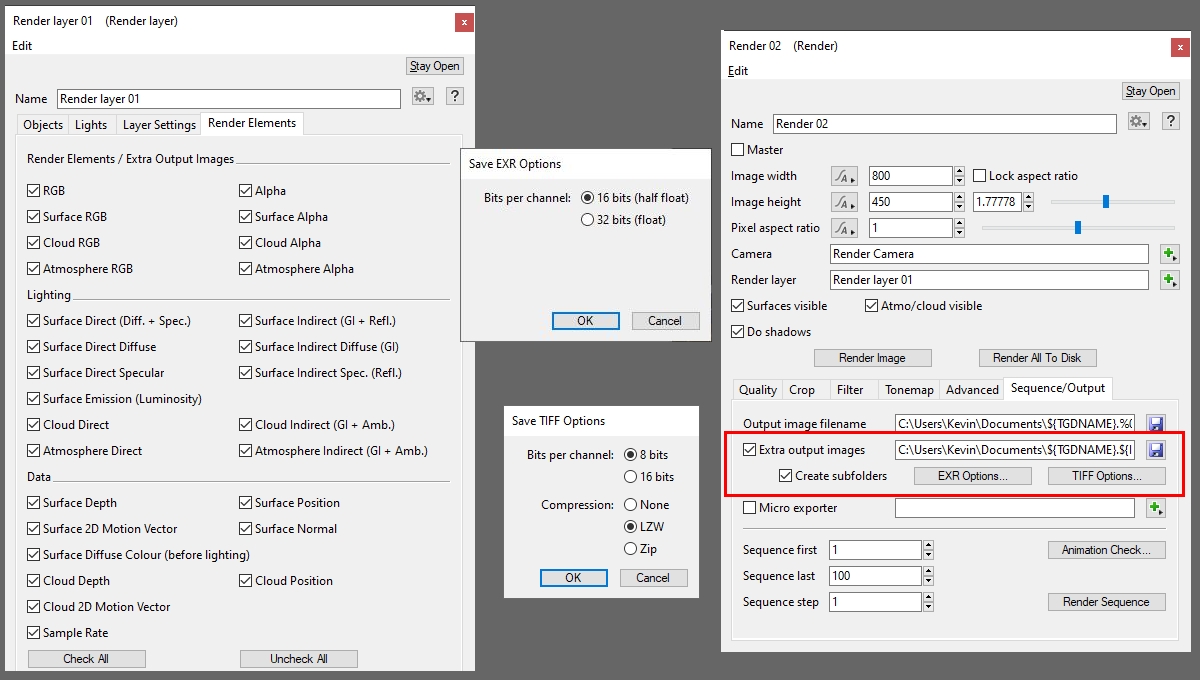
Render Layers and Render Elements
Terragen 4 Professional includes the Render Layers feature, which allows you to assign one or more Render Layers to a project and control which parts of the scene are rendered, or override certain render settings. Render Layers can be broken down into their component elements (AOVs), such as the terrain, cloud layers and atmosphere, as well as direct and indirect lighting, and object groups. When submitting a project with Render Layers, be sure to enable the Extra Output Images parameter found under the Renderer’s Sequence/Output tab, and set the subfolder and file format options.
Colour Management
Colour management, such as OpenColorIO or “OCIO”, is often used in production pipelines where many different viewing devices and software packages contribute to the look of the final image or shot. While Terragen 4 Professional supports colour management, we recommend that you test render several frames from your project on the render farm to ensure that your colour management configuration is supported on the render farm. For example, your production might be using customized configurations that the render farm might not have available to it. It’s far better to determine this first, before incurring fees for rendering images that may not be suitable for your production pipeline.
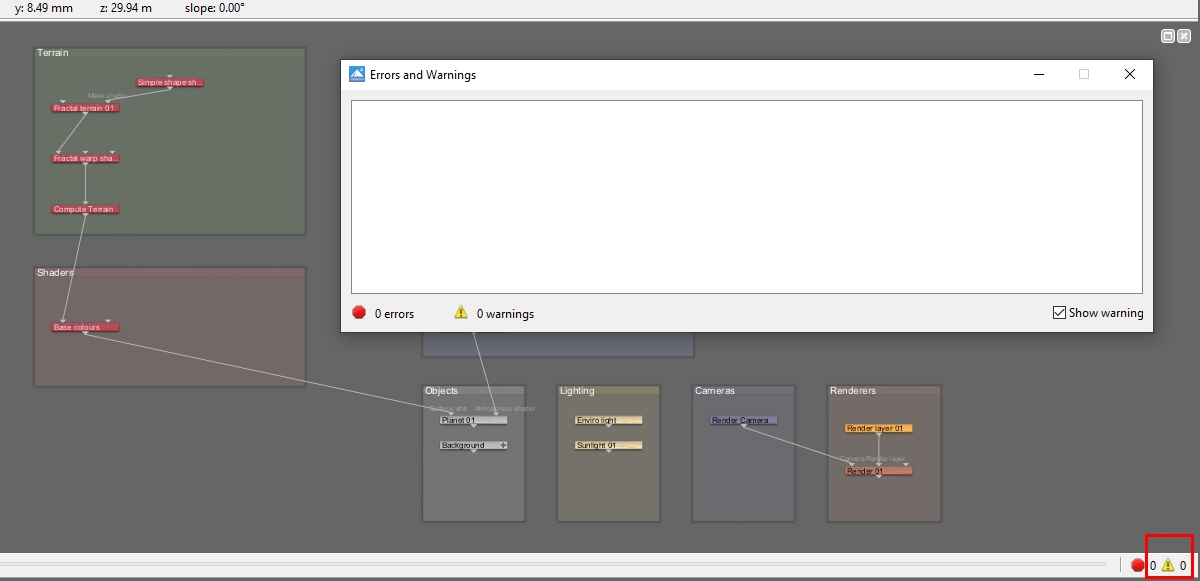
In Conclusion
Always be sure to reload the newly gathered project file in Terragen 4, to make sure there are no Errors and Warnings. You can click on the yellow triangle button at the bottom right of the interface to open the Errors and Warnings window.
In “Part 2” of this blog post, we’ll download and install the Pixel Plow Agent application, and walk through the step-by-step procedure for submitting a Terragen project file for rendering. You can read Part 2 here.