Terragen Sky Early Access introduces “Sky Paint”, a new workspace in which you can add, remove and modify clouds with paint strokes.
Now you can have precise control of the shapes and positions of the clouds in your project.
To access the new workspace, click on the Sky Paint tab at the top of the UI.
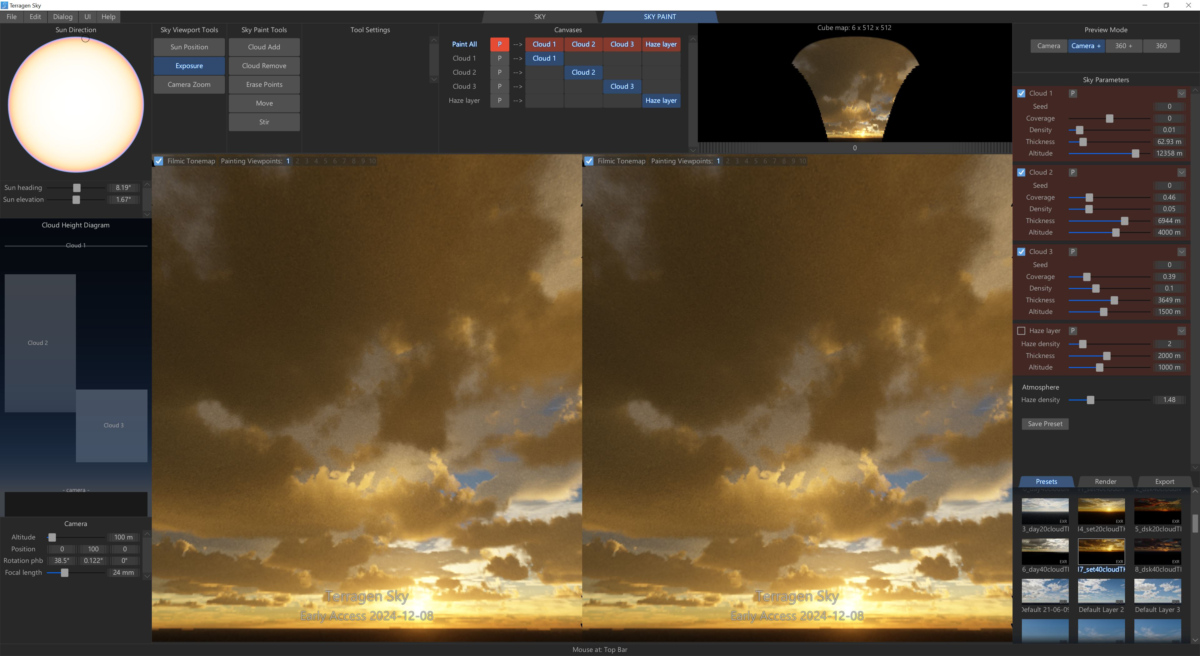
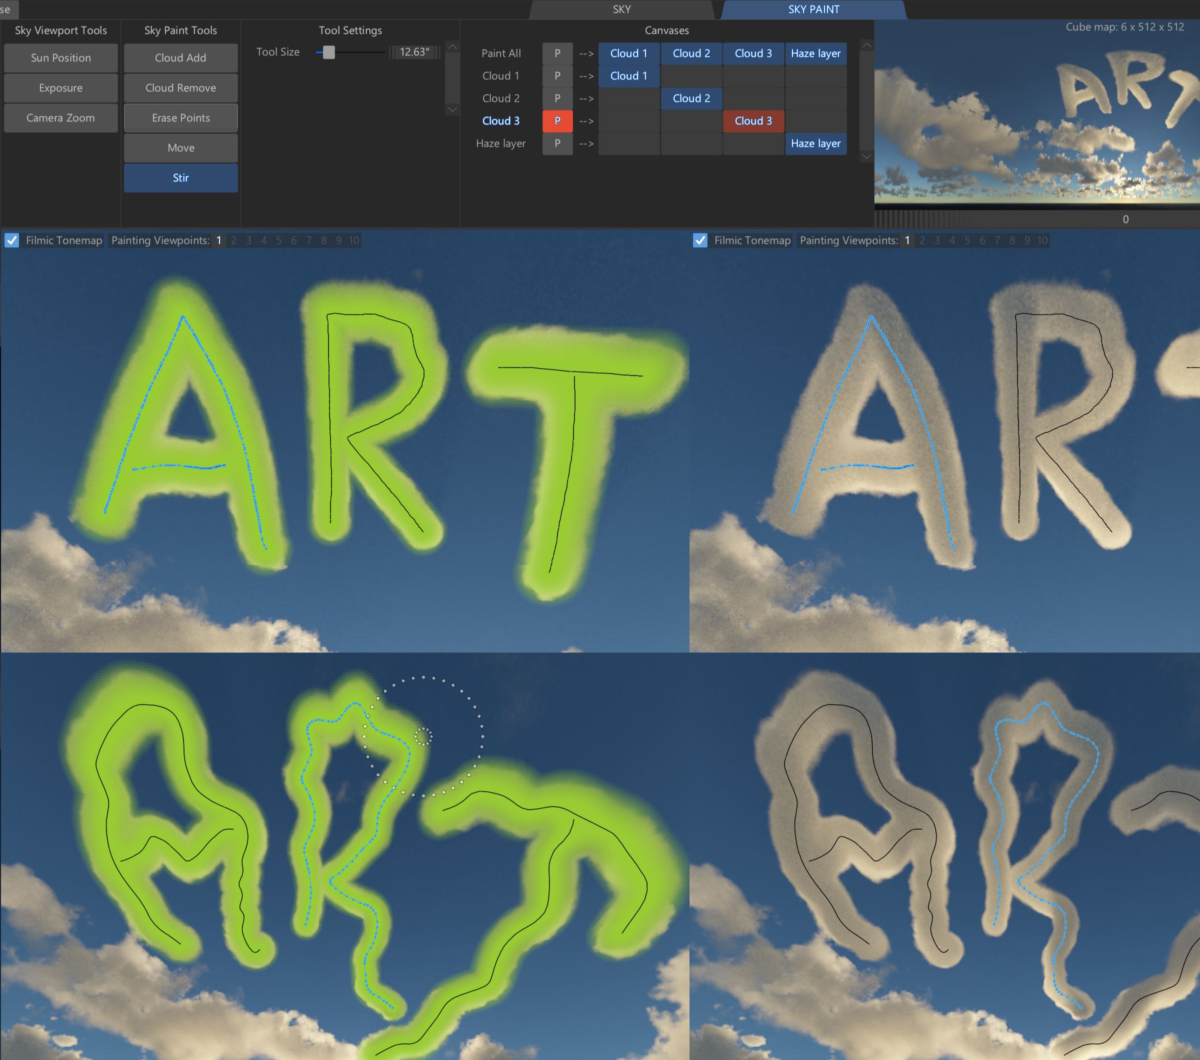
The Sky Paint workspace features a viewport, canvases, tools and settings to paint with.
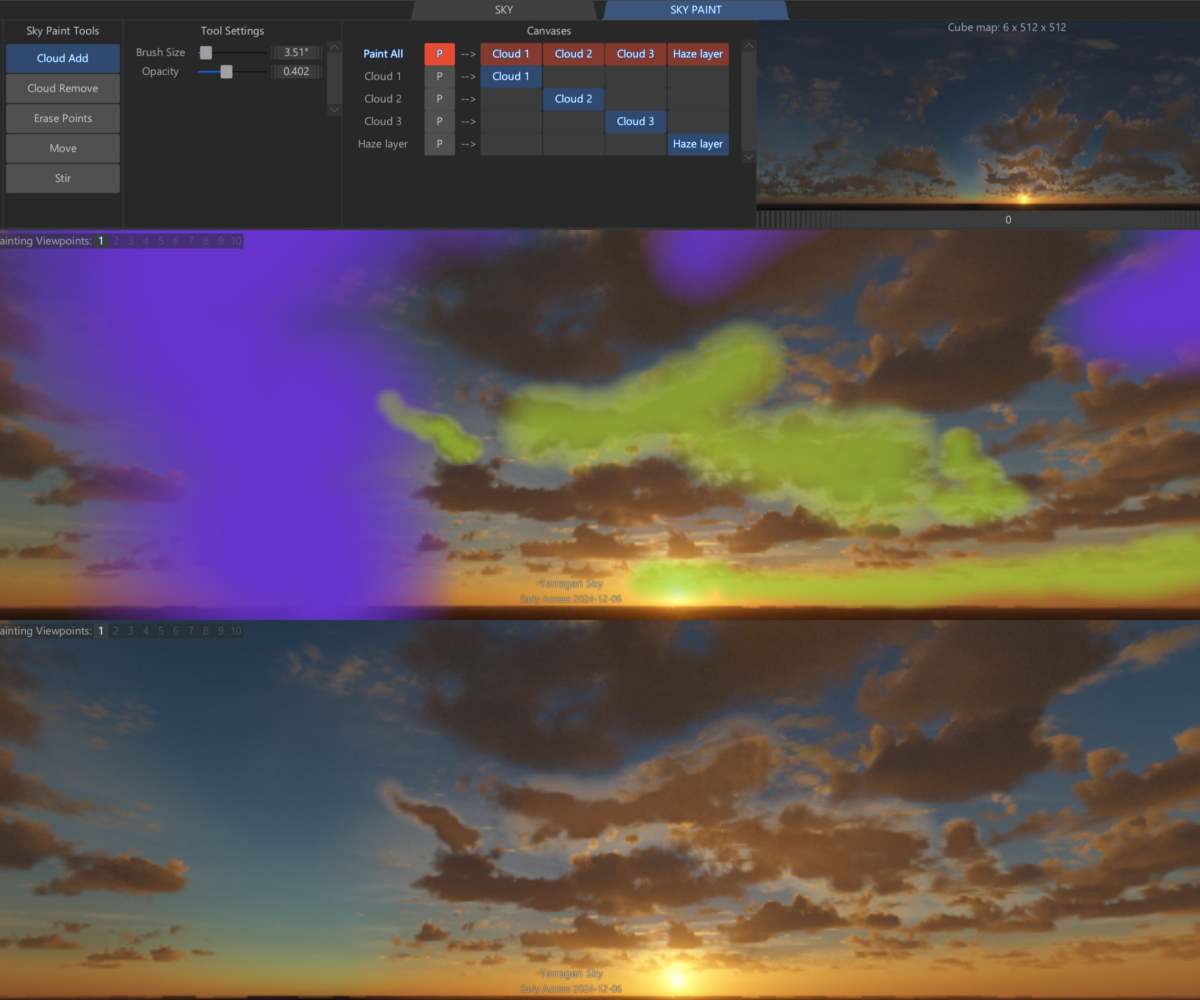
Viewports
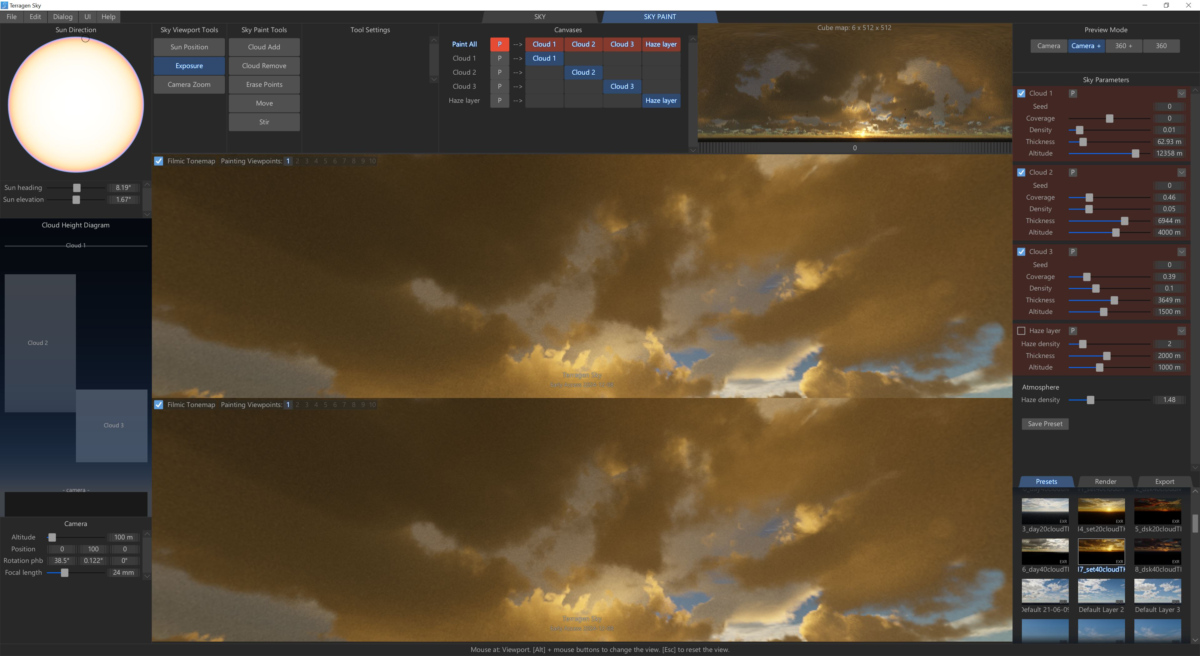
Viewports can be split into top and bottom views, left and right views, or paint view only.
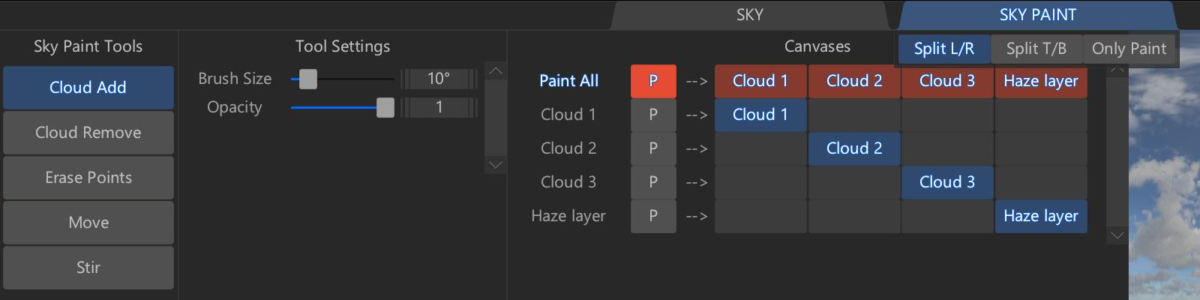
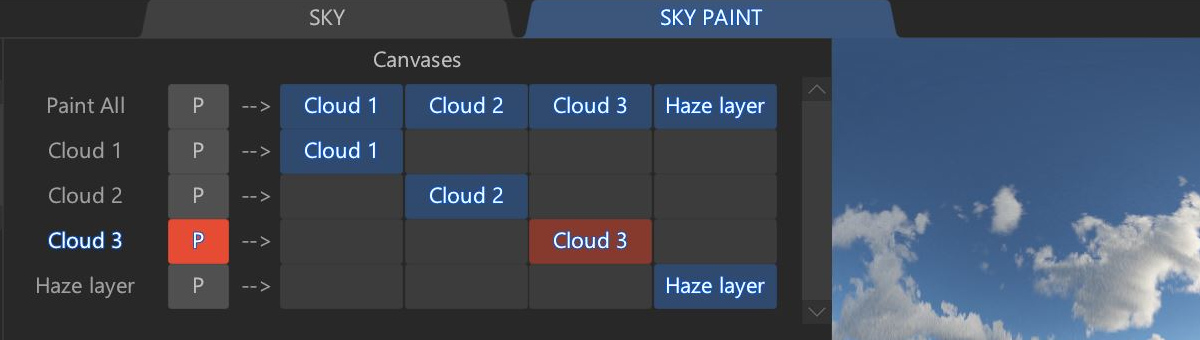
Canvases
Each cloud and haze layer has its own Canvas, which is a 360 degree paintable volume. To activate a canvas for painting, click on the “P” button for a specific cloud layer in either the Canvases section or Sky Parameters section. By default the “Paint All” canvas is active which allows any painted brush strokes in this layer to effect all cloud and haze layers.
Sky Paint Tools And Tool Settings
These tools allow you to add, remove and tweak cloud and haze layers. Painting is completely non-destructive and you can even edit your brush strokes at any time. Everything is undoable.
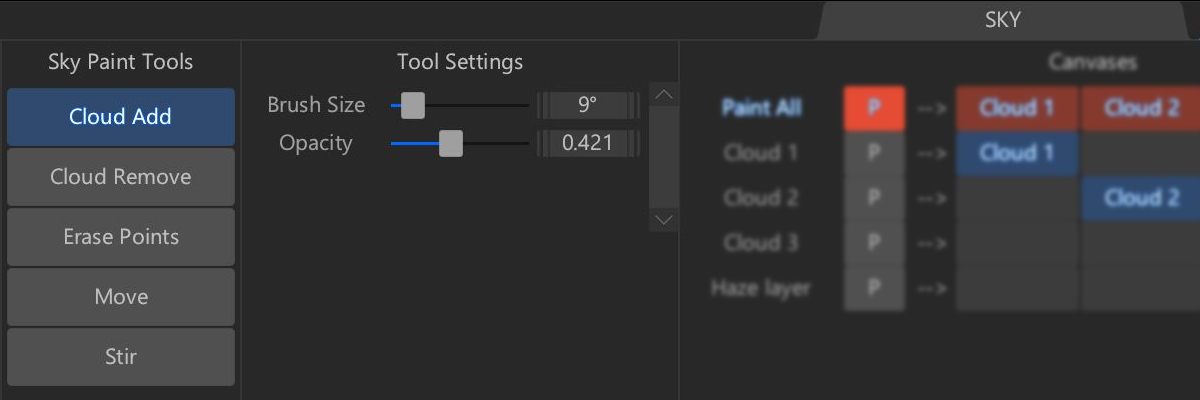
Cloud Add and Cloud Remove
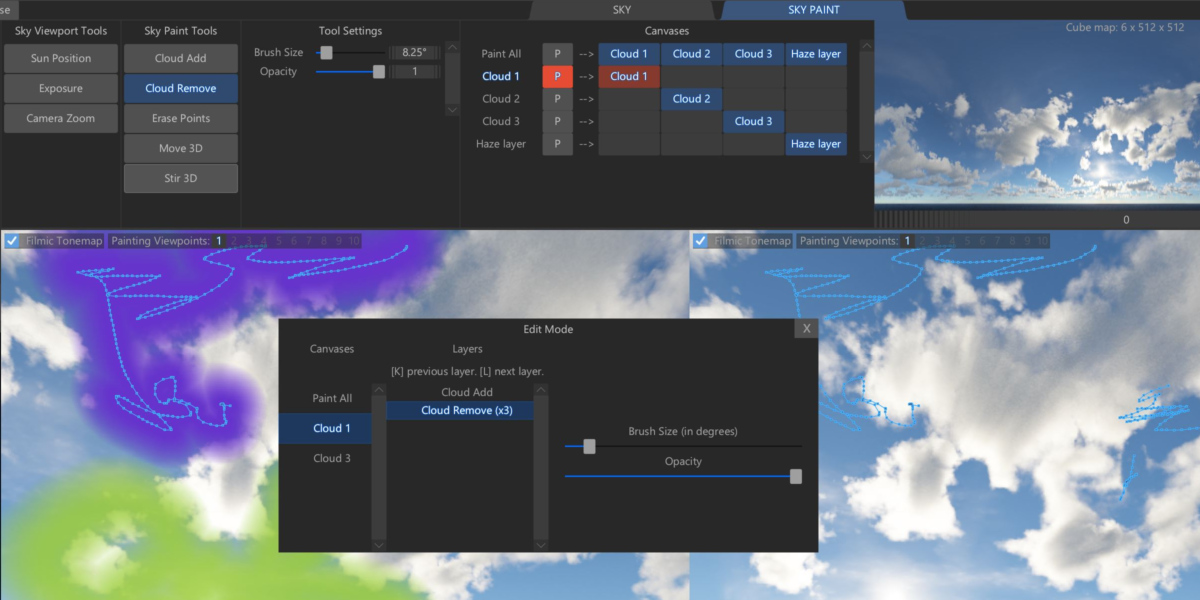
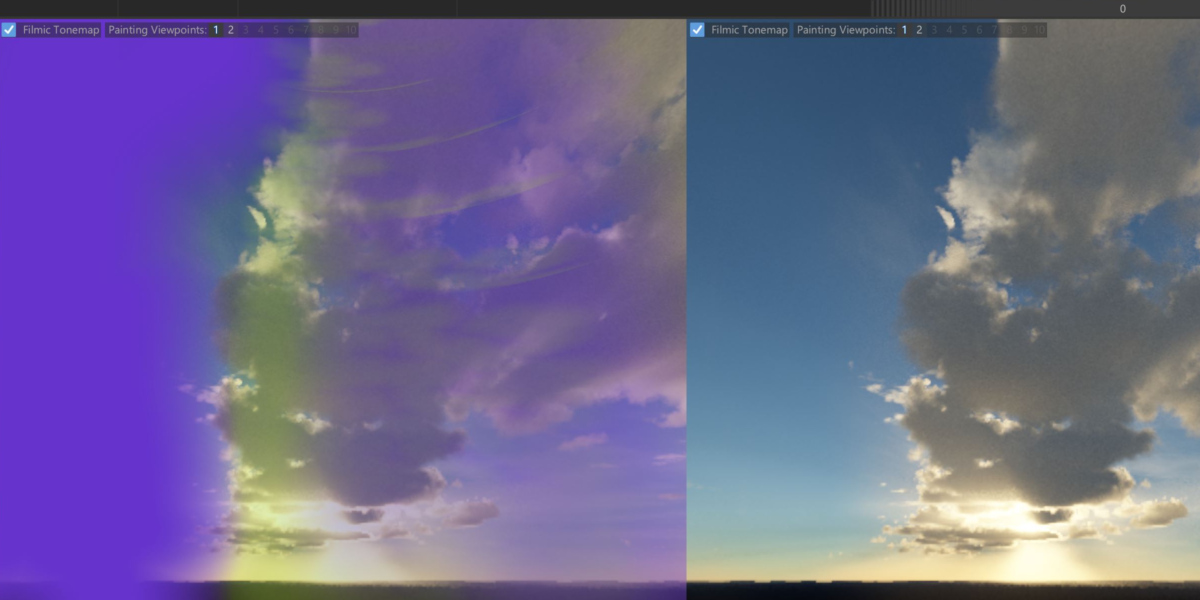
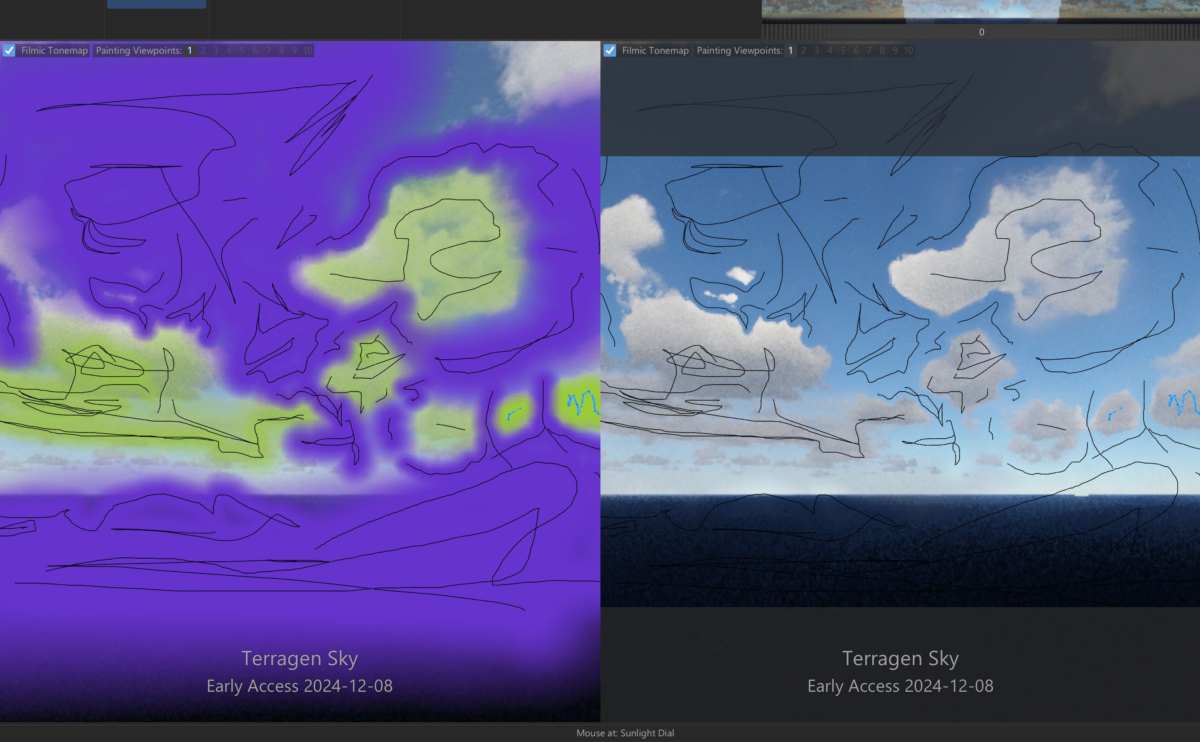
Paint strokes created with the Cloud Add tool appear in green and those created with the Cloud Remove tool are coloured purple. Both tools allow you to set the brush size and opacity. You can use the left “[“ and right “]” bracket keys to change the current tool’s size.
Paint strokes are grouped together into a layer when their size and opacity are the same. A new layer is created whenever the size or opacity is changed and a new paint stroke is made. You can edit the size and opacity of a paint stroke layer by simply hitting the Space Bar to enter into the Edit mode. Within the Edit mode, you can move paint strokes from one canvas to another.
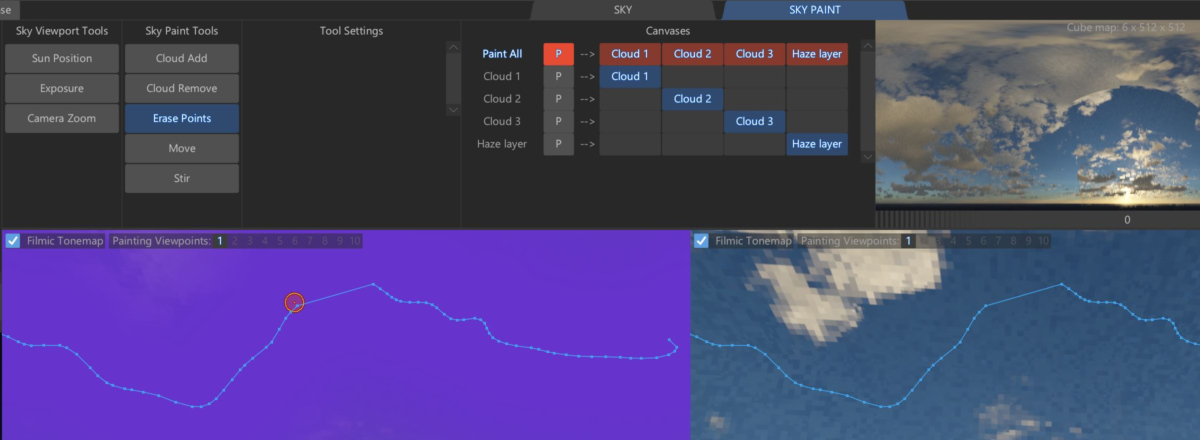
Erase Points
This tool works like an eraser, allowing you to remove individual points of the curve that makes up the brush stroke.
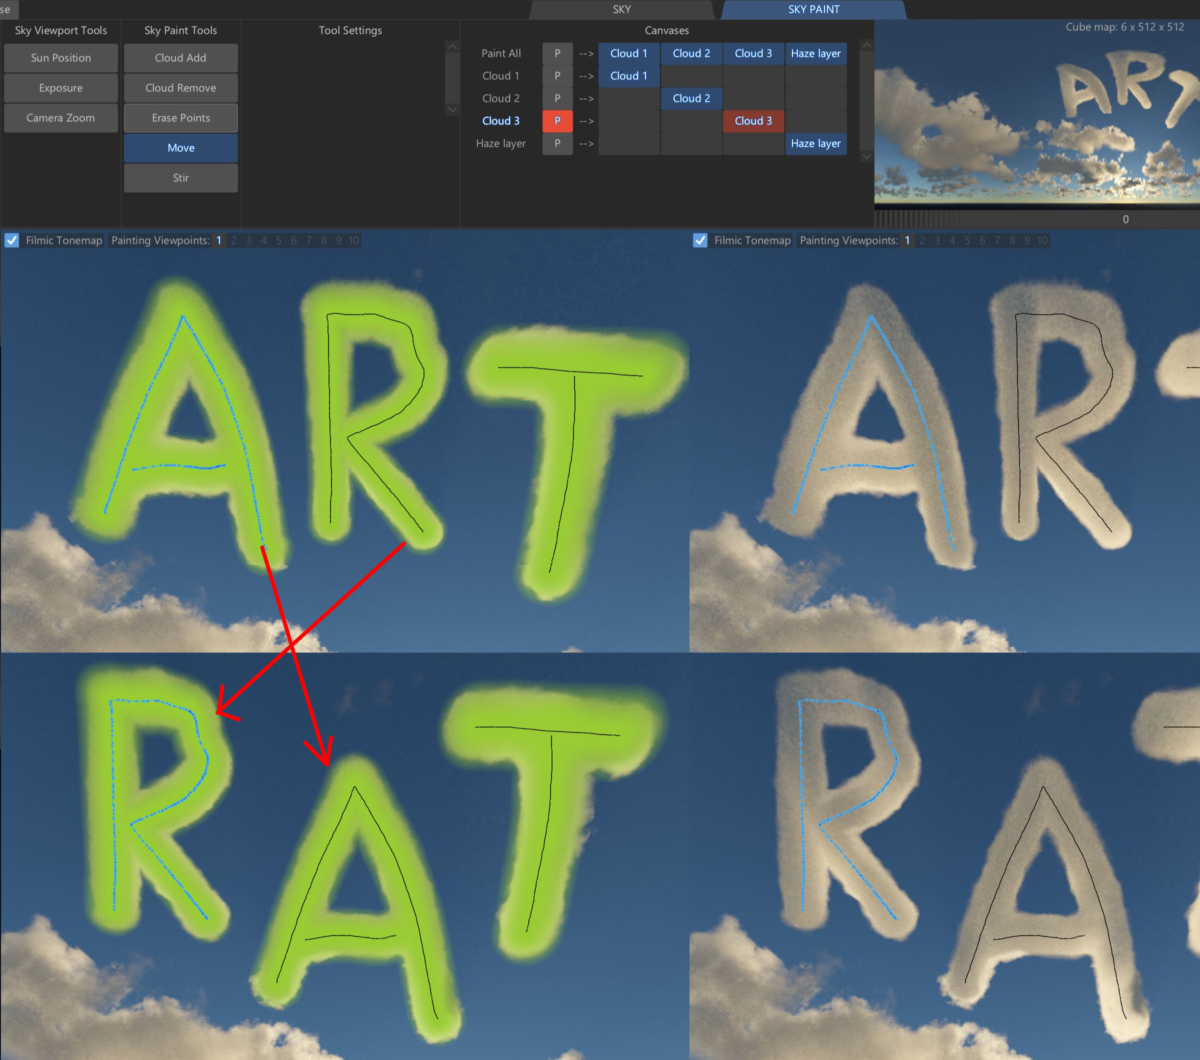
Move
This tool allows you to move entire paint stroke layers. Hovering the cursor over the paint strokes will highlight the current paint stroke layer to move.
Stir
This tool allows you to distort the shape of the paint stroke curve. The tool displays two dotted circles indicating the extent of the distortion effect upon points that fall within. Points of the curve within the inner circle are more intensely affected by the strength of the distortion, which gradually falls off by the outer circle. The “Tool Size” parameter allows you to increase or decrease the area affected by distortion and the left “[“ and right “]” bracket keys change the current tool’s size as well.
Edit Mode
Hitting the Space Bar will bring up the Edit Mode. Any canvas having contained a paint stroke is listed, along with the individual paint strokes. In Edit Mode you can select paint strokes and change their size and opacity. You can also delete them and move them from one canvas to another.
Painting POVs
The system can store up to 10 points of view (POVs), or camera positions from which to paint. Each POV has its own set of cube maps which are projected into 3D space. All the cube map projections intersect with one another in 3D space to work out where clouds should be added or removed. You can click a “Painting Viewpoint” or “Painting POV” button to switch to that view or hover over it to temporarily see that point of view.


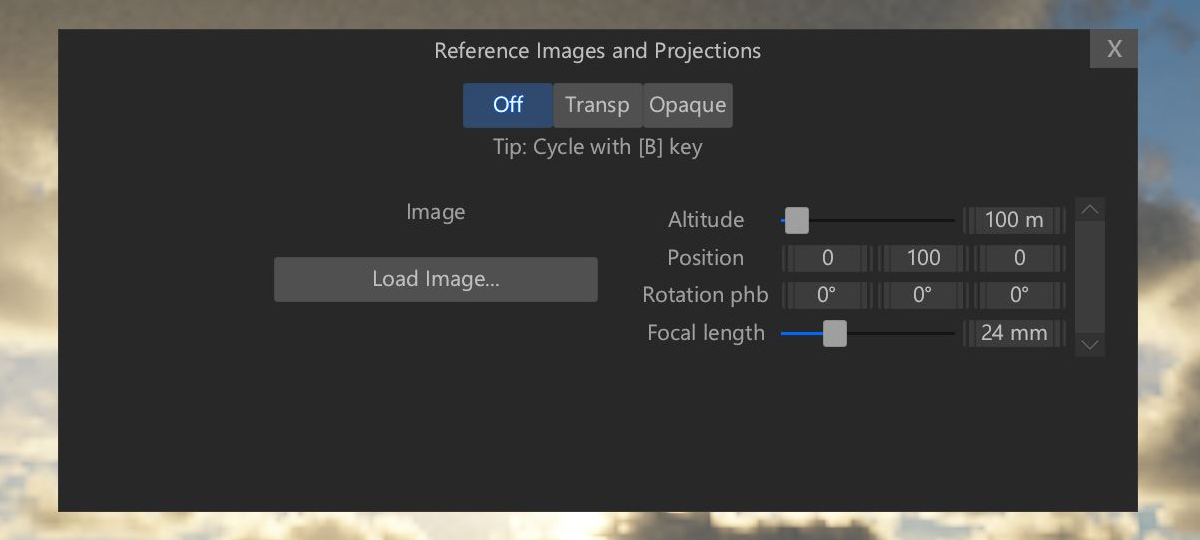
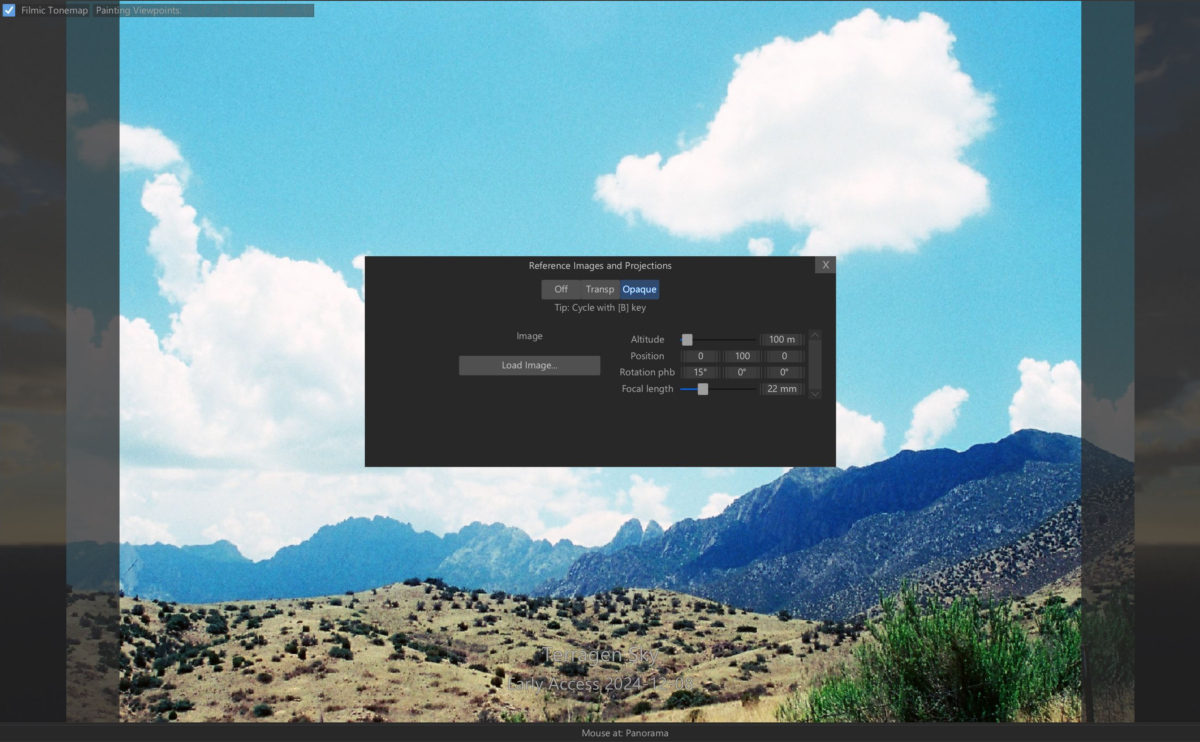
Viewport Background/Reference Image
You can now add an image in the background of a viewport for reference. This feature is found under the Dialog menu. The image’s opacity can be cycled through on, semi-transparent and off.
Other Improvements
Added a ‘Dialog’ menu which lets you to toggle the “Edit Mode” for painting and “Reference Images and Projections” windows without needing to know the keyboard shortcuts.
Added a ‘Help’ menu with a link to the Online Documentation. The SysInfo and License buttons have been moved to the Help menu.
Save file dialogs will ask before overwriting an existing file.
Text for the auto-save filename is written in red if the file already exists when the Render Image button is pressed, to warn you that it will be overwritten. You can click on the text to choose a new filename.
The “Square” render aspect ratio is now called “1:1” to make it more readable in the dropdown menu.
Panning/navigation cursor is the default pointer, not the pointing hand.
Loop-around has been disabled on the roller widgets for most parameters, and enabled on a few parameters where it makes sense.
Minor improvements to the Undo system.
Bug Fixes
Resizing the viewport or resizing/minimizing/maximizing the main window was causing the preview to start rendering from scratch if it had already finished rendering.
Fixed a couple of bugs that made the UI slower after the app had been running for some time.
Early Access – Available Now!
You can download Terragen Sky Early Access from your registered online account if you have a current subscription to Terragen 4 Creative or Terragen 4 Professional, or the Maintenance subscription on your perpetual license is currently active. If your Maintenance expired before December 06, 2024 you’ll need to renew it in order to have early access to Terragen Sky.
To download Terragen Sky please login to your account on our website and go to the details and downloads for your most recent Terragen purchase.
For more information about Terragen Sky click here.
Be sure to check these posts and links out too!
Painting Clouds in Terragen Sky
The latest video tutorial from Terratuts provides a great overview to the new Sky Paint tools in Terragen Sky Early Access.
Sky Paint for Terragen Sky
Matt Fairclough, founder of Planetside Software, has posted an in-depth article on LinkedIn using the new Sky Paint tools, complete with case study examples. Click here to read it!
Terragen Sky Online Documentation
The most recent online documentation for Terragen Sky Early Access can be found here.