Editor’s note: This post was originally published June 23, 2023 and has been updated to reflect improvements to the terragen_rpc module.
In this post we’ll take a look at Terragen’s Remote Procedure Call (RPC) feature, which allows third party programs and scripts to communicate with Terragen. This feature is available in the Professional version only.
The focus of this post is two-fold. First, we want to illustrate how a Terragen project can be modified by an external program or script, and secondly, we want to demystify the coding process for artists and non-programmers.
To illustrate this, we’ll use Python to write a standalone program that adds a Landmark object to the active Terragen project, at very specific coordinates.
If you’re an experience programmer, or have Python already installed and are familiar with the Python Programming language, you can skip down to the Add the Landmark section below.
Let’s get started.
What you’ll need:
- Terragen Professional 4.6.31 or later
- Python Programming Language
Basic setup
The RPC feature was introduced in Terragen Professional 4.6.31, so you’ll first need to launch that version of Terragen or later. We’ll use Python’s Integrated Development and Learning Environment, or IDLE, to write the code for our standalone program, so be sure you have Python installed on your computer, and open Python’s IDLE shell. Recent improvements to the Terragen RPC package now allow it to be installed via Python’s package manager, or “pip” for short.
To install the Terragen RPC module open a Command Prompt on your computer. You can verify that Python has been installed on your computer by entering the following command at the prompt. If Python has been installed, you’ll see the version number and if not, you’ll need to install Python first.
python --version
To install the Terragen RPC module, enter the command below at the prompt. Pip will download and install the Terragen RPC module.
python -m pip install terragen-rpc
If you ever need to verify which version of Terragen RPC has been installed, you can enter the following command at the prompt.
pip show terragen-rpc
When a new release of Terragen RPC becomes available, you can upgrade by simply typing either one of the following two commands at the prompt.
pip install --upgrade terragen-rpcor
pip install -U terragen-rpcIf a new version exists, Python will download and install it, or let you know that the most current version is already installed.

Outline a Plan (in plain English)
We’ll use Python’s built-in file editor to write the code for our program. This will allow us to run the code over and over as we refine it.
- Select “New File” from the IDLE shell menu to open the file editor windows.
An optional, but very useful, first step in writing a program is to block out “in English” what you want the program to accomplish. For example, we want to add a Landmark object to the Terragen project that’s currently opened.
In the Python programming language, the “#” character instructs Python that any text following it on the same line should be ignored when the program is run. This is the standard way to leave notes or comments in your program.
In the file editor type the following lines of code:
# Import the module

# Add a landmark to the project
These two lines of code describe what we want our program to do. First, we load the Terragen RPC module into our program, and once the module is loaded we can tell it to add the Landmark object to the project.
Behind the Scenes
Now let’s save and run the program.
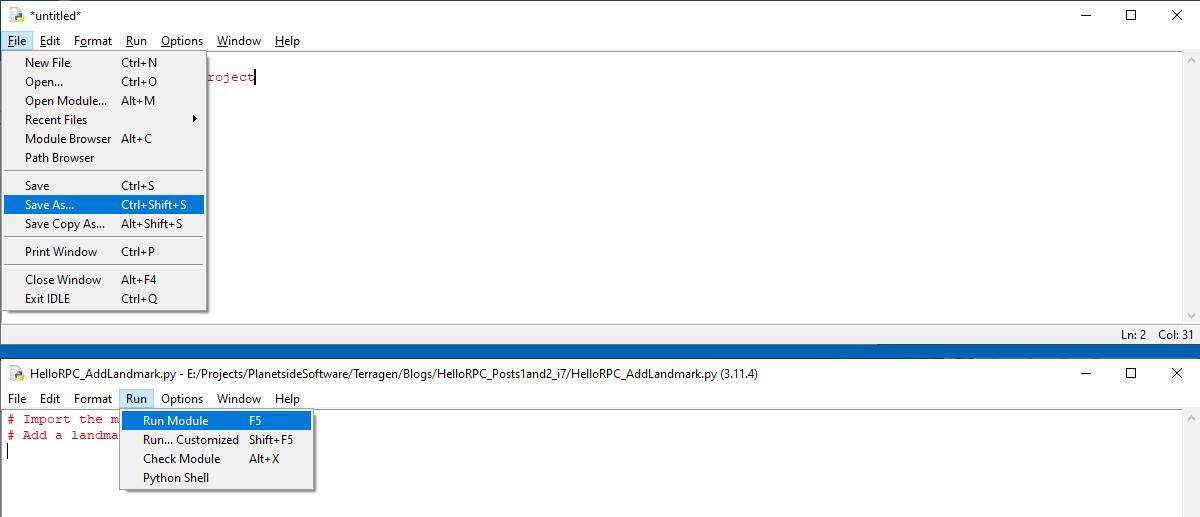
- From the File menu select Save As, and give the program a name.
- From the Run menu select Run Module.
As you might have expected, nothing happens…or did it? Take a look at the IDLE shell window and notice that a message has appeared and that the prompt is ready for its next instructions.

Even though we didn’t tell the program to do anything, because each line of code was preceded by the “#” symbol and Python ignored them, behind the scenes Python did “stuff”. To illustrate what Python actually did and to provide some context for the next few steps, let’s temporarily tell the program to display some of the things it’s doing. We can do this by inserting a “print” function and indicating what we want to have printed. We’ll tell Python to print a list of the modules it loads by default whenever it runs.
Following the last line of code in our program, type the following:
print(dir())
Then run the program just as we did before, or press the shortcut “F5”.
- From the Run menu select Run Module, or press “F5”.
Oops…Python always wants us to save the program anytime a change is made!
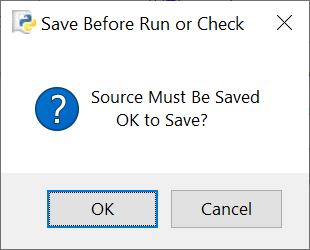
- Click the “OK” button to save and run the program.

This time the IDLE window displays some text in blue after the program is run.
The line of code that we added, instructed the program to print the results from another internal Python function called “dir()”.
You can think of a function as a group of instructions designed to perform a specific task. You can tell a function from other programming code because the function’s name is followed by an open and closed parenthesis, for example “print()” is the print function. By placing the “dir()” function inside the print() function’s two parentheses we told the program to print the results of the dir() function to the IDLE window when run.
Notice that the name of each item in the printed list begins and ends with two underscores. These “dunders” as they’re’ often called in Python, for “double underscores”, are internal functions within Python, and not normally invoked by the programmer. What’s important right now is to see that Python did some “stuff” behind the scenes when our program was run, even though it appeared as if nothing occurred when we first ran the program.
Modules and Libraries
It would become very tedious if we had to rewrite code over and over for every new program. Instead we can use “Modules”, which are groups of related code that when saved to a file with a “.py” extension, may be imported into another program at the time the program runs. The “terragen_rpc” file is one such module.
Let’s import the Terragen RPC module into our program, and introduce the concept of creating an “alias” for the module. An alias serves as a bit of shorthand, so that we don’t have to type “terragen_rpc” every time we need to invoke the module. By assigning “tg” as the alias we’ll save some typing and our code will be much more legible.
Following the “# Import the module” notation in the program, type the following:
import terragen_rpc as tg
Then run the program again and take a look at the output in the IDLE window. Can you see that the Terragen RPC module is now loaded in the program under the alias “tg”?

Just for fun, we can type the following line of code directly in the IDLE shell in order to reveal all the built-in functions of the terragen_rpc module.
print (dir(tg))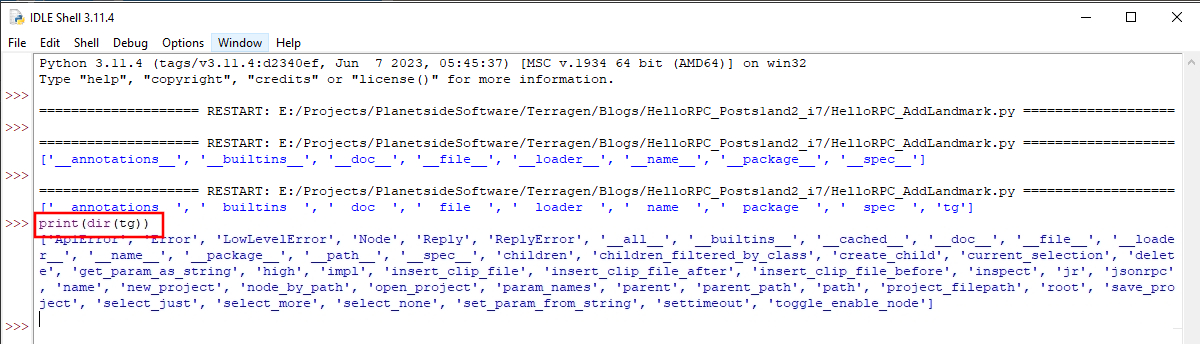
For this post, we’re done using the “print(dir()) line of code, so feel free to remove it from the program or comment it out by adding the “#” character at the start of its line.
Add the Landmark
We’re about to open a line of communication between Terragen and Terragen RPC, so as a reminder, make sure that Terragen is running. We don’t want to create a situation which could result in an error, although we’ll do exactly that in our next blog post when we address how to handle errors with our code!
Now that the terragen_rpc module is loaded into our program, we can use its built-in functions to manipulate the active Terragen project. First, we’ll assign the active project to a variable by typing the following line of code beneath the import statement.
project = tg.root()It’s helpful if the name of the variable describes what it represents, so we’ve chosen the word “project”. This line of code is also a good example of “dot notation”, that is, a “dot” separates the important parts of the line of code. For example, “tg.root()” refers to a function named “root” within the terragen_rpc module. You can see the “root” function listed in the output of the print(dir(tg)) example above.
Also add this line of code to our program, then run the program.
print (project)Notice the output of the print() function in the IDLE window. It has returned the hexadecimal memory address of the project variable within the computer’s memory. Now that a line of communication exists between RPC and Terragen we can begin to send instructions from our Python program through RPC to the Terragen project.

For this post we’re done with the “print(project)” line of code and it may be removed from the program.
Now we get to add the Landmark object to the Terragen project. In terms of coding, it’s very similar to what we just did in the previous step.
We’ll define a variable and tell Terragen to create a new object in our project based on a certain type of node. Once created, we can manipulate the object’s position within the scene.
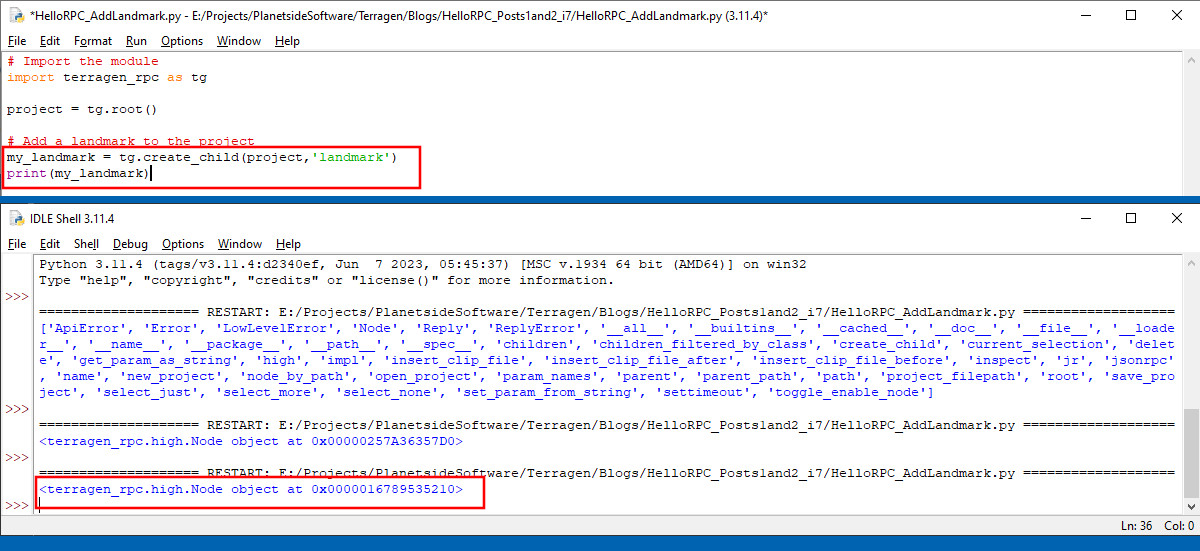
Type the lines of code below into our program, then run the program to create a new Landmark object in the active Terragen project.
my_landmark = tg.create_child(project,'landmark')

print (my_landmark)
The variable “my_landmark” is assigned to the memory address of the new node created by the create_child() function of the tg module. Two items were passed to the create_child() function, the variable “project” which is the parent node in the active Terragen project and the type of node to base the child object on, in this case a Landmark.
The “print(my_landmark)” function displays the hexadecimal memory address of the object named my_landmark. Note that its memory address is different from the project variable’s memory address.
For this post, we’re done with the “print(my_landmark)” line of code and it may be removed from the program.
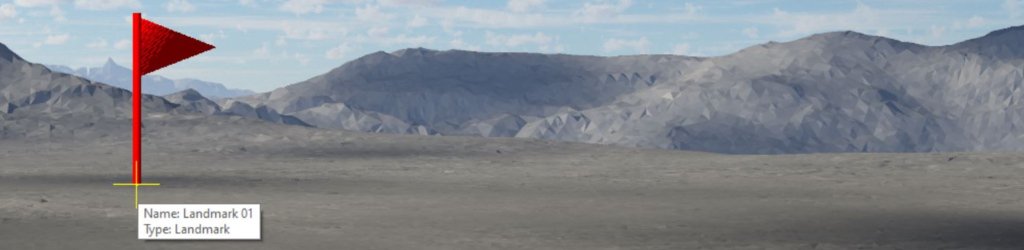
If we look at the open Terragen project we’ll see that a new Landmark object has been created in the project. Its initial position leaves a bit to be desired as it’s below the ground plane. Let’s fix that next.
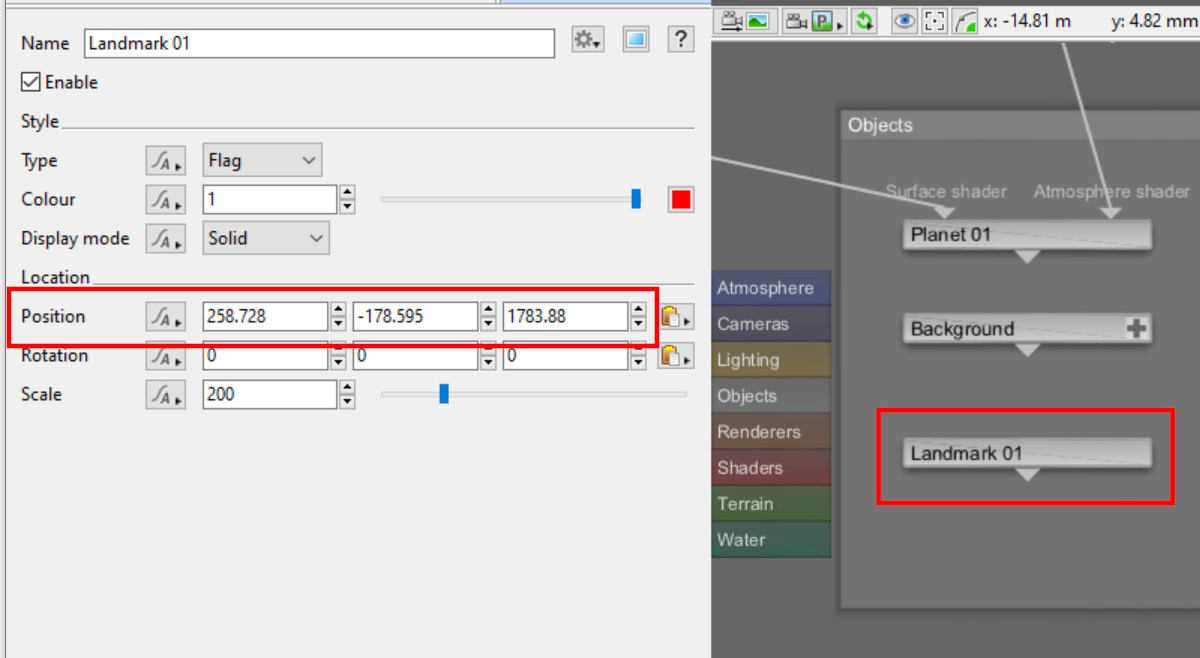
The power of Terragen RPC is the ability to manipulate an item’s parameters within the project. We want to position the Landmark at the origin of the project with the coordinate value of 0 for each axis X,Y and Z.
Examine the following line of code, then type it into the program and run it.
my_landmark.set_param('position',(0,0,0))Using dot notation syntax we pass two bits of information to the set_param() function of the my_landmark object. The first is the parameter we wish to manipulate, “position”, and the second is the value for each of the position channels (XYZ).

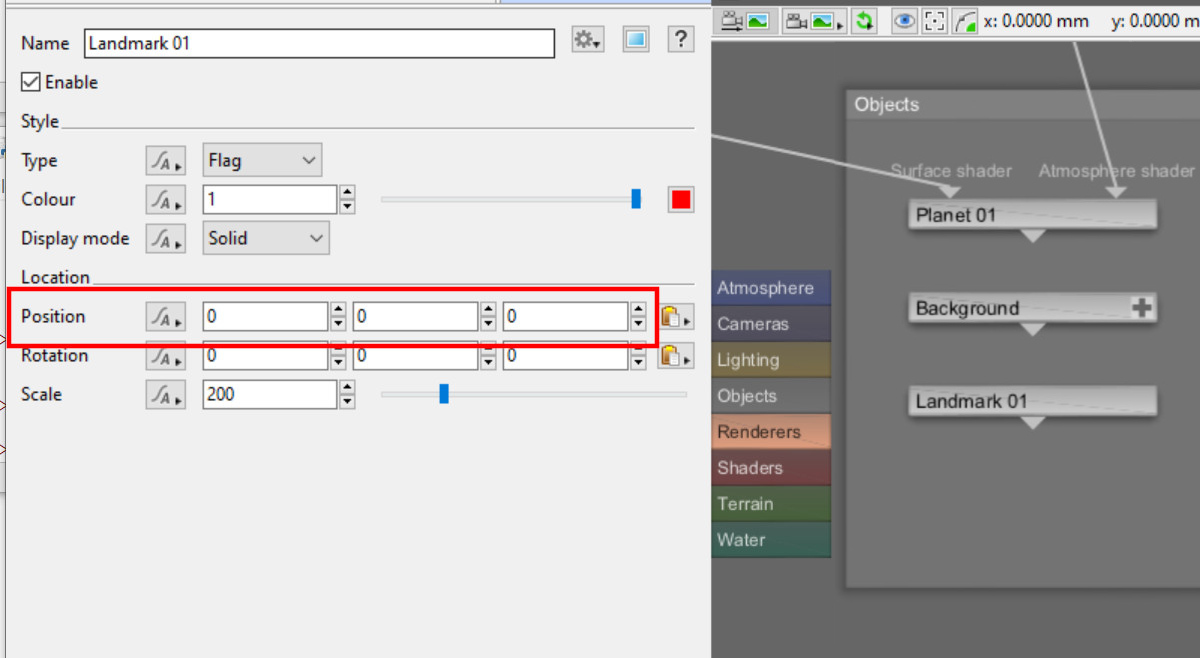
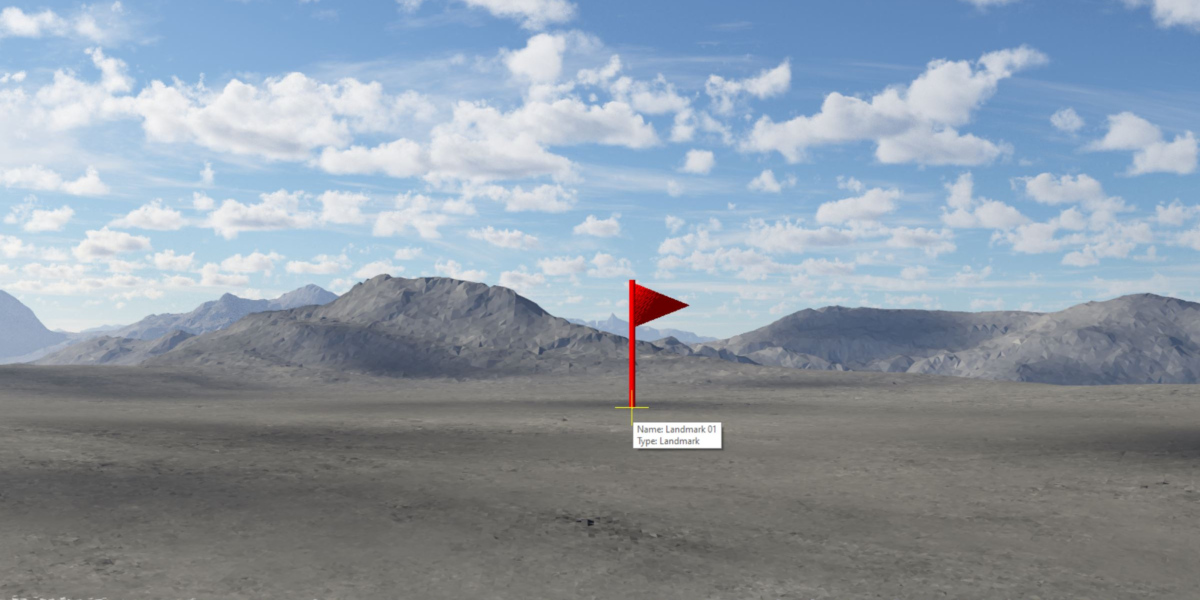
As indicated in the image above, the Landmark object is now positioned at the origin of the Terragen project, just like we wanted.
What else can you do with this incredible new power you ask? How about modify the scale, rotation, or colour? Perhaps change the type of Landmark from “Flag” to “Teapot”.
Conclusion
This post covers the absolute basics, using only enough code to do the task at hand. When writing code there’s many other things to consider, such as how to handle errors when they arise, and this will be the topic for our next post.
For the complete documentation on Terragen RPC click here.